Pressure Testing
The
maximum
gas
supply
pressure
for
the
appliance pressure regulator supplied on this
appliance is 14"
w.e.
The
test
pressure
for
checking
this
appliance pressure regulator
must
be
at
least 6"
w.e.
for
Natural Gas, and
at least 11"
w.e.
for
LP.
It is shipped
from
the
factory set
for
Natural Gas
at
5"
w.e.
This appliance and it's individual
shutoff
valve
must
be
disconnected
from
the
gas
supply
piping
system
during
any pressure
testing
of
that
system
at
test
pressures in
excess
of
1/2"
PSIG
(3.5k Pal.
This appliance
must
be isolated
from
the
gas
supply
piping
system
by
closing its individual
manual
shutoff
valve
during
any pressure
testing
of
the
gas
supply
piping system at test
pressures equal
to
or
less than 1/2"
PSIG
(3.5k Pal.
Gas
Components
- (Designer)
Air
Shutter
Adjustment
To
adjust
surface
burner
air
shutters
(select
models):
SURFACE BURNER ROTATE AIR
AIR SHUTTER SHUTTERON
MIXER HEAD TO
MAKE AIR
ADJUSTMENT
AIR SHUTTER
AIR OPENING
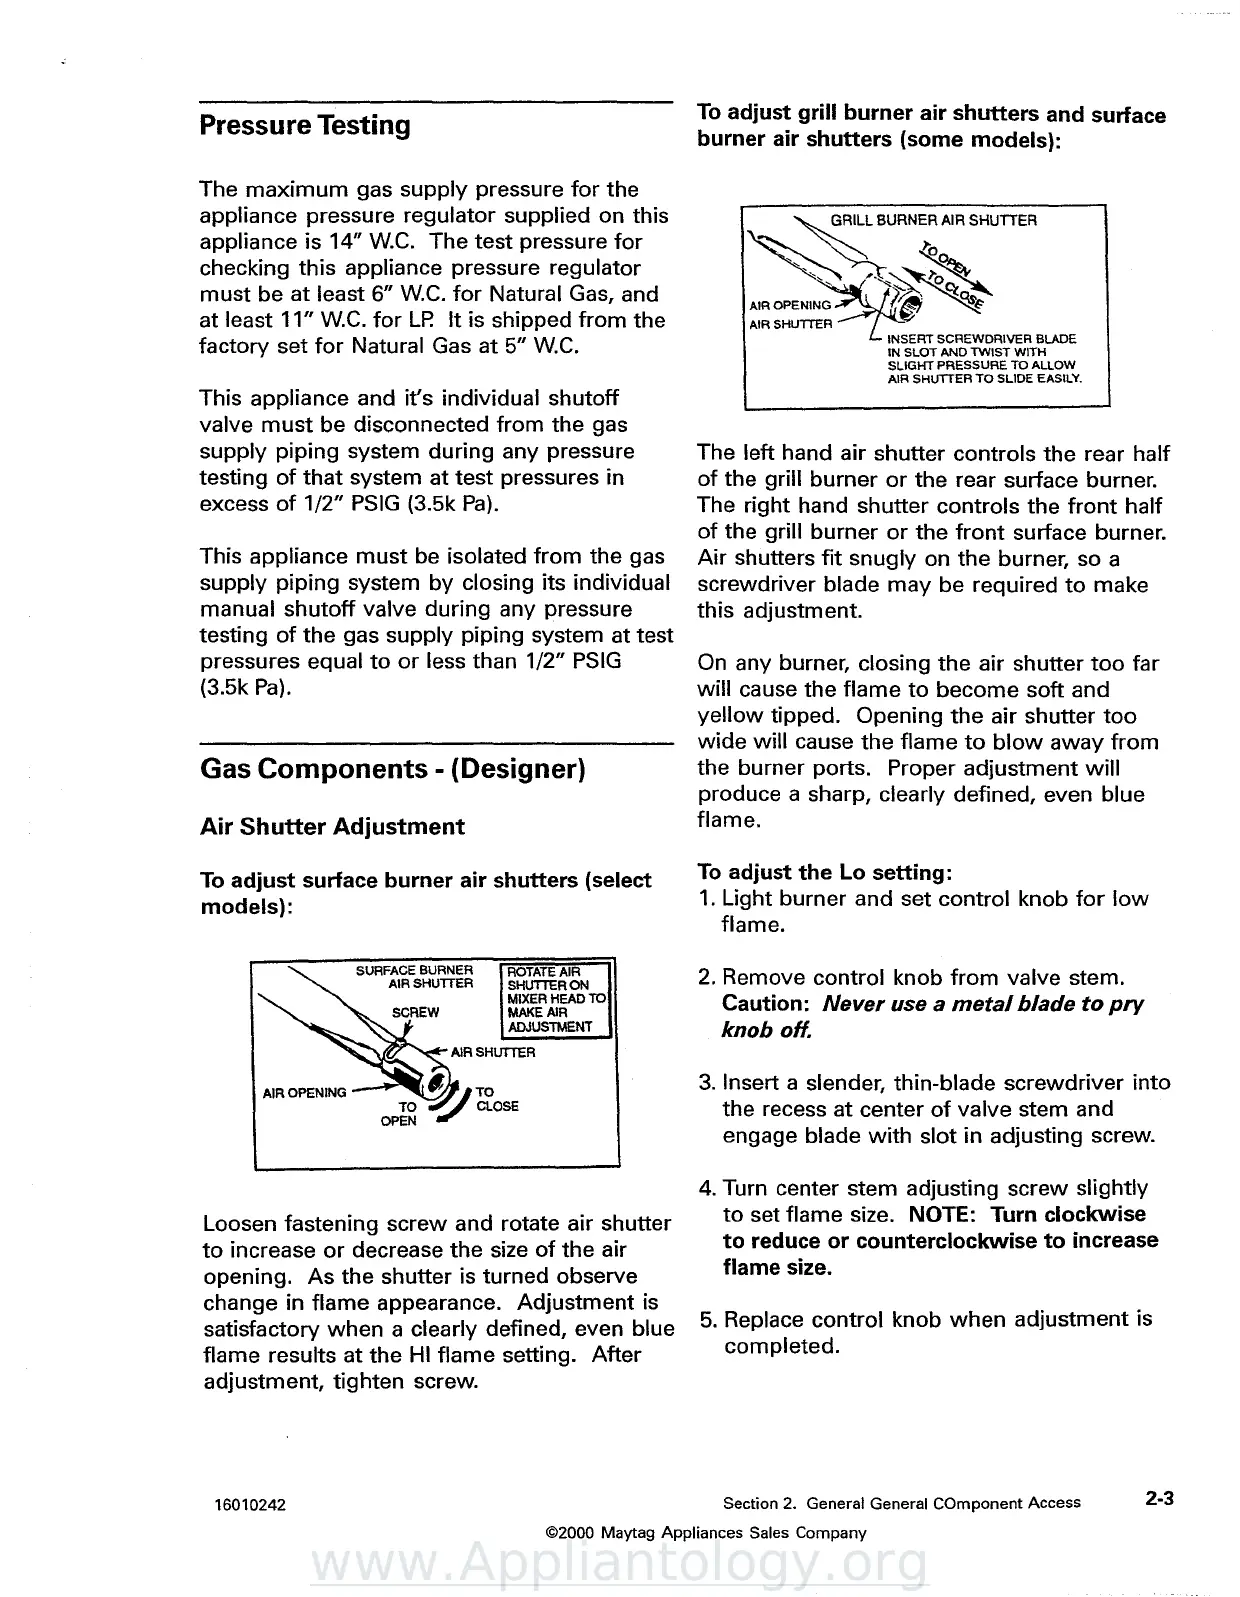
Loosen fastening
screw
and rotate air shutter
to
increase
or
decrease
the
size
of
the
air
opening.
As
the
shutter is turned observe
change in
flame
appearance.
Adjustment
is
satisfactory
when
a clearly defined, even blue
flame
results
at
the
HI
flame
setting.
After
adjustment,
tighten
screw.
To
adjust
grill
burner
air
shutters
and surface
burner
air
shutters
(some
models):
~
RILL
BURNER AIR SHUTTER
~'~
)"0
~~
""r~
AIROPENIN~I~
~
AIR SHUTTER
INSERT SCREWDRIVER BLADE
IN SLOT AND TWIST WITH
SLIGHT PRESSURE TO ALLOW
AIR SHUTTER
TO
SLIDE EASILY.
The left hand air shutter
controls
the
rear
half
of
the grill
burner
or
the rear surface burner.
The right hand
shutter
controls
the
front
half
of
the grill
burner
or
the
front
surface burner.
Air
shutters
fit
snugly on
the
burner, so a
screwdriver blade
may
be required
to
make
this
adjustment.
On any burner, closing
the
air shutter
too
far
will
cause the
flame
to
become
soft
and
yellow
tipped. Opening
the
air shutter
too
wide
will
cause
the
flame
to
blow
away
from
the burner ports. Proper
adjustment
will
produce a sharp, clearly defined, even blue
flame.
To
adjust
the
Lo
setting:
1.
Light
burner
and set
control
knob
for
low
flame.
2.
Remove control knob
from
valve stem.
Caution:
Never
use
a
metal
blade
to
pry
knob
au.
3.
Insert a slender, thin-blade
screwdriver
into
the
recess
at
center
of
valve stem and
engage blade
with
slot
in
adjusting screw.
4.
Turn center stem adjusting
screw
slightly
to
set flame size. NOTE: Turn
clockwise
to
reduce
or
counterclockwise
to
increase
flame
size.
5.
Replace
control
knob
when
adjustment
is
completed.
16010242
Section 2. General General COmponent Access
©2000 Maytag Appliances Sales Company
2-3




 To Next Page