EasyManua.ls Logo

Maytag MER7662WQ User Manual

Maytag MER7662WQ
16 pages
To Next Page IconTo Next Page
Page #1 background imageLoading...
Page #1 background image
INSTALLATION INSTRUCTIONS
30" (76 CM) FREESTANDING ELECTRIC RANGES
Table of Contents
RANGE SAFETY .............................................................................2
INSTALLATION REQUIREMENTS................................................3
Tools and Parts............................................................................3
Location Requirements................................................................3
Electrical Requirements - U.S.A. Only.........................................5
INSTALLATION INSTRUCTIONS..................................................6
Unpack Range .............................................................................6
Install Anti-Tip Bracket.................................................................6
Electrical Connection - U.S.A. Only.............................................8
Verify Anti-Tip Bracket Is Installed and Engaged......................12
Level Range ............................................................................... 13
Warming Drawer or Premium Storage Drawer..........................13
Storage Drawer..........................................................................14
Oven Door..................................................................................14
Complete Installation .................................................................15
Moving the Range......................................................................15
IMPORTANT:
Save for local electrical inspector's use.
W10403811B
Question and Answer IconNeed help?

Do you have a question about the Maytag MER7662WQ and is the answer not in the manual?

Maytag MER7662WQ Specifications

General IconGeneral
BrandMaytag
Model NumberMER7662WQ
Product TypeRange
TypeFreestanding
Fuel TypeElectric
ColorWhite
Number of Elements4
Oven Capacity5.3 cu. ft.
Self-CleaningYes
Convection OvenYes
Warming DrawerNo
Cooktop SurfaceCeramic Glass
Power SourceElectric
Control TypeElectronic
Width30 inches

Summary

RANGE SAFETY

Tip Over Hazard Warning

Explains the risk of tipping and how to verify anti-tip bracket installation.

INSTALLATION REQUIREMENTS

Tools and Parts Checklist

Lists required tools and supplied parts for installation.

Location and Clearance Guidelines

Details clearances, cabinet dimensions, and electrical supply requirements.

Mobile Home Installation Specifics

Specifies additional requirements for mobile home installations.

ELECTRICAL REQUIREMENTS AND CONNECTIONS

USA Electrical Requirements

Outlines voltage, frequency, and grounding requirements for USA installations.

Power Supply Cord Connection (3-Wire)

Guide for connecting a 3-wire power supply cord to the range.

Power Supply Cord Connection (4-Wire)

Specifics for connecting a 4-wire power supply cord to the range.

Direct Wire Connection (3-Wire)

Instructions for direct wiring a 3-wire connection.

Direct Wire Connection (4-Wire)

Instructions for direct wiring a 4-wire connection.

INSTALLATION PROCEDURE

Unpacking and Initial Setup

Steps to unpack the range, remove packaging, and prepare for installation.

Anti-Tip Bracket Installation

Instructions for securely mounting the anti-tip bracket to the floor or wall.

Bracket Mounting Methods

Details methods for mounting the anti-tip bracket to wall or floor.

Verify Anti-Tip Bracket Engagement

Steps to confirm the anti-tip bracket is properly installed and engaged.

Leveling the Appliance

Procedures for leveling the range for proper operation and cleaning.

Component Removal and Reinstallation

Steps for removing and reinstalling storage drawers and the oven door.

Final Installation Checks

Final checks, cleaning, and powering up the range after installation.

Moving the Range Safely

Safety procedures for moving the range for cleaning or maintenance.
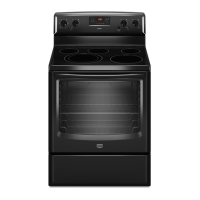
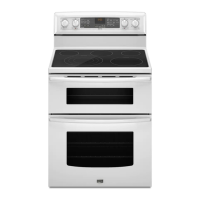
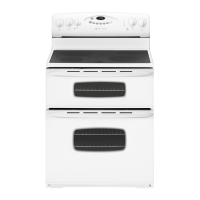
Related product manuals