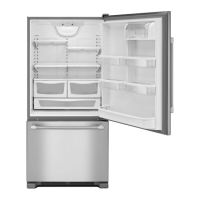
INSTALLATION
Remoxe and discard tile cantilever shelf packing clips _ K
located just above each shelf where it hooks onto the
fralne. To remove the plastic clips, wiggle the clips side- TURNCLOCKWISETO
ways and pull straight out. RAISE CABINET CORNER
Locating Your Refrigerator
1. Allow a free flow of air through the front base grille.
'2.Your model should not be installed where the room
TURN
temperature will go below 55 degrees F., because it COUNTER-
CLOCKWISE TO
will not run frequently enough to maintain proper LOWERCABINET
texnperature in the freezer. CORNER
3. For ease of installation, you should ]ea_e a space of
about 1/2 inch between the refrigerator and adjacent 3. it is not necessacv to lock the refrigerator in place.
However, if that is desirable, ttn_l one or both of the
}
walls or cabinets. If the refrigerator is placed with the locking feet clockwise. They are located near the
hinge side against a wall, you may want to leave addi-
tional space so the door can he opened wider. (Refer /_'ontwheels.
to the installation instruetlons for more detail.) If the floor is not level and it is neeessa D to raise the _"
rear of the cabinet, we suggest rolling the rear wheels
Important Leveling Information onto a piece of pl?_voud or other shim iuaterial.
Your refrigerator is equipped with f_contand back rollers 4. To replace, center the clips in the cut-out areas and
so it can be moved away from the wall tor cleaning. The push in until the base grille snaps iuto place.
}}controllers are adjustable and should be positioned so
the refrigerator sits firmly on the floor and is level. Connecting the Appliance
WARNING: This appliance is designed to operate
To adjust the front rollers: on a nominal 115 volt, 15 amp, 60 cycle line. There
1. Remove the base grille by grasping the ends, lift and should be a separate, grounded circuit setMng this
pull out. appliance only. Do not use an extension cord.
This appliance is equipped with a three-pronged
J_ grounding plug for your protection against possible elec-
trical shock hazards. It must be phlggcd into a ground-
ing receptacle. Where a standard two-prnng wall recep-
tacle is encountered, it is the personal responsibility and
obligation of the customer to hme it rq)laced with a
_ _ properly grounded three-prong wall receptacle. Do nut
under any circumstances, cut or remoxe tile third
2. To level the refrigerator, nse a screwdriver and turn (ground) prong fi'om the power cord. Do not use an
roller adjusting screws eloe!avise to raise the cabinet adapter plug.
or connterclockavise to lower the cabinet.
PAGE 1