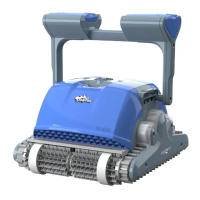
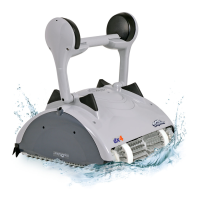
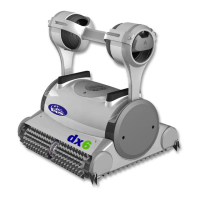
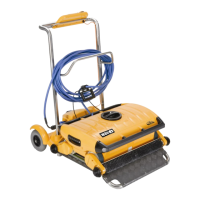
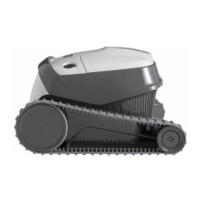
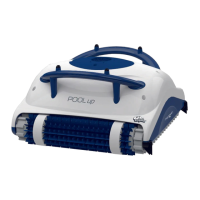
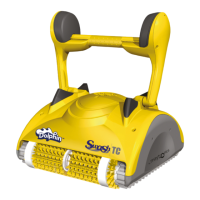
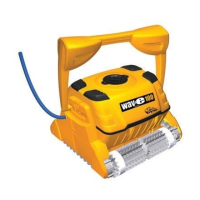
The Maytronics Dolphin Robotic Pool Cleaner, specifically the CLASSIC 7+, TOP 7, and TOP 9 models, is designed to provide reliable, convenient, and cost-effective pool cleaning. This device ensures maximum pool hygiene through its efficient filtration system, active brushing capabilities, and all-surface climbing brush.
Function Description
The primary function of the Maytronics Dolphin Robotic Pool Cleaner is to autonomously clean swimming pools. It operates by moving across the pool floor, walls, and waterline, brushing surfaces to dislodge debris and then filtering the water. The cleaner is equipped with a digital switch-mode power supply that manages its operation.
The robotic pool cleaner can be controlled in several ways:
- Autonomous Operation: Once placed in the pool and turned on, the cleaner will operate through a pre-programmed cleaning cycle.
- MyDolphin™ Plus IoT Mobile App: This app provides cloud-connected control, allowing users to manage the cleaner from anywhere at any time with real-time connectivity. The app facilitates initial setup, connection to home Wi-Fi®, and activation of cleaning cycles.
- Remote Control Unit (Optional): For specific models, a remote control unit offers two operation modes: Automatic Mode and Manual Drive Mode.
Usage Features
Setup and Placement:
- Cable Management: Before use, the blue cable should be completely unwound and stretched to prevent kinks.
- Brush Preparation: If the cleaner has sponge-containing brushes, they should be dipped in water and squeezed to absorb water, especially during first use or if they have dried out.
- Handle Adjustment: The robot's handle should be adjusted and locked diagonally for optimal cleaning. This adjustment also influences the speed at which the robot moves along the waterline.
- Power Supply Positioning: The power supply should be placed approximately at the center of the long side of the pool, at least 3.5 meters (12 feet) away from the edge, and a minimum of 11 cm (4 inches) above the ground.
- Cable Connection: The blue cable connects to the power supply by aligning a notch on the connector with a groove in the socket and turning clockwise.
- Power On: After plugging in the power supply (leaving it initially in the OFF position), the cleaner is placed in the pool, allowed to sink, and then the power supply is turned ON. Enough cable should be in the water for the cleaner to reach the farthest corner without kinks.
MyDolphin™ Plus IoT Mobile App Usage:
- App Download: Download the MyDolphin™ Plus app from Google Play or the App Store.
- Device Compatibility: The app is compatible with Apple iOS (version 10 and up) and Android (version 5 and up) devices.
- Connectivity Requirements: Ensure the mobile device is connected to a 2.4GHz Wi-Fi® network, Bluetooth® is enabled, and for Android users, GPS and Location Services are ON. For iOS 13, Bluetooth® & location must be enabled while the app is working.
- Cleaner Preparation: Connect the cleaner to its power supply, place it in the water, and press the ON button on the IoT power supply. The connectivity LED light on the power supply will flash blue.
- Activation: Activate the app, agree to permissions, sign up, and then scan the QR code on the power supply or manually search for the robot to pair.
- Wi-Fi® Connection: Connect the cleaner to the home/pool Wi-Fi® network by entering the password. The power supply LED will flash green and blue, then turn steady green once connected.
LED Lights Indicators:
- Connectivity LEDs:
- Flashing blue: Waiting for Bluetooth® connection.
- Steady blue: Connected via Bluetooth®.
- Flashing green: Trying to connect to Wi-Fi® network and cloud, or weak internet signal.
- Steady green: Connected to Wi-Fi® network and cloud.
- Alternating blue and green: Connected via Bluetooth® and trying to connect to Wi-Fi® network & cloud.
- On/Off LEDs:
- Flashing green: Waiting for next operation (delay mode or weekly timer).
- Alternate blue/green/red: Program updating remotely.
- Steady red: Fault (refer to troubleshooting).
Remote Control Unit Usage (Optional):
- Power On: If the cleaner is OFF, turn on the remote control and wait 2 seconds for the display.
- Start Cleaning: Press the START icon. The power supply will turn on (blue LED light), and the cleaner will begin cleaning based on selected settings.
- Automatic Mode:
- Delayed Operation: Set the cleaner to start later by pressing START LATER. The power supply will blink green, and the cleaner will start after one hour. This can be canceled by pressing START LATER again.
- Weekly Scheduling: Set cleaning programs for every 2 or 3 days. The schedule is valid for one week.
- Manual Drive Mode: Control the cleaner's movement using direction control arrows. If the robot is ON, turn on the remote, press the mode selector, and use the arrows. If the robot is OFF, turn on the remote, wait 60 seconds for self-test, then press the mode selector and use the arrows.
- Troubleshooting Remote Control: If the signal bar blinks or connection is lost, check if the power supply is plugged in, move closer to the power supply, or re-pair the remote control by ensuring it's OFF, attaching it to the power supply, and pressing both right and left direction control arrows simultaneously until two beeps are heard and the power supply shows a steady blue connectivity LED.
Removing the Pool Cleaner from Water:
- Turn Off Power: Always turn OFF the power supply before removing the cleaner.
- Bring to Edge: Use the blue cable to bring the cleaner to the pool edge.
- Lift with Handle: Use the handle to lift the cleaner out of the water. Do not pull the robot by the cable to lift it to the surface; use the cable to bring it to the edge, then use the handle.
- Drain Water: Place the cleaner on the edge of the pool to allow water to drain out.
Maintenance Features
Routine Maintenance:
- Unplug Power: Always unplug the power supply before any servicing activity.
- Filter Cleaning: Do not let cartridge filters dry out before cleaning.
- Open the filter covers and remove cartridges from both sides of the robot.
- Open the clips and remove the filter elements.
- Clean the filters with a hose.
- Reassemble by inserting locating tabs at the bottom of the filter element into their grooves on the base frame. Do not force filters into place.
- Clean the filter basket with a hose.
- Impeller Cleaning:
- Dismantle the impeller cover.
- Clean around the impeller housing.
- Reassemble (use a Phillips screwdriver only, not an electric screwdriver).
Off-Season Storage:
- Drain Water: Ensure no water is left in the pool cleaner.
- Clean Filters: Thoroughly clean the cartridge filters and insert them back in place.
- Cable Storage: Roll up the cable without kinks and place it on the Caddy.
- Storage Location: Store the pool cleaner upright on its Caddy in a protected area, away from direct sun, rain, or frost, at a temperature between 5°C and 45°C (41°F and 113°F).
Troubleshooting:
The manual provides a comprehensive troubleshooting guide for common issues such as the power supply not working, the cleaner not moving or moving in circles, not cleaning effectively, or the remote control not working. Solutions range from checking power connections and cleaning filters to adjusting the power supply position and ensuring proper water conditions. For MyDolphin™ Plus app issues, solutions include checking internet signal, re-pairing, and adjusting Wi-Fi® settings. If problems persist, users are advised to contact Maytronics Customer Care.