Do you have a question about the McCulloch ROB S800 and is the answer not in the manual?
Basic introduction to the product, serial number, PIN code, and registration.
Information on contacting McCulloch servicing dealers for product support.
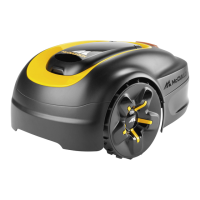
Description of the robotic lawn mower, its automatic cutting and charging features.
Details on the product's emission-free, energy-saving, and frequent cutting technique.
Explanation of how the product finds the charging station using the guide wire.
Visual identification and numbering of the product's main components and accessories.
Explanation of symbols found on the product for user understanding and safety.
Explanation of symbols used on the product's display for settings and schedules.
Instructions on how text formatting in the manual aids user comprehension.
Visual representation of the product's menu hierarchy for navigation.
Description of the display's function and how to access it.
Detailed explanation of the keypad layout and the function of each button.
Important safety instructions, user responsibility, and precautions for operation and children.
Explanation of warning, caution, and note indicators used in the manual.
Guidelines for correct product usage, including safety signs and operator responsibilities.
Critical safety precautions for handling and using lithium-ion batteries to prevent hazards.
Step-by-step instructions and safety warnings for safely lifting and moving the product.
Safety warning that the product must be switched off before performing maintenance.
Recommendations for reducing electrical damage risk during thunderstorms.
Guidance on installation, firmware updates, and safety before starting.
Listing and description of the main components required for product installation.
General preparation steps and cautions before commencing installation.
Advice on wire installation methods and precautions.
Guidelines for selecting the optimal location for the charging station.
Instructions for choosing a suitable location for the power supply unit.
Detailed instructions on positioning the boundary wire, including distances and obstacles.
Specific guidance for installing the boundary wire in sloped areas.
Instructions for installing boundary wires in passages and narrow areas.
Steps for creating an 'island' by isolating areas with the boundary wire.
Instructions for setting up a secondary mowing area not connected by a passage.
Guidance on the placement of the guide wire for efficient operation and calibration.
Examples of different work area configurations and their implications for installation.
List of tools required for the installation process.
Step-by-step guide for installing the charging station, including safety precautions.
Detailed steps for correctly installing the boundary wire and connecting it.
Detailed steps for correctly installing the guide wire and connecting it.
Instructions on using stakes to position the boundary and guide wires.
Method for burying the boundary and guide wires for a cleaner installation.
Procedure for extending the boundary or guide wires if they are too short.
Steps for visually verifying the correct installation of the charging station.
Initial setup steps required before the product can operate for the first time.
Explanation of the automatic guide calibration process for optimal performance.
Overview of the main menu categories available for product settings.
Steps to access the product's main menu and settings.
Procedure to access the schedule menu for setting mowing times.
Using the wizard for quick and suitable schedule settings based on lawn size.
Explanation of the Day mode for setting mowing schedules.
Explanation of the Night mode for setting mowing schedules.
Detailed steps for setting up a custom mowing schedule via the Advanced menu.
Guidance on estimating daily operating time for optimal product and lawn health.
Function to copy schedule settings from one day to another or for the entire week.
Procedure to reset schedule settings to factory defaults.
Information on the Lawn shield feature for automatic cutting time adjustment.
Steps to activate and set the Lawn shield feature.
Setting the frequency (Low, Mid, High) for the Lawn shield feature.
Explanation of the three available security levels for the product.
How to select and set the desired security level for the product.
Advanced security options, including changing the PIN code and creating a new loop signal.
Function to guide the product to remote areas and manage lawn cutting in complex yards.
Steps to configure the Lawn Coverage function for specific areas.
How to perform a test run of the Lawn Coverage function.
Instructions to disable or enable Lawn Coverage for specific areas.
How to reset Lawn Coverage settings to their factory defaults.
Setting the distance the product moves from the charging station before starting operation.
Procedure to adjust the starting point distance for the product.
Function that controls how far the product moves past the boundary wire.
Steps to adjust the distance for the Drive Past Wire function.
Information on the ECO mode for saving energy and reducing interference.
Steps to activate and set the ECO mode.
Setting to prevent collisions with an accessory mower house.
Information about connecting to mobile devices via Bluetooth using the McCulloch ROB app.
Instructions for pairing the mobile app with the robotic mower.
Section for changing general product settings.
How to set the product's internal time and date.
Steps to change the display language of the product.
How to select the country setting for regional configurations.
Procedure to reset all user-configured settings to factory defaults.
Accessing information about the product, like serial number and firmware versions.
Instructions for turning the product ON and OFF, including safety warnings.
Explanation of the indicator lamp's status and meaning.
Step-by-step guide to start the product, including PIN code entry.
Overview of the different operating modes available for the product.
How to use the Secondary area mode for mowing disconnected lawn sections.
Temporarily overriding the schedule to cut grass for a specific duration.
Using Spot Cut mode for quick mowing of small, specific areas.
Description of different parking modes like Home & Stay and Home & Wait.
Instructions on how to safely stop the product's operation.
Procedure for completely switching off the product.
Steps for charging the product's battery and important safety warnings.
Instructions for adjusting the cutting height and important cautions.
Detailed steps for adjusting the cutting height using the control knob.
General guidelines for product maintenance, safety, and parts replacement.
Procedure for inspecting and cleaning the chassis and blade disc.
Instructions for cleaning the wheels to ensure proper performance.
How to clean the exterior body of the product.
Safety warning and instructions for cleaning the charging station.
Safety warnings and procedure for replacing the cutting blades.
Step-by-step guide for replacing the product's blades.
Information on updating the product's firmware via a computer.
Detailed steps for updating the product's firmware using a USB cable.
Important safety warnings and general information about the product's battery.
Step-by-step instructions for safely replacing the battery.
Recommendations for professional servicing before winter storage.
Introduction to the troubleshooting chapter and where to find more information.
Table listing product fault messages, their causes, and recommended actions.
Table listing product information messages, their causes, and actions.
Explanation of the charging station's indicator lamp colors and their meanings.
Table listing common product symptoms, their causes, and troubleshooting actions.
Method for locating breaks in the loop wire and initial checks.
Regulations and requirements for transporting the product, especially its batteries.
Instructions for proper storage of the product and charging station.
Guidance on environmentally responsible disposal of the product and battery.
Detailed specifications for the product's dimensions, electrical system, and energy consumption.
List of registered trademarks and their usage rights.
Details of the product's warranty coverage, terms, and exclusions.
Declaration of conformity with EU directives and applied standards for the robotic lawn mowers.
| Brand | McCulloch |
|---|---|
| Model | ROB S800 |
| Category | Lawn Mower |
| Language | English |
