12
4. With the Tone Arm parallel to the record surface,
record platter and turntable base, tighten the set
screw, which was loosened in step 2. If not, repeat
steps 1, 2 and 3 until the Tone Arm is parallel.
Setting the Tracking Force Pressure
The MT2 is supplied with a Stylus Tracking Force
Gauge for checking and adjusting the Stylus Track-
ing Pressure. The Gauge uses the “Balance Scale”
methodology for measurement. Place the Gauge on
the record mat and perpendicular to the front of the
Tone Arm, with the Stylus Tip over graduation marks.
Set the Anti-Skate Adjustment to minimum (refer to
figure 32). Adjust the position of the Tone Arm Coun-
terweight to establish a tracking force pressure in the
middle of the recommend range from the Cartridge
manufacturer as a starting place. Refer to figures 28
thr u 31.
Note: Usually, adjusting the tracking force pressure
closer to the maximum setting recommend by
the Cartridge Manufacturer will produce better
sound with less record and stylus wear. Refer
to “Trackability Adjustments” for additional
information.
Anti-Skating Adjustment
The MT2 has adjustable Anti-Skating to equalize the
pressure on both sides of the record groove wall by
rotating the Anti-Skating Weight Up and Down the
threaded shaft, refer to figure 32.
For additional information about Tracking Force Pres-
sure and Anti-Skating refer to “Trackability Adjust-
ments”.
Installing a non-supplied Cartridge and Tone Arm Adjustments
Trackability Adjustments
During playback of Phonograph Recordings, the stylus
assembly is subjected to all kinds of extreme operat-
ing conditions. One of those conditions is the forces
constantly trying to push the stylus up and out of the
grooved wall of the recording. Another condition is
the uneven side to side pressure applied to the stylus
as it tries to stay in contact with both sides of the
groove wall of the recording. Refer to figure 35.
The Anti-Skating Adjustment permits equalizing
for even side to side pressure. The correct amount of
Tracking Force Pressure and Anti-Skate Pressure var-
ies with the exact shape of the Stylus Tip and finally
the audio signal (both frequency and amplitude) con-
tained in the groove wall of the record.
To achieve good performance and the least amount
of Stylus Tip/Record Groove wear, use a Trackablity
Test Record. Both Tracking Force and Anti-Skate Ad-
justments are made as a result of listening to the test
record to reduce different forms of audible distortions.
Never exceed the manufacturers recommend Maxi-
mum Tracking Force Pressure Setting.
Your McIntosh Dealer, using Test Measurement
Equipment and Professional Test Recordings, can
achieve via adjustments, the best possible sound qual-
ity from your record collection and ensure the greatest
longevity.
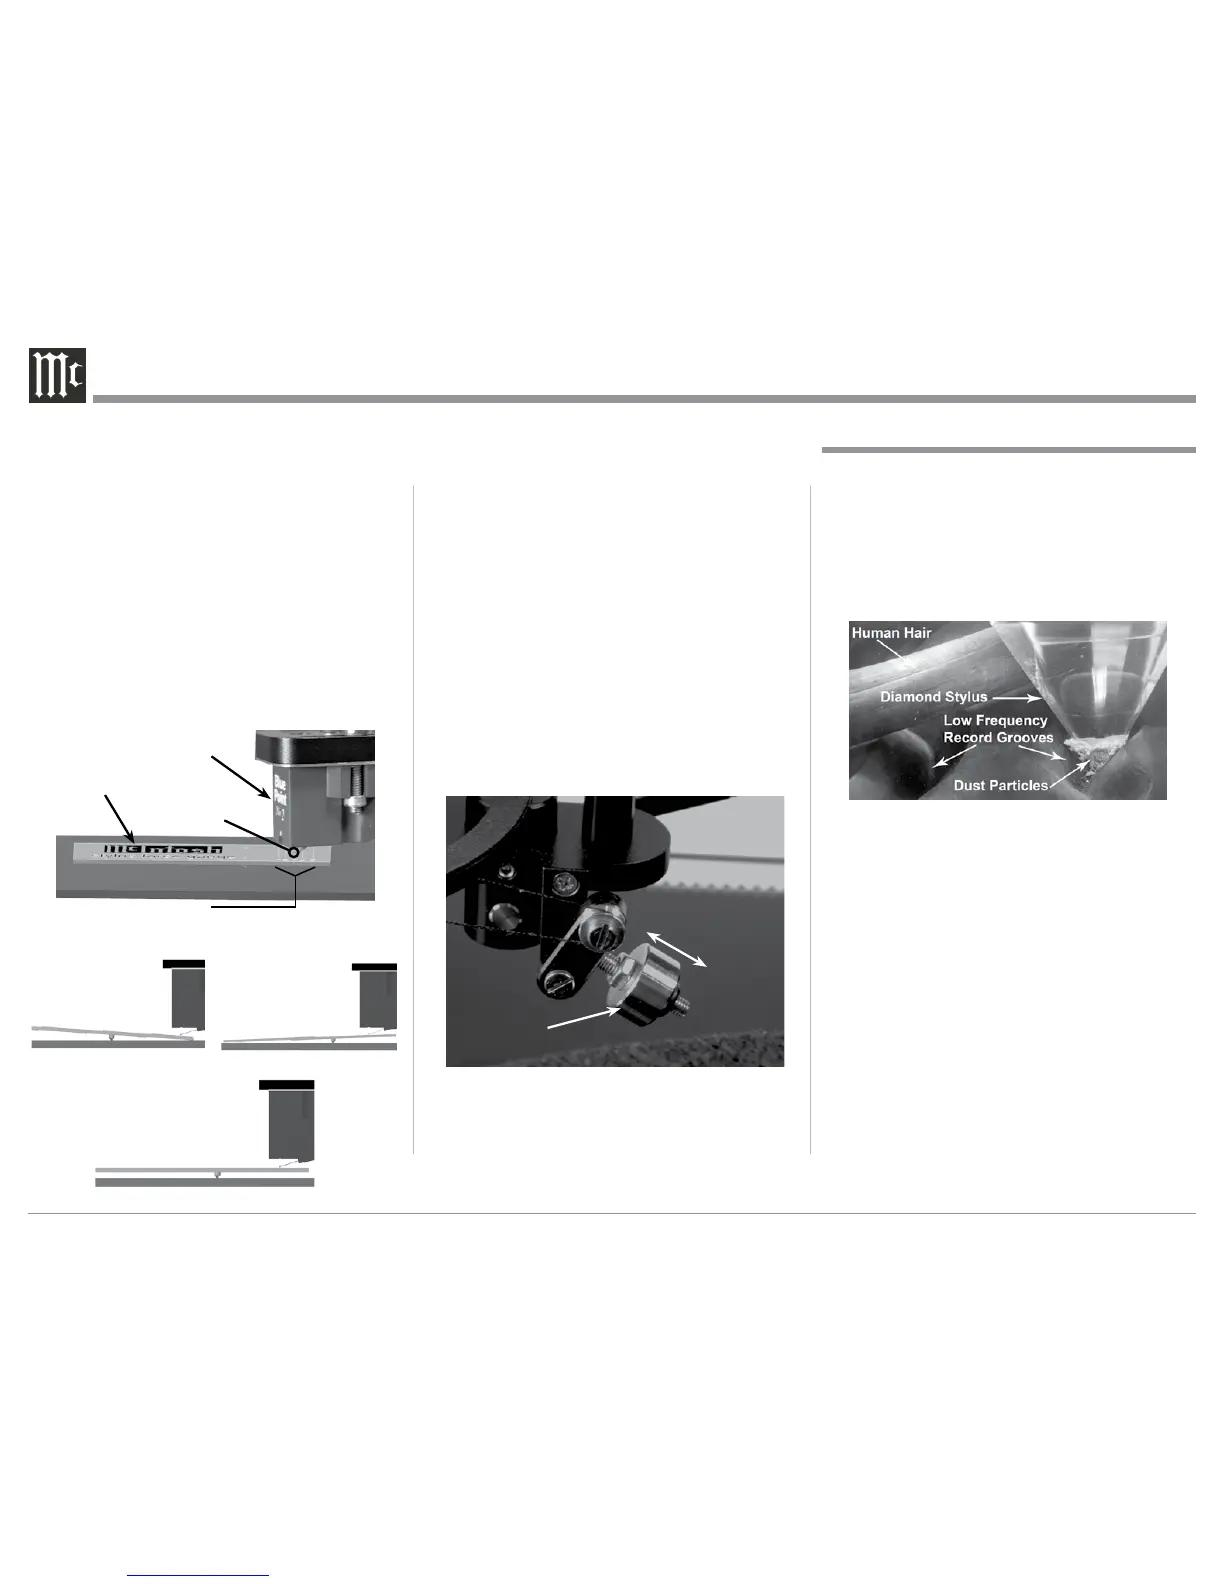
Figure 35
Figure 28
Stylus
Force
Gauge
Stylus Tip
Cartridge
Stylus Pressure Scale
(Graduations are in grams)
Figure 29
Stylus Pressure
Set higher than
gauge marking
Figure 30
Stylus Pressure
Set lower than
gauge marking
Figu re 31
Stylus Pressure Set the
same as gauge marking
Figure 32
Antiskating
Weight
Antiskating
Adjustment
Maximum
Minimum