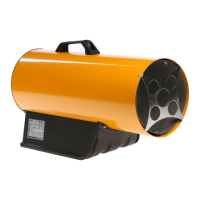
►►3. FUEL
WARNING: The heater only runs on
DIESEL or KEROSENE fuel.
To avoid re or explosion, use only diesel or
kerosene fuel. Do not use gasoline, naphtha,
paint thinners, alcohol or any other combustible
liquids.
For low-temperature operation, use antifreeze
supplements.
►►4. OPERATING PRINCIPLE
See Fig. 2
Airow is necessary to ensure proper
combustion, it is supplied by the internal burner
fan. The air enters the burner funnel and gets
mixed with a high-pressure fuel jet. The fuel ow
is secured by an electrical pump, which sucks
the fuel away from the tank and moves it to the
nozzle under high pressure.
►►5. OPERATION
WARNING: Read the section “SAFETY
CONSIDERATIONS” carefully before
turning the heater on.
IMPORTANT: After the rst time the
heater does not switch on, make sure there
is fuel in the tank, make sure the fuel lter
is clean and make sure that the heater is
positioned on a at, stable surface.
IMPORTANT: This is a target infrared
heater. Infrared heats bodies and not the air.
►►5.1. RUNNING THE HEATER:
►5.1.1. Observe all safety instructions at all
times.
►5.1.2. Check if fuel is present in the tank.
►5.1.3. Close the fuel tank ller plug.
►5.1.4. Plug the feeder cable into the socket
(CHECK THE VOLTAGE IN ”TECHNICAL
DATA SHEET”).
►5.1.5. Turn the “ON/OFF” switch “ON” (|) (A
Fig. 3). The heater should be online in a few
seconds. If it is not, please refer to the section
“PROBLEM IDENTIFICATION” (Paragraph
10).
►5.1.6. To obtain maximum power, turn the
switch (D Fig. 3) to “
”.
NOTE: IN THE EVENT OF HEATER BEING
TURNED OFF DUE TO RUNNING OUT OF
FUEL, TURN THE HEATER OFF, REFUEL
AND TURN IT BACK ON (SEE PARA. 5.1.).
►►5.2. TURNING THE HEATER OFF:
WARNING: DO NOT CUT THE POWER
OR DISCONNECT THE FEEDER CABLE
BEFORE THE HEATER COOLS DOWN
COMPLETELY (ab. 5 minutes).
►5.2.1. Turn the “ON/OFF” switch “OFF” (0) (A
Fig. 3).
►►5.3. ROOM THERMOSTAT
CONNECTION (Optional):
Remove the plug connected to the appliance
and connect the room thermostat (Optional) (C
Fig. 3).
►►6. MAINTENANCE
THE FILTERS MAY NEED TO BE CLEANED
DEPENDING ON THE QUALITY OF THE
FUEL USED:
►►6.1. LOADING FILTER (Fig. 4):
►6.1.1. Remove the tank’s plug (A).
►6.1.2. Remove the lter (B) from the tank.
►6.1.3. Clean the lter (B) with clean fuel; make
sure you do not damage it.
►6.1.4. Put the lter (B) back in the tank.
►6.1.5. Close the plug (A).
►►6.2. INTAKE FILTER (Fig. 5):
►6.2.1. Remove the cup (A).
►6.2.2. Take out the lter (B) from the cup.
Make sure you preserve the gaskets.
►6.2.3. Clean the lter (B) with clean fuel; make
sure you do not damage it.
►6.2.4. Put the lter (B) back into the cup.
►6.2.5. Put the glass (A) back, make sure you
reassemble the gaskets correctly.
►►6.3. TANK (Fig. 6):
►6.3.1. Empty the fuel from the tank by
removing the discharge plug at the bottom
of the tank. Dispose of the fuel appropriately
and in line with current standards.
►6.3.2. If you notice any residue, pour clean
fuel into the tank and rinse again.
►6.3.3. Close the drain plug and the tank plug.
►►7. HANDLING, TRANSPORT AND
STORAGE
WARNING: BEFORE HANDLING,
TRANSPORT OR STORAGE, SWITCH OFF
THE HEATER, WAIT FOR IT TO COOL
COMPLETELY, DISCONNECT THE POWER
SUPPLY PLUG FROM THE MAINS AND
MAKE SURE THE PLUGS OF THE TANK
ARE CLOSED TIGHTLY.
en
it
de
es
fr
nl
pt
da
no
sv
pl
ru
cs
hu
sl
tr
hr
lt
lv
et
ro
sk
bg
uk
bs
el
zh