37
UK
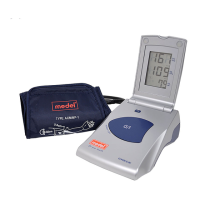
5. CARRYING OUT A MEASUREMENT
5.1. Before the measurement:
• Avoid eating, smoking as well as all forms of exertion directly before the
measurement. All these factors influence the measurement result. Try and find
time to relax by sitting in an armchair in a quite atmosphere for about ten
minutes before the measurement.
• Remove any garment that fits closely to your upper arm.
• Measure always on the same arm (normally left).
• Attempt to carry out the measurements regularly at the same time of day,
since the blood-pressure changes during the course of the day.
5.2. Common sources of error:
Note:Comparable blood-pressure measurements always require the same con-
ditions!
These are normally quiet conditions.
• All efforts by the patient to support the arm can increase the blood-pressure.
Make sure you are in a comfortable, relaxed position and do not activate
any of the muscles in the measurement arm during the measurement. Use a
cushion for support if necessary.
• If the arm artery lies considerably lower (higher) than the heart, an erro-
neously higher (lower) blood-pressure will be measured (Each 15cm diffe-
rence in height results in a measurement error of 10mmHg!).
• Cuffs that are too narrow or too short result in false measurement values.
Selecting the correct cuff is of extraordinary importance. The cuff size is
dependent upon the circumference of the arm (measured in the centre). The
permissible range is printed on the cuff. If this is not suitable for your use,
please contact your dealer.
Attention: Only use clinically approved MEDEL original cuffs!
• A loose cuff or a sideways protruding air-pocket causes false measurement
values.
36
UK
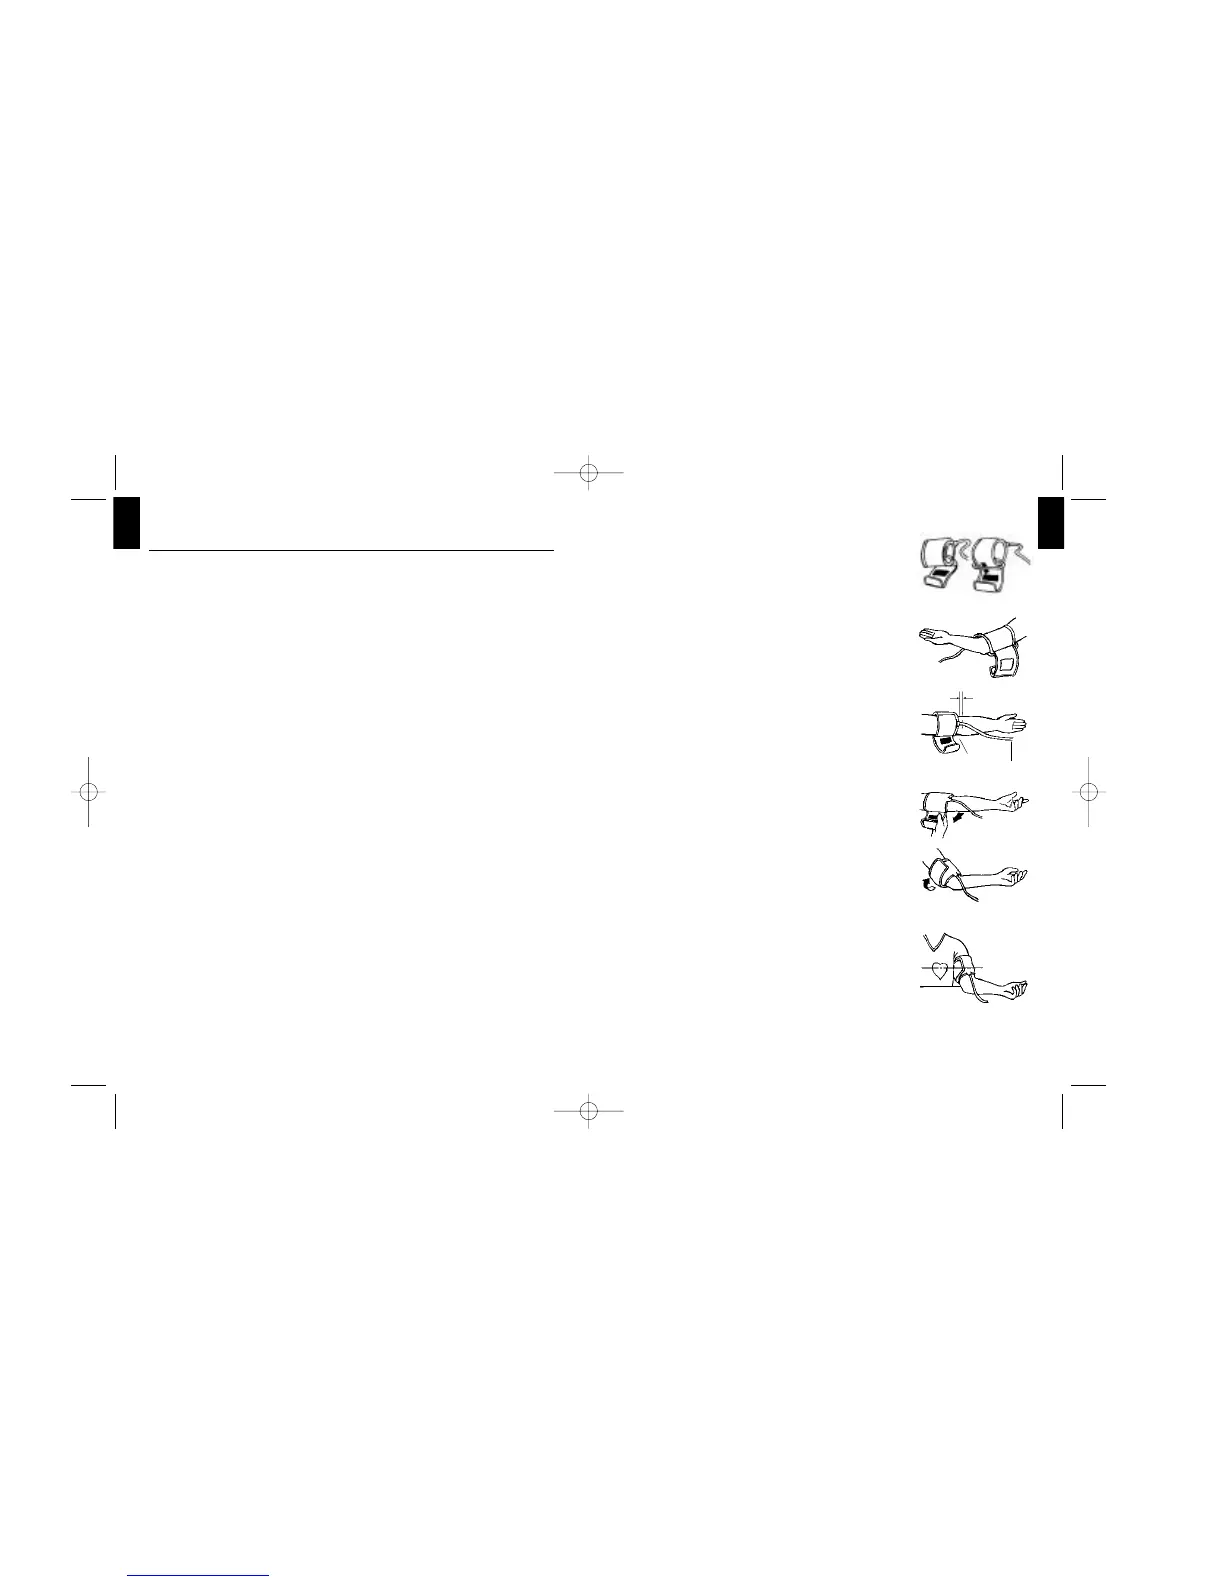
5.3. Fitting the cuff
a) Pass the end of the cuff (with sewn-in rubber
stopper) through the metal stirrup so that a loop
is formed. The Velcro closer must be facing out-
wards. (Ignore this step if the cuff has already
been prepared.)
b) Push the cuff over the left upper arm so that the
tube points in the direction of the lower arm.
c) Position the cuff on the arm as illustrated. Make
certain that the lower edge of the cuff lies
approximately 2 to 3 cm above the elbow and
that the rubber tube leaves the cuff on the inner
side of the arm. Important! The mark (ca. 3 cm
long bar) must lie exactly over the artery which
runs down the inner side of the arm.
d) Tighten the free end of the cuff and close the cuff
with the closer.
e) There must be no free space between the arm
and the cuff as this would influence the result.
Clothing must not restrict the arm. Any piece of
clothing which does (e.g. a pullover) must be
taken off.
f) Secure the cuff with the Velcro closer in such a
way that it lies comfortably and is not too tight.
Lay the arm on the table (palm upwards) so that
the cuff is at the same height as the heart. Make
sure that the tube is not kinked.
g) Remain seated quietly for two minutes before
you begin the measurement.
2-3 cm
cuff edge
tube