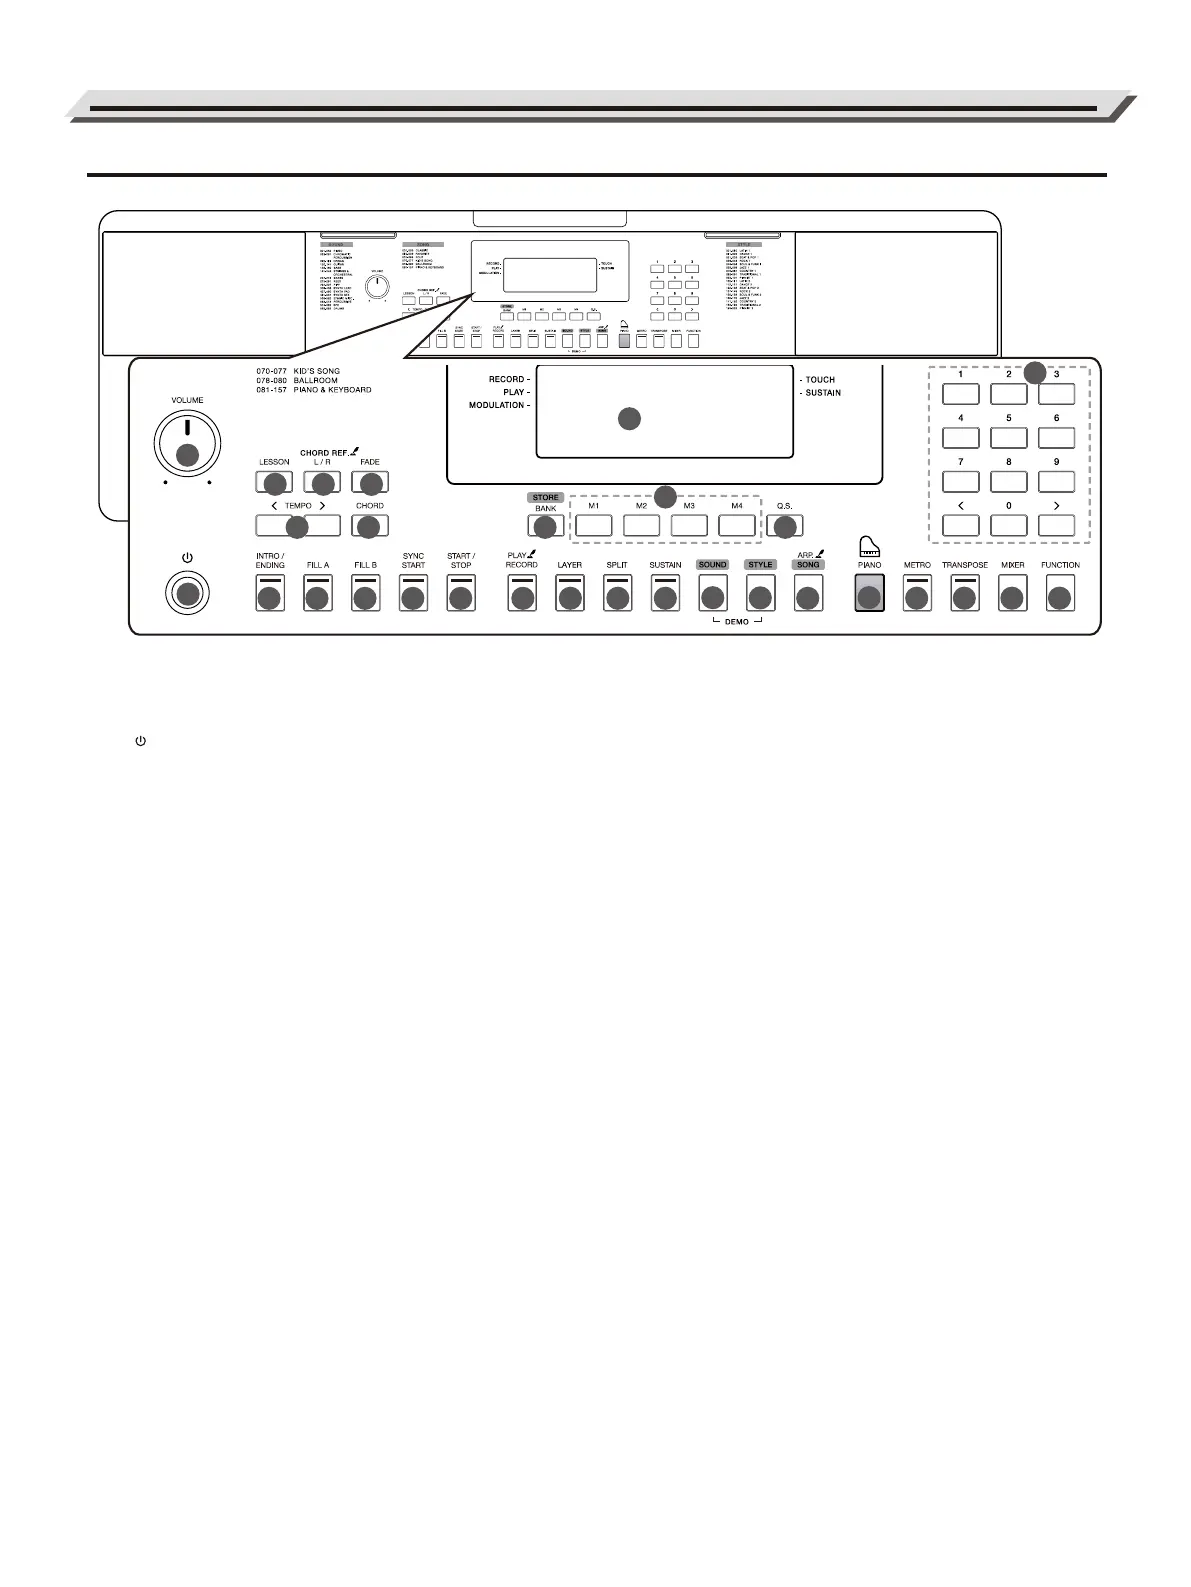
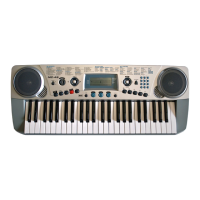
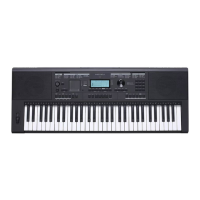
Panel & Display Description
Front Panel
1. [VOLUME] Knob
Adjust the master volume.
2. [ ] Button
Turn the power on or off.
3. [LESSON] Button
Enter the lesson mode.
4. [L/R] Button
Choose to practice the left hand
or right hand part.
[CHORD REF.] Button
Turn the chord reference function
on or off.
5. [FADE] Button
Turn the Fade In/Out function on
or off.
6. [TEMPO +/-] Buttons
Adjust the current tempo value.
7. [CHORD] Button
Enter the Chord Mode.
8. [INTRO/ENDING] Button
Play the Intro or Ending pattern.
9. [FILL A] Button
Play the fill-in pattern A.
10. [FILL B] Button
Play the fill-in pattern B.
11. [SYNC START] Button
Turn the Sync Start function on
or off.
12. [START/STOP] Button
Start or stop playing the style or
song.
13. [BANK] Button
Switch between memory banks.
[STORE] Button
Register the current panel settings.
14. [M1]~[M4] Buttons
Recall the registered panel settings.
15. [Q.S.] Button
Turn the Quick Setting
function on or off.
16. [RECORD] Button
Enter the Record Mode.
[PLAY] Button
Play back the recording.
17. [LAYER] Button
Turn the layer function on or off.
18. [SPLIT] Button
Turn the split function on or off.
19. [SUSTAIN] Button
Turn the sustain function on or off.
20. [SOUND] Button
Switch to Sound Mode.
Press [SOUND] and [STYLE] at the
same time to enter Demo Mode.
21. [STYLE] Button
Switch to Style Mode.
Press [SOUND] and [STYLE] at the
same time to enter Demo Mode.
22. [SONG] Button
Switch to Song Mode.
[ARP.] Button
Turn the Arpeggiator function on
or off.
23. [PIANO] Button
Turn the Piano Mode on or off.
24. [METRO] Button
Turn the metronome on or off.
25. [TRANSPOSE] Button
Adjust the Transpose value.
26. [MIXER] Button
Enter the Mixer menu.
27. [FUNCTION] Button
Enter the function menu.
28. [+]/[-] and Number Buttons
Set parameters value or select
the number.
29. LCD Display
Display all parameters and values
related to the current operation.
04
1
11
2
2012
13
15
16 17
18 19
5
6
7
8
9 10
4
3
21
22
24
2726
23 25
29
14
28