Questions? Refer to Page 10-13 For Customer Care Information.
8-9
What You See
on the Display
What You Do Comments
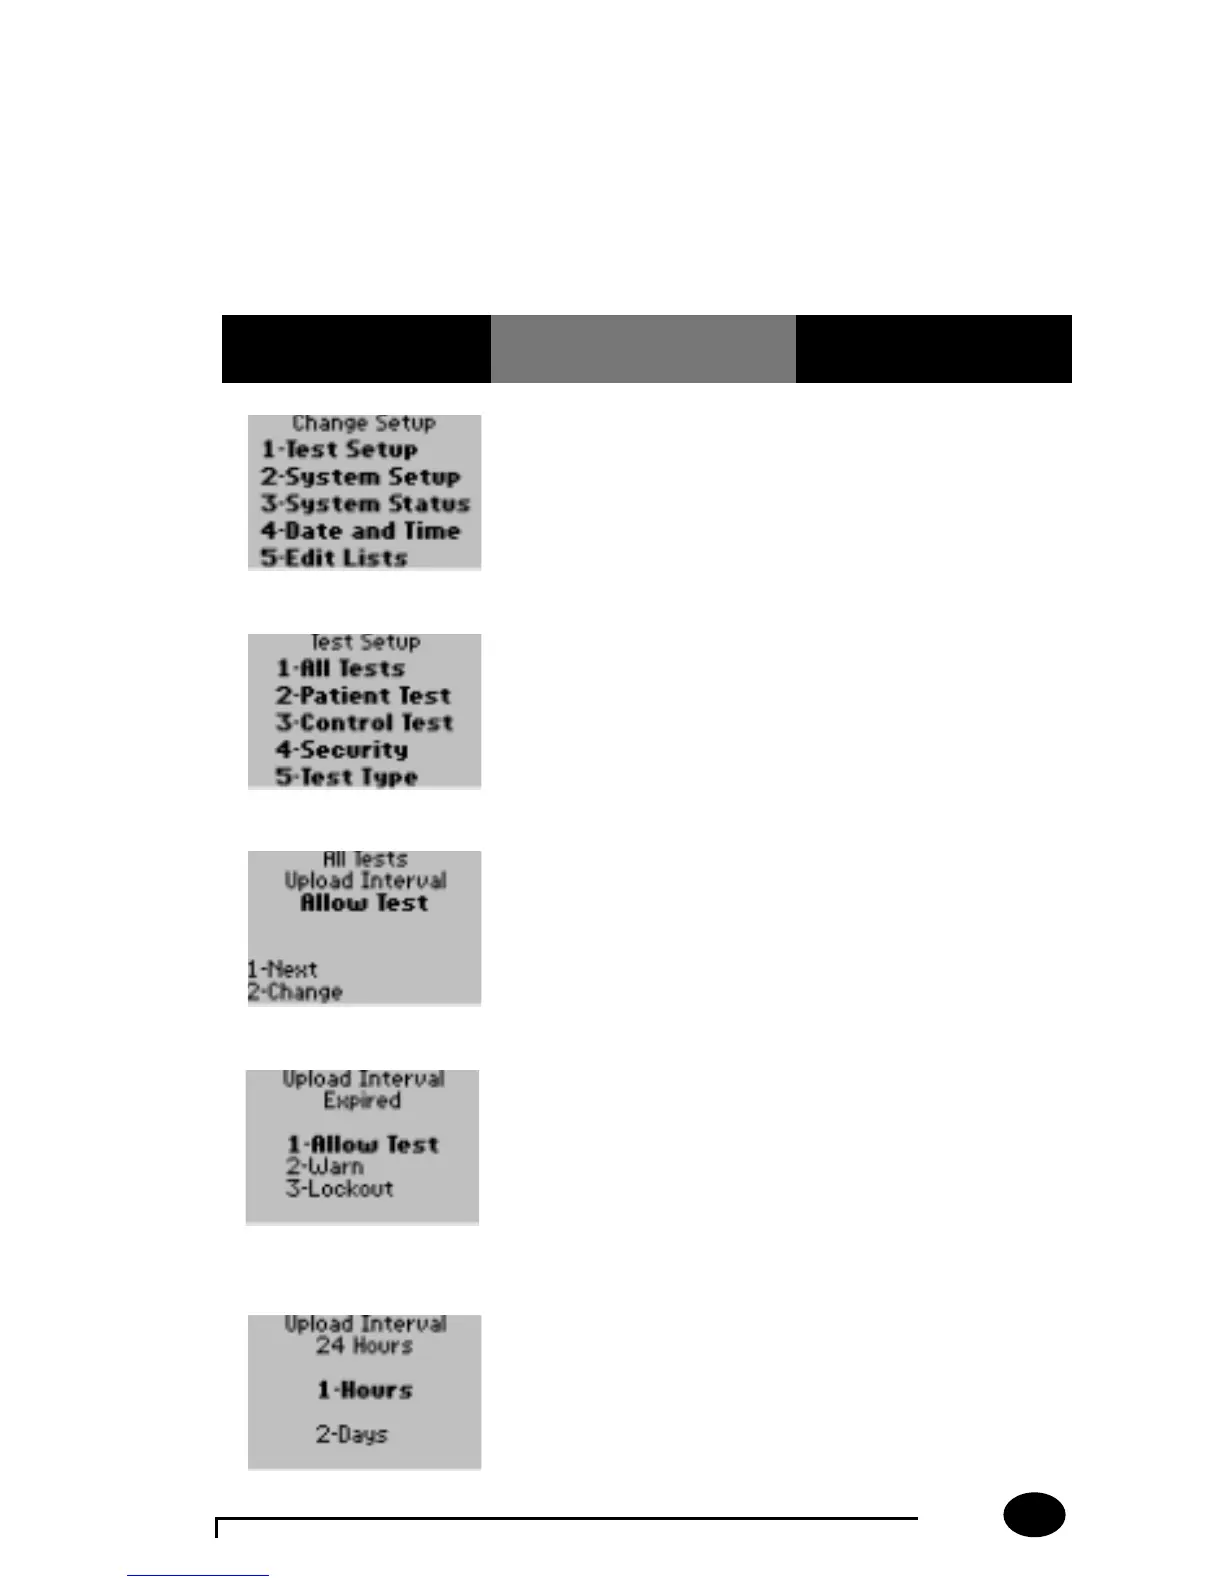
1. Press 1 for Test Setup. The display shows the
Test Setup menu.
2. Press 1 for All Tests. The display shows the
Upload Interval menu.
3. The administrator will
select one of the
following options:
Press 1 – Next; skip
forward to step 8.
Press 2 – Change.
The display shows the
current settings in bold. If
2 is pressed, the display
shows the Upload Interval
options.
4. The administrator will
select one of the
following options:
Press 1 – Allow Test; skip
forward to step 7.
Press 2 – Warn.
Press 3 – Lockout.
If 2 or 3 is pressed, the
display will show the
upload interval hours
and days option.
5. The administrator will
select one of the
following options:
Press 1 – Hours.
Press 2 – Days.
The display prompts for
the number of days/hours
to be entered.
Review/Change Setup for All Tests:
Refer to the beginning of the Review/Change Setup Section for step-by-
step instruction to access the appropriate setup menu.
If the monitor displays a message not indicated in these procedures,
please refer to section 10, Troubleshooting.