EN
44
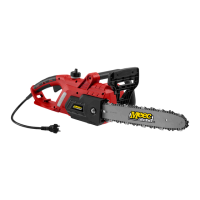
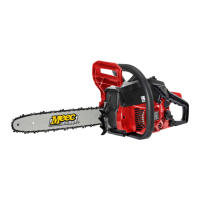
DESCRIPTION
1. Bar
2. Chain
3. Lock nut for bar
4. Cover
5. Sight glass for chain oil level
6. Strain reliever
7. Filler cap for chain oil
8. Start inhibitor
9. Power switch
10. Plug
11. Bumper spike
12. Screw chain tension
13. Chain brake handle
FIG. 1
FIG. 2
ASSEMBLY
WARNING!
Incorrect assembly of the parts for the electric
chain saw can result in the risk of fatal and/or
serious personal injury. Do not use the chain saw
if it has not been completely assembled and all
parts have been correctly tted and tightened.
Fitting the bar and chain
1. Undo the nut (3) on the cover (4) and
remove the cover.
FIG. 3
2. Turn the chain tensioning screw forwards.
3. Place the bar (1) with the slot over the
guide (13).
4. Put the chain round the sprocket (14).
Check the direction of rotation.
5. Put the chain round the bar.
FIG. 4
6. Fit the cover.
7. Tighten the nut loosely.
NOTE:
Note the positioning of the guide when tting
the chain.
USE
INTENDED USE
• The electric chain saw must only be used to
saw wood, with a chain of the
recommended type.
• The saw is not intended for commercial or
industrial use.
• Do not use the saw for any other purpose.
• Never modify the saw in any way and do
not use parts that are not approved by the
manufacturer. This can result in material
damage.
• The electric chain saw must only be used
for its intended purpose and in accordance
with these instructions. All other use is
considered to be unsuitable.
SAFETY DEVICES
The electric chain saw has several safety devices
to reduce the risk of personal injury when in use.
Chain catcher
The chain catcher catches the chain if it comes
o or jumps out from the slot on the bar. Correct
maintenance of the bar and correct and regular
tensioning of the chain prevent such problems.
FIG. 5
Chain brake handle
To reduce the risk of personal injury in the event of
kickback the saw has a chain brake, which triggers
on contact and stops the chain immediately.
FIG. 6