EasyManua.ls Logo

Melnor Two Zone AquaTimer - User Manual

Melnor Two Zone AquaTimer
3 pages
Print Icon
To Next Page IconTo Next Page
Loading...
Model 3100
Operating Instructions
Mode d emploi
Two Zone AquaTimer
®
English/ Français/ Español
Congratulations on the purchase of your new Melnor Two
Zone AquaTimer
®
! The Melnor Two Zone AquaTimer
®
will
allow you freedom and exibility in watering your lawn and
garden.
Battery Installation
Before you begin using your Melnor Two Zone AquaTimer
®
,
you will need to install four AA batteries. On the lower back
of your AquaTimer
®
is a small battery door with a tab. Push
down on the tab and the door will slide off easily. Pull out
the black battery holder that is inside the unit. Insert four AA
batteries into the battery holder. Push the battery holder back
into the unit and snap the battery door securely into place. As
soon as the batteries are in the holder, you will hear the valves
activate.
There is a small light at the bottom center of your AquaTimer
®
,
under which are written the wordsLow Battery. The Low
Battery light will flash when the charge in the batteries is
low, and the valve(s) will close automatically, preventing over
watering. The timer will cease operation until fresh batteries
are installed.
Programming Your AquaTimer
®
Your Melnor Two Zone AquaTimer
®
has two valves, which
makes it possible for you to automatically water two separate
areas (orzones”) of your lawn or garden on two different
watering schedules. Each zone is controlled by a Frequency
knob and a Duration knob. The knobs can be rotated in either
direction.
Each zone can be programmed independently. The first step
is to set the watering frequency (How often do you want to
water?). There are pre-set timing increments on the unit’s
Frequency knob from as often as once an hour to as little
as once a week. Turn the yellow Frequency knob for Zone
1 and line up its arrow with the number on the green circle
surrounding the knob that represents your desired watering
frequency. You have just set the frequency of Zone 1.
The second step in programming your AquaTimer
®
is setting
the Duration (How long do you want to water?). There are
pre-set increments on the units Duration knob starting with
one minute per watering session going up to as long as 120
minutes per session. Turn the yellow Duration knob for Zone
1 so that its arrow is lined up with the number on the green
circle surrounding the knob that
represents the length of time
for which you want the water
to run. You have now set the
duration of Zone 1.
Your AquaTimer will begin watering
with the next scheduled watering cycle. Example: If you
program the Frequency to 12, the AquaTimer will begin
watering 12 hours after you program it and every 12 hours
after that.
To program Zone 2, follow the same two steps that you have
just completed for Zone 1. The two zones can be set for
different frequencies and durations.
Your AquaTimer
®
can be programmed while it is either
attached or unattached to the faucet.
Installing the AquaTimer
®
At the top of your AquaTimer
®
is what is known as a
coupler”. Use the coupler to attach your timer to the outdoor
faucet. Once you have attached the AquaTimer
®
to the
faucet, open the faucet valve and leave it open.
At the bottom of your AquaTimer, there are two connectors
onto which you can attach two hoses.
Manual On/Off
Your Melnor Two Zone AquaTimer
®
allows you to water
manually without removing your AquaTimer
®
from the faucet.
To turn on your AquaTimer
®
, simply rotate the desired
Duration knobs to the On position. Turn it back to the Off
position when the watering is complete. You also can
rotate the Duration knobs to the Off position if you want to
cancel the current program. You might want to suspend the
program if it rains, for example. If you do that, you will need
to rotate the knobs back to the desired Duration to resume
its programmed time.
Operating Tips
Turn off the faucet if your AquaTimer
®
will not be used for
an extended period of time.
Use only fresh alkaline batteries.
Do not use rechargeable batteries.
Replace the batteries at the beginning of each watering
season.
Question and Answer IconNeed help?

Do you have a question about the Melnor Two Zone AquaTimer and is the answer not in the manual?

Summary

Battery Installation and Low Battery Indicator

Programming Your AquaTimer

Setting Watering Frequency

Set how often you want to water your lawn or garden with pre-set timing increments.

Setting Watering Duration

Determine how long the water will run for each watering session, from one minute up to 120 minutes.

Programming Zone 2

Follow the same steps to program a second zone with different frequencies and durations.

Installing the AquaTimer

Manual On;Off Operation

Operating Tips and Maintenance

Frequently Asked Questions

Low Battery Light Flashing Cause

Identifies low battery indication and advises changing batteries.

Program Not Running Cause

Troubleshoots why a program might not run, suggesting faucet check.

Turning Off Watering During Rain

Explains how to temporarily stop watering by setting duration to Off.

Creating a New Program

Guides user to reset frequency to 'Now' and duration to 'Off' to start fresh.

Changing Watering Duration After Setup

Details how to adjust watering duration for a set program.

Delayed Watering Feature

Now Feature for Immediate Watering

Overview

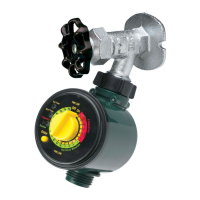
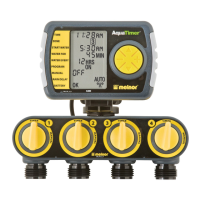
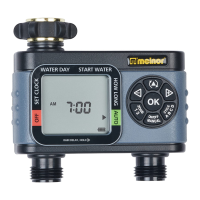
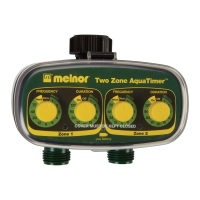
The Melnor Two Zone AquaTimer® Model 3100 is a device designed to automate lawn and garden watering across two separate areas, or "zones," each with its own programmable schedule. This allows for freedom and flexibility in managing watering tasks.

Function Description:

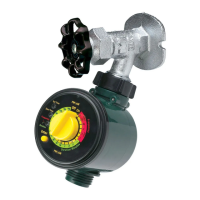
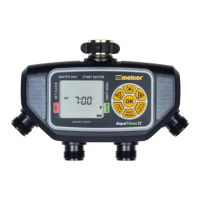
The AquaTimer® connects to an outdoor faucet via a coupler at the top of the unit. It features two valves, each controlled by a Frequency knob and a Duration knob, allowing independent programming for each zone. The Frequency knob sets how often watering occurs, with pre-set increments ranging from once an hour to once a week. The Duration knob determines how long each watering session lasts, with increments from one minute up to 120 minutes. Once programmed, the AquaTimer® will begin watering at the next scheduled cycle. For example, if programmed for a frequency of 12 hours, watering will start 12 hours after programming and continue every 12 hours thereafter.

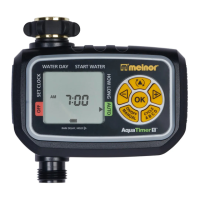
The device also includes a "Now" feature, enabling immediate manual watering for a set duration without altering the programmed schedule. To use this, the Frequency knob is turned to "Now" and the Duration knob is set to the desired time. The valve will open and then automatically close after the specified duration.

A manual On/Off function is also available. Users can rotate the Duration knobs to the "On" position for manual watering and back to "Off" when complete. Rotating the Duration knobs to "Off" can also cancel a current program, useful for suspending watering due to rain, for instance. To resume the programmed time, the knobs must be rotated back to the desired Duration setting.

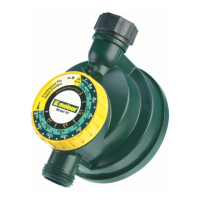
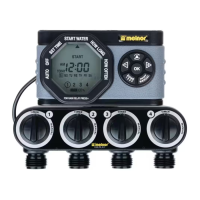
The AquaTimer® supports delayed watering for each zone by up to 12 hours using a small button at the bottom middle of each zone area. Each press of this button delays the first start time by one hour. The "Low Battery" light illuminates when the delay button is pressed.

Important Technical Specifications:

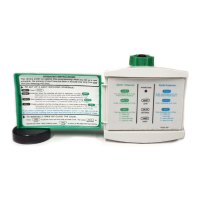
The AquaTimer® requires four AA alkaline batteries for operation. It is designed for outdoor use only, with clean water, and for residential applications. The device should not be exposed to temperatures at or below 32° F (0° C).

Usage Features:

  • Two Independent Zones: Allows for different watering schedules for two distinct areas.
  • Programmable Frequency: Users can select watering intervals from hourly to weekly.
  • Programmable Duration: Watering sessions can be set from 1 minute to 120 minutes.
  • Manual On/Off: Provides flexibility for immediate watering or program suspension.
  • "Now" Feature: Enables instant watering for a specified duration.
  • Delayed Watering: The first watering cycle can be delayed by up to 12 hours per zone.
  • Low Battery Indicator: A flashing light warns when battery charge is low, and valves close automatically to prevent overwatering.
  • Easy Programming: Knobs can be rotated in either direction for setting frequency and duration. Programming can be done whether the unit is attached or unattached to the faucet.

Maintenance Features:

  • Battery Replacement: Four fresh AA alkaline batteries are required. The battery door is located on the lower back of the unit. The device will cease operation until fresh batteries are installed.
  • Seasonal Battery Replacement: Batteries should be replaced at the beginning of each watering season.
  • Long-Term Storage: Batteries should be removed if the AquaTimer® will not be used for an extended period of time.
  • Filter Washer Cleaning: A filter washer inside the coupler at the top of the AquaTimer® should be cleaned regularly to prevent clogging.
  • Faucet Management: The faucet valve should be left open once the AquaTimer® is attached. If the AquaTimer® will not be used for an extended period, the faucet should be turned off.
  • Handling Precautions: To avoid damage to the faucet connection, users should not tug on a hose while it is attached to the AquaTimer®.

The AquaTimer® is designed to simplify garden and lawn care by providing reliable and customizable watering automation.

Melnor Two Zone AquaTimer Specifications

General IconGeneral
BrandMelnor
ModelTwo Zone AquaTimer
CategoryTimer
LanguageEnglish

Related product manuals