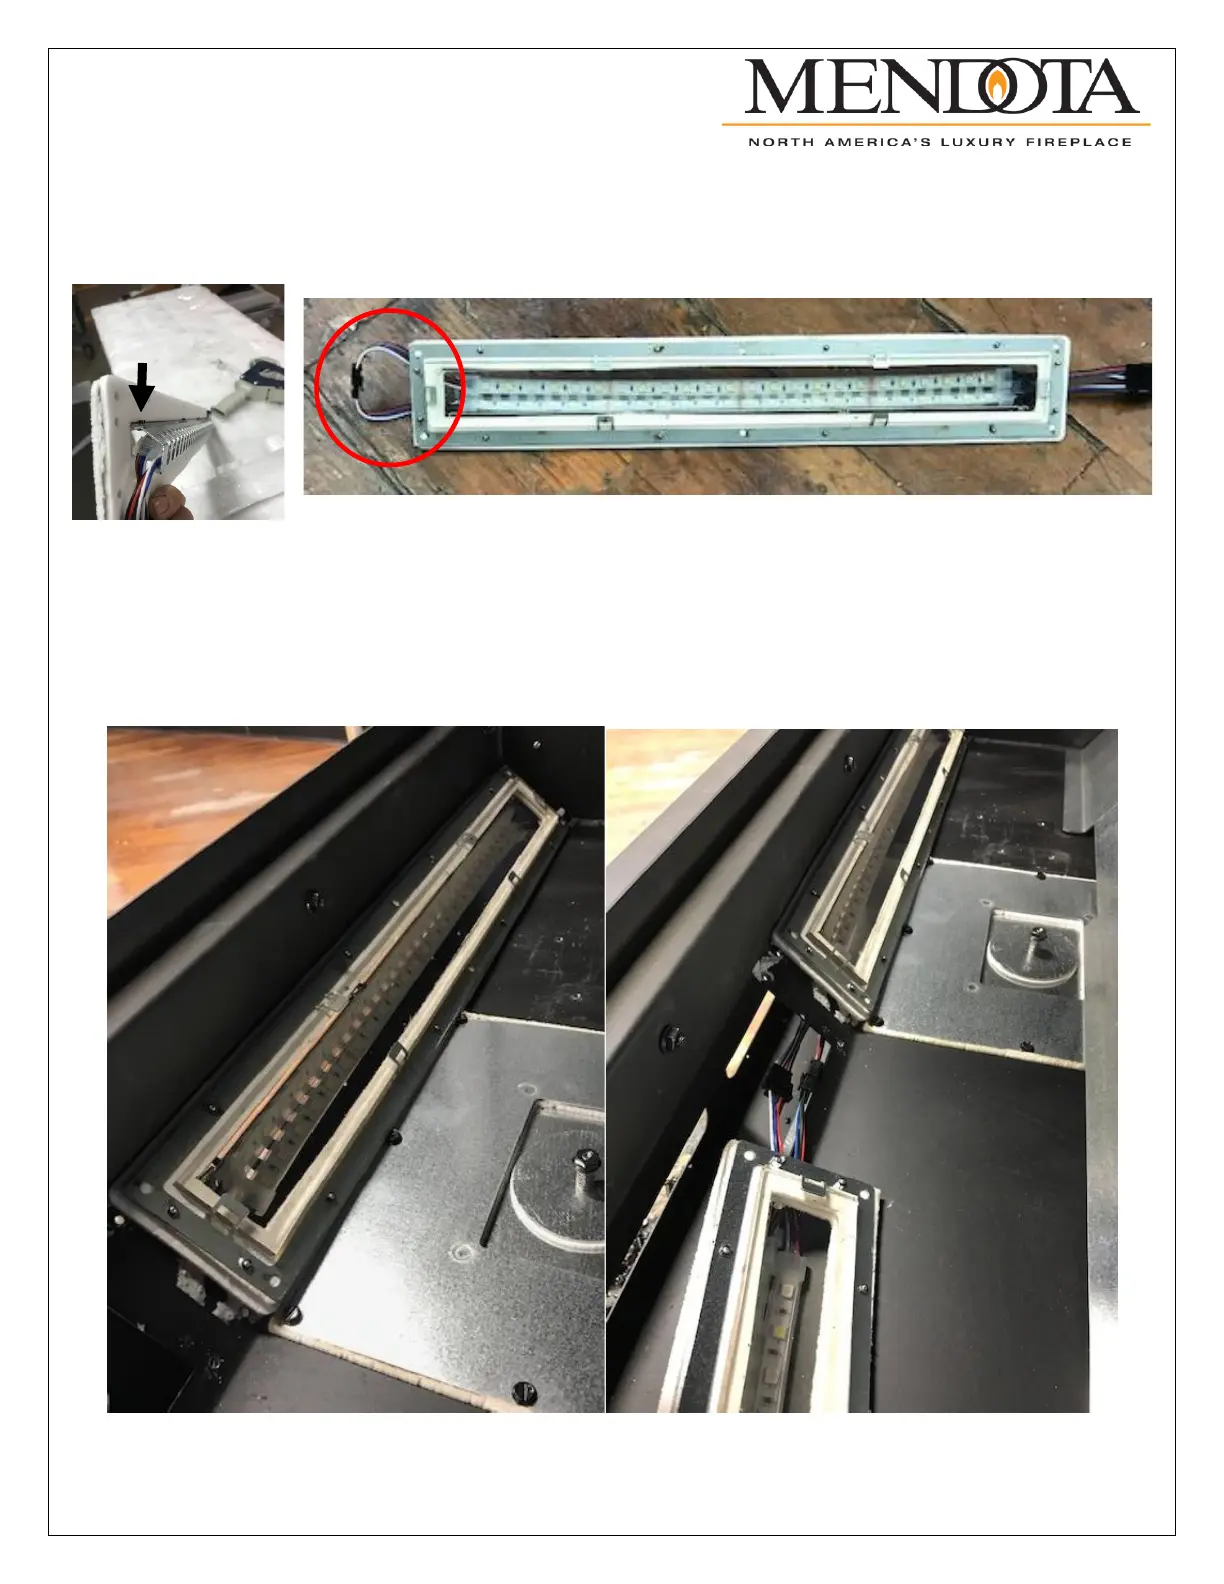
The light assemblies will be installed from left to right. The LED lights are attached to the assemblies on a shielded piece
of metal. The shield is to be at the top when installed into the unit, see the side view below. The left LED assembly will
need the left end wire connections connected together to form a loop as shown below. The assembly is shown as it will be
placed in the unit from left to right.
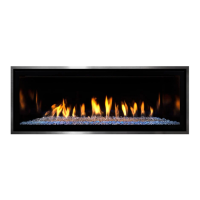
Begin by placing the left LED light assembly into the left cutout on the fire box. Make sure the connectors that were looped
together are on the far left. Tuck the connectors into the firebox so that only the gasket is touching the firebox and the
connectors are on the outside of the firebox.
Then, continue and do the same with the center LED light assembly. Place the assembly in the same orientation as the
previous with the shielded area at the top. Then find the connectors from the left light assembly and connect them to the
center light assembly as shown below before placing the center light assembly into the firebox cut out.
Repeat this same procedure for the right LED light assembly if applicable. If not applicable, skip to the next step.