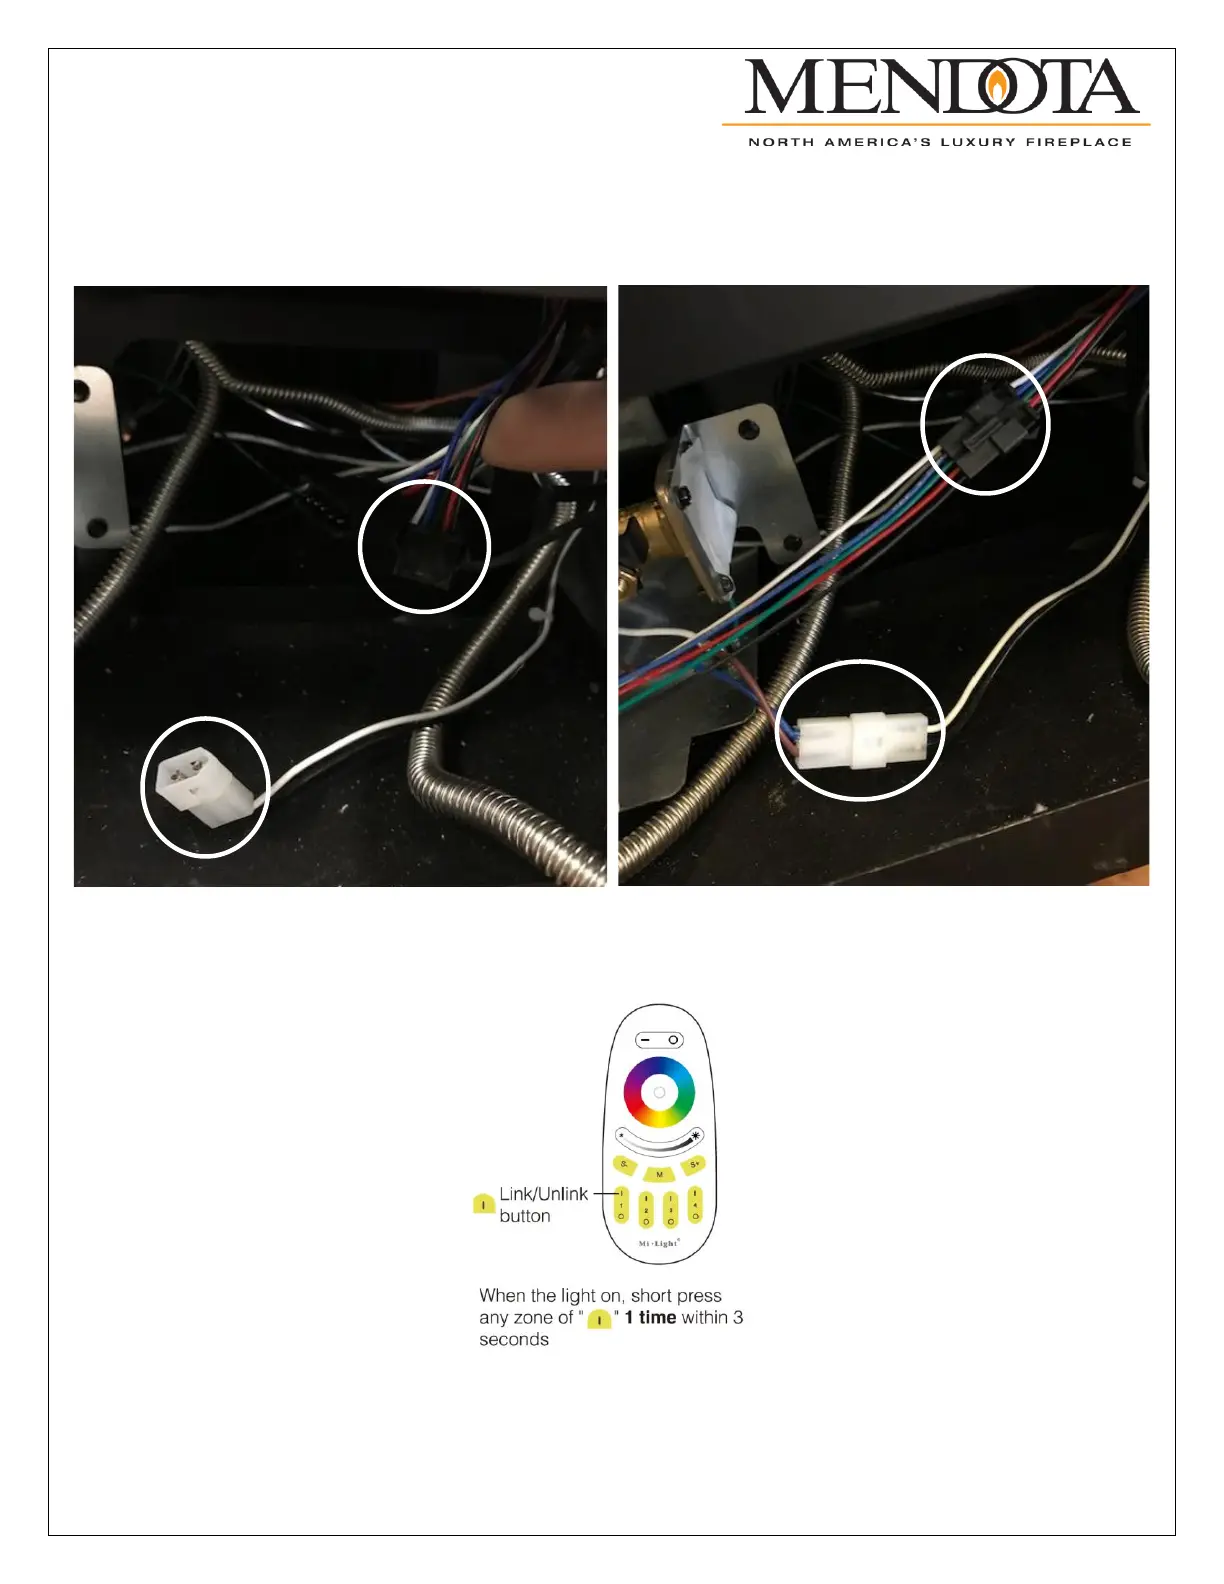
Once the components are properly placed, the Molex connector on the end of the power source can be connected to the
auxiliary power connector that was found earlier on the right-side floor of the unit. Then, the controller harness can be
connected to the right-side LED light assembly connector. There will be two open connectors on the far-right side light
assembly, one male and one female. Connect the female end of the LED controller to the male end of the LED light
assembly.
The last step of the installation is to sync the LED light remote control to the LED controller. Restore power to the fireplace
and within 3 seconds of restoring power press the “I” of the zone 1 control. If the pairing is successful, the LED lights will
blink green 3 times slowly.
The LED Floor Light Kit installation is now complete. Replace all the components that were removed to gain access to the
floor light cover plates. Replace these components in the reverse order from which they were removed. See the next page
for the quick setup LED remote and smartphone connection instructions. To control the LED lights with your smartphone,
Google Home, or Amazon Alexa proceed to the LED controller instructions. The complete instructions for the remote and
controller are also provided in the kit if more information is necessary.