POWERHEAD
90-883728 JULY 2001 Page 4A-37
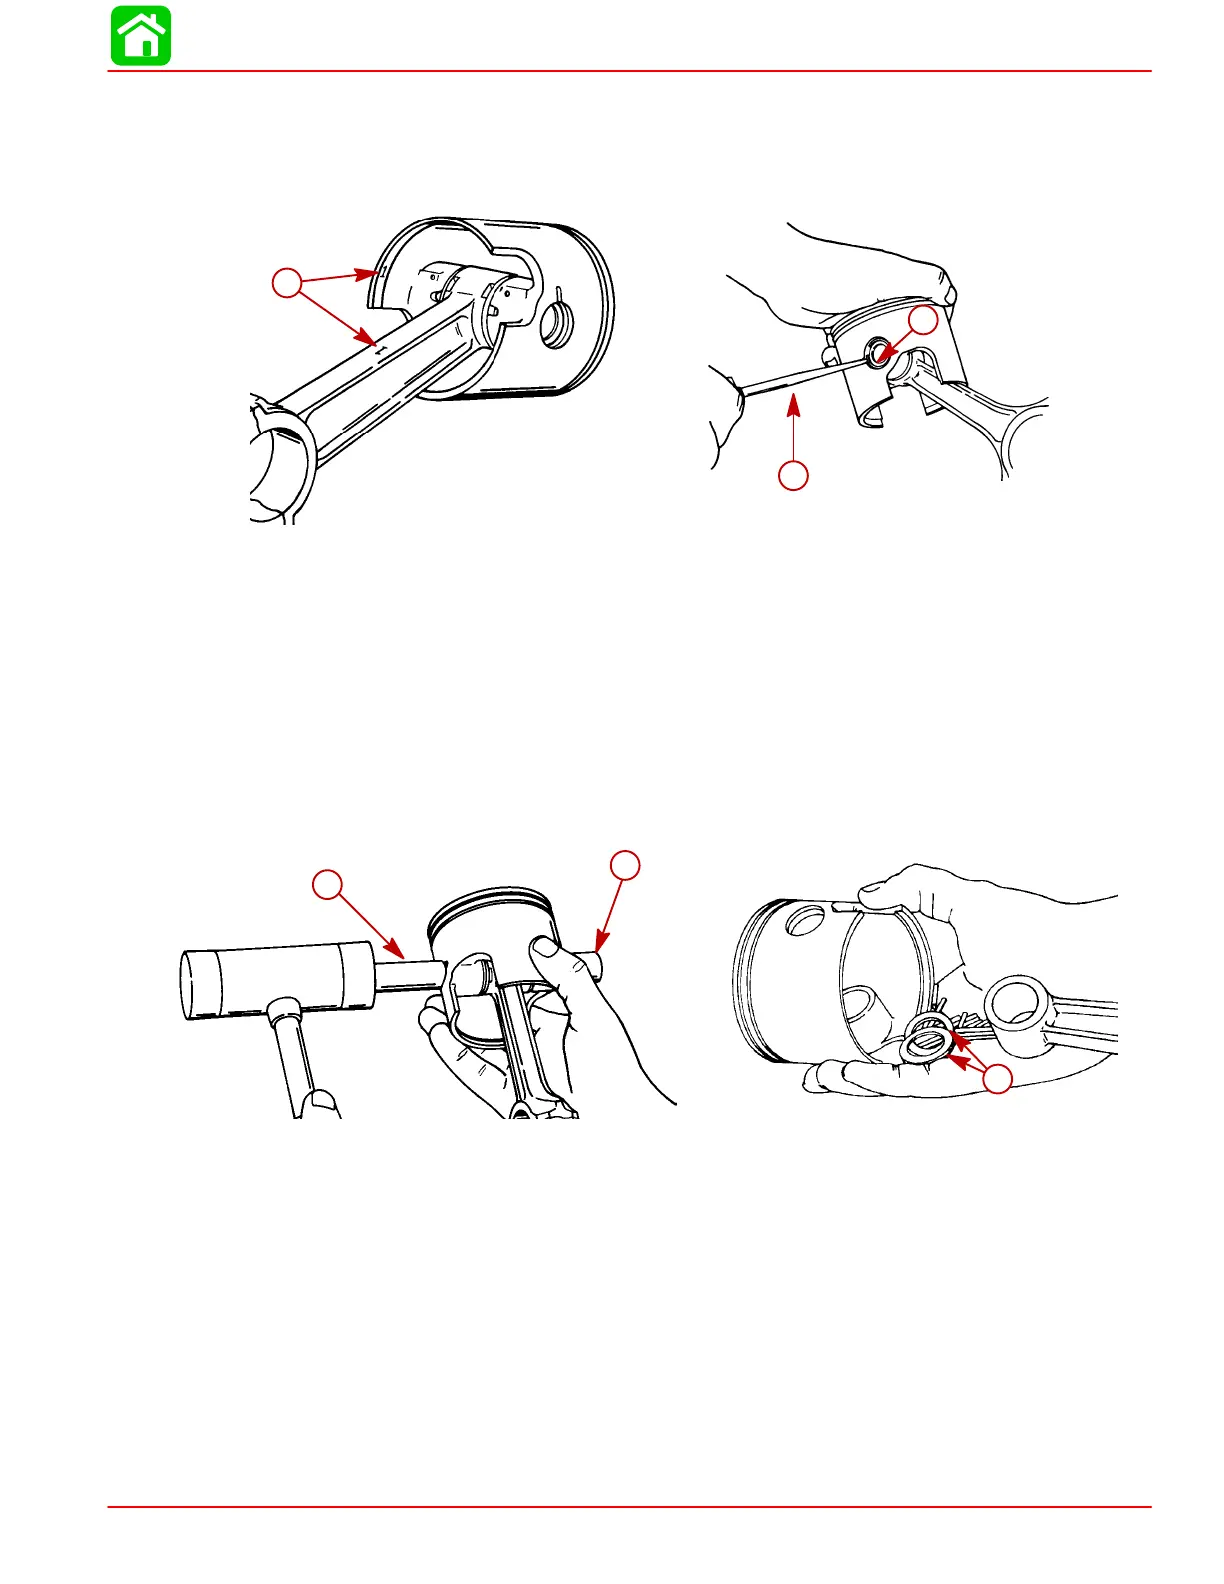
17. Using an awl, scribe identification number of connecting rod on inside of piston. Reas-
semble piston on same connecting rod.
18. Using tool (91-52952A1), remove piston pin lock rings from both ends of piston pin. Nev-
er re-use piston pin lockrings.
51851
51083
a
b
c
a-Lockring
b-Scribe Identification
Number
c-Lockring Tool (91-52952A1)
IMPORTANT: Warming the piston dome using a torch lamp will ease removal and in-
stallation of piston pin.
19. Support piston and tap out piston pin using service tool (91-76159A1) as shown.
20. Remove piston pin needle bearings (29 per piston) and locating washers (2 per piston)
as shown.
IMPORTANT: We recommend that you use new needle bearings at reassembly for
lasting repair. However, if needle bearings must be re-used, keep each set of bearings
identified for reassembly on same connecting rod.
51853
a
b
51088
c
a-Piston Pin Tool
(91-76159A1)
b-Piston Pin
c-Needle Bearing Locating Washers
 Loading...