POWERHEAD
90-883728 JULY 2001 Page 4A-61
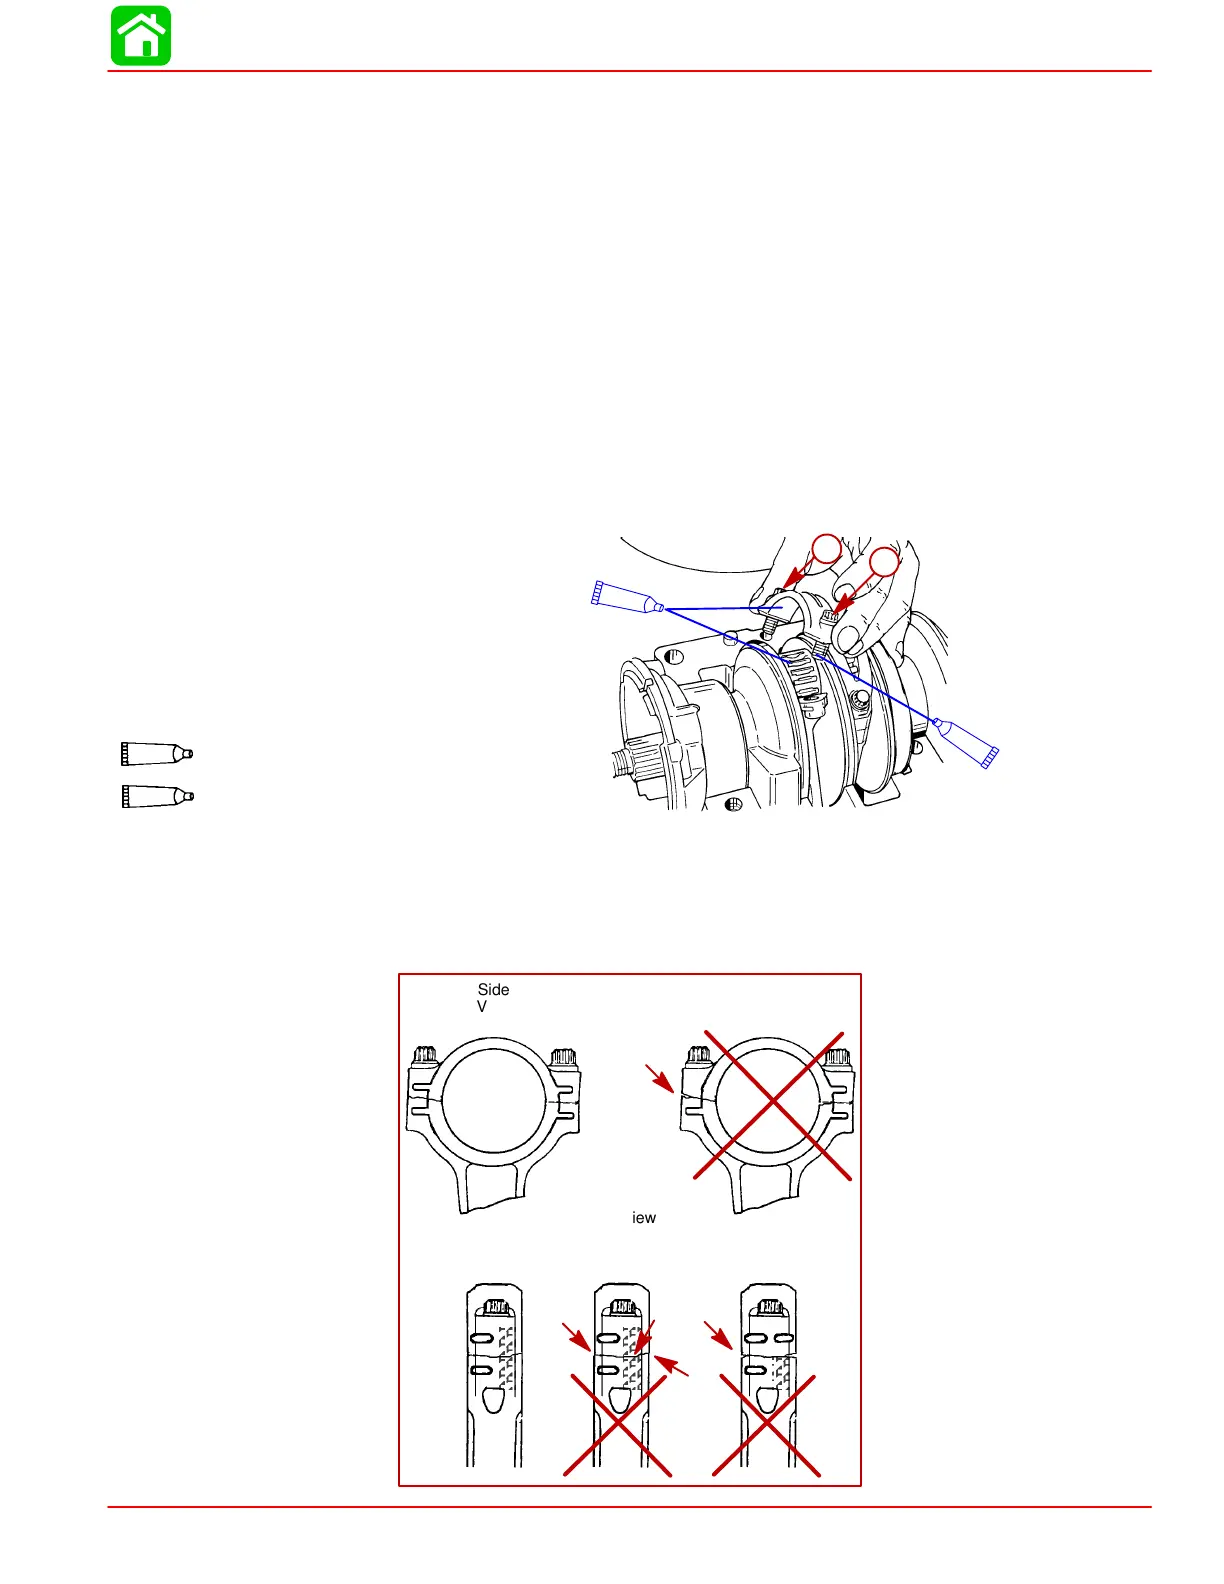
10. Apply Quicksilver 2-4-C with Teflon to bearing surface of connecting rod and, install
bearing assembly as shown.
IMPORTANT: It is recommended that connecting rod bolts not be reused.
11. Place connecting rod cap on connecting rod. Apply light oil to threads and face of con-
necting rod bolts. Thread connecting rod bolts finger-tight while checking for correct
alignment of the rod cap as shown.
IMPORTANT: Connecting rod and connecting rod caps are matched halves. Do not
torque screws before completing the following procedure.
• Run a pencil lightly over ground area.
• If pencil stops at fracture point, loosen bolts, retighten, and check again.
NOTE: If you still feel the fracture point, discard the rod.
12. Tighten connecting rod bolts (using a 5/16 in. - 12 point socket). First torque to 15 lb.
in. (1.7 N·m) then 30 lb. ft. (41 N·m). Turn each bolt an additional 90° after 2nd torque
is attained. Recheck alignment between rod cap and rod as shown.
a
a
51850
a
a
95
2-4-C With Teflon
95
14
2 Cycle Outboard Oil
14
a-Connecting Rod Screws
13. Rotate crankshaft several times (using powerhead stand) to assure free operation (no
binds and catching).
Check each connecting rod cap for correct alignment. If not aligned, a ridge can be seen
or felt at the separating line as shown below. Correct any misalignment.
Side
View
Correct
End
View
Correct
Side View
Incorrect-Cap
on Backwards
End View
Incorrect-Cap
on Backwards
End View
Incorrect-
Not
Aligned

 Loading...


