CLAMP/SWIVEL BRACKETS & DRIVESHAFT HOUSING
90-883728 JULY 2001 Page 5A-13
9. Position drive shaft housing plate on top of housing.
10. Apply a thin coat of Perfect Seal onto metal portion of upper dyna-float mounts.
11. Position mounts on drive shaft housing plate.
12. Install a rubber washer onto each upper mount, followed by a metal washer.
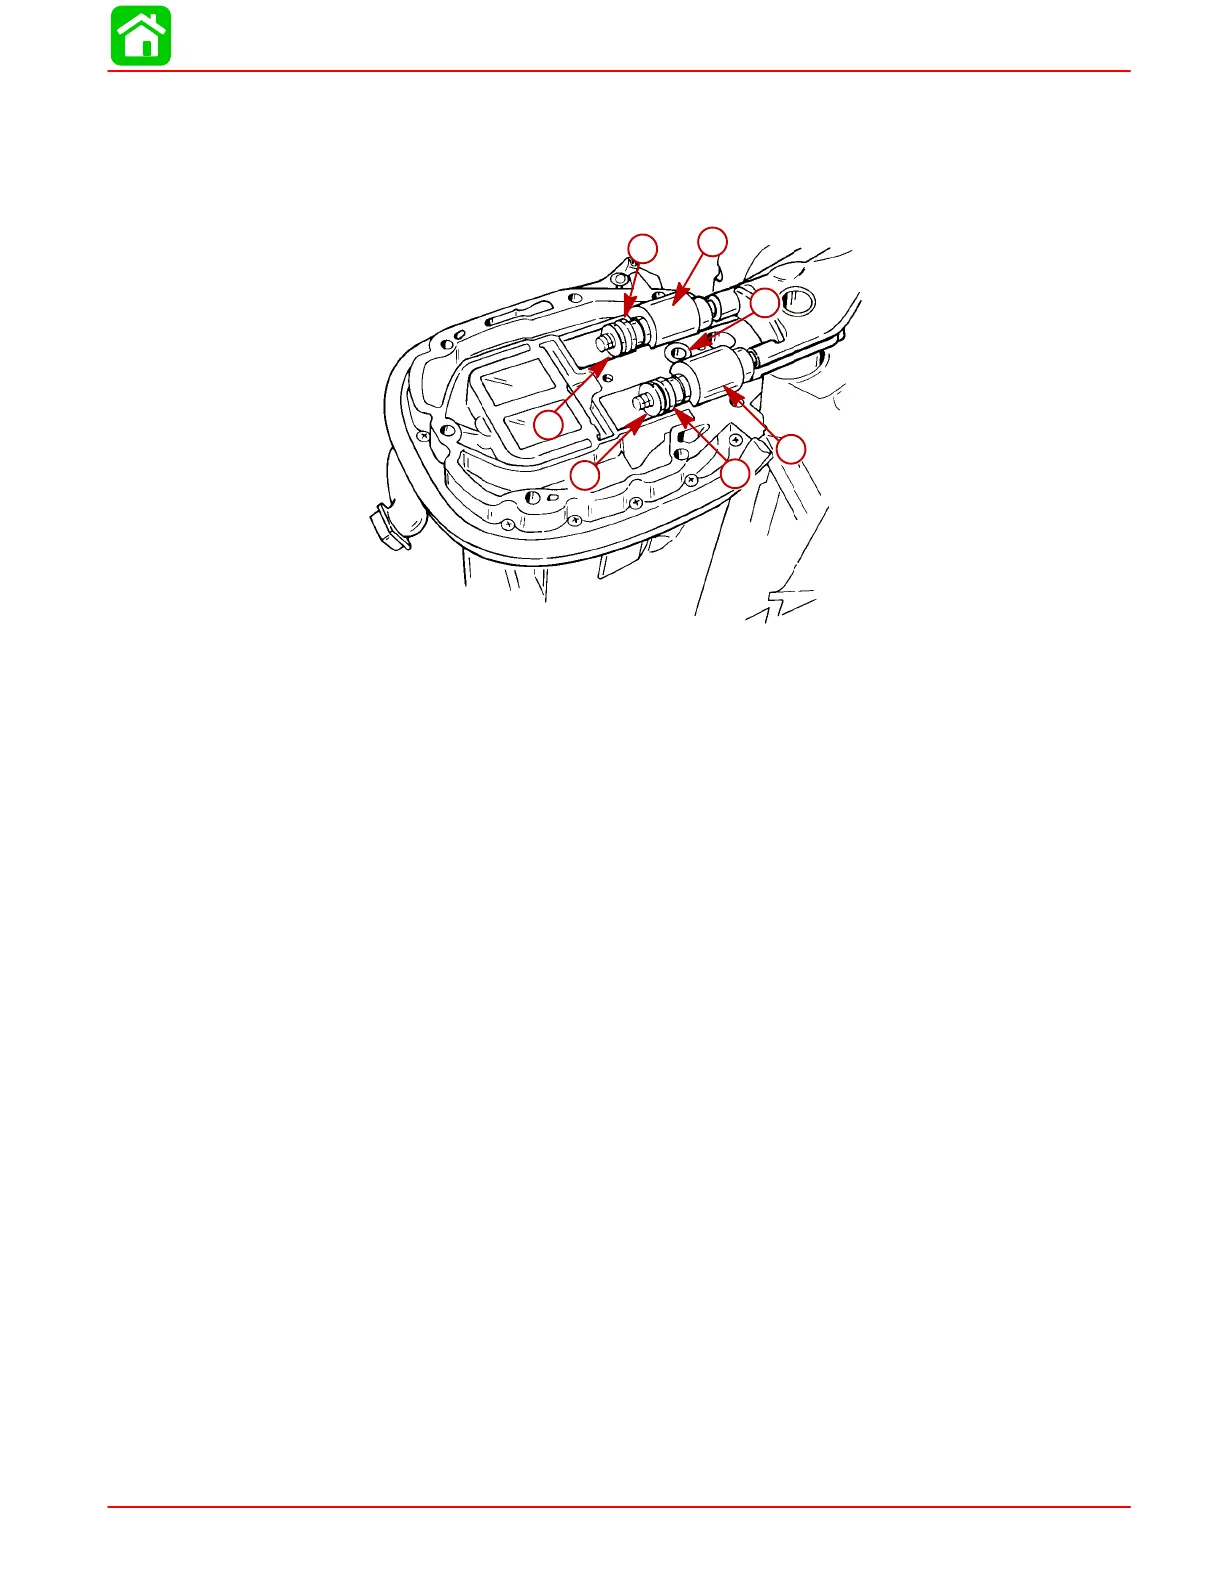
51857
c
b
a
b
c
d
d
a
b
c
d
d
b
c
a-Water Tube Seal (Plastic End)
b-Dyna-Float Mounts
c-Rubber Washers
d-Metal Washer
13. Install a ground strap onto one of the lower mount mounting bolts.
NOTE: Apply Perfect Seal along length of lower mount bolts.
14. Insert a mounting bolt thru the short end of each lower mount.
15. Position a mount on each lower side of driveshaft housing.
16. Install a flat washer over each lower mounting bolt.
17. Position a bumper on steering arm between mounting bolts.
18. Start upper mounting bolts in upper mounts and align lower mounting bolts with holes
in swivel pin yoke. Slide driveshaft housing up against yoke and bumper.
19. Secure upper mounts to steering arm with flat washers and self-locking nuts. Torque
nuts to 50 Ib. ft. (68.0 Nm).
20. Install ground strap (if equipped) between port lower mount bolt and swivel bracket.
21. Secure lower mounts to swivel pin yoke with self-locking nuts. Torque nuts to 50 Ib.
ft. (68.0 Nm). Place a rubber cap over each lower mounting bolt head.
 Loading...