POWER TRIM
Page 5B-20 90-883728 JULY 2001
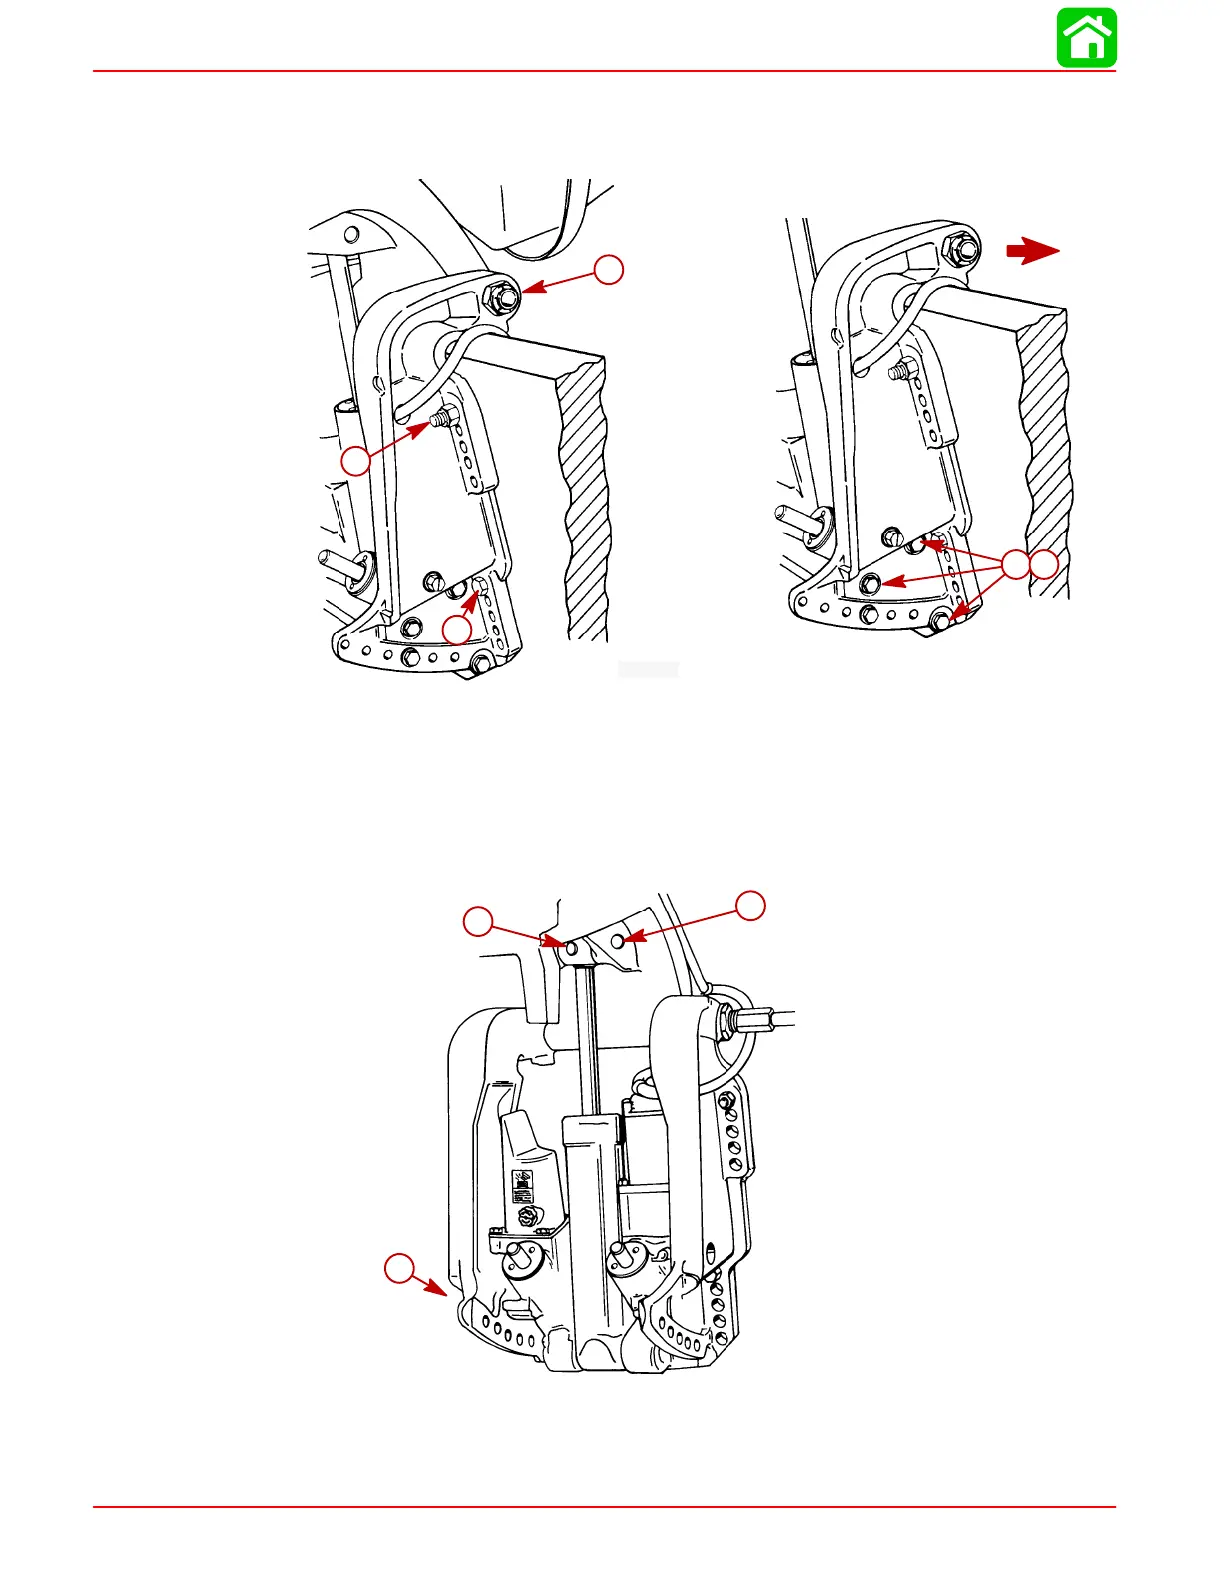
5. Remove outboard transom mounting bolts, and loosen tilt tube nut until nut is flush
with end of tilt tube thread.
6. Remove 3 screws and washers and move starboard transom bracket.
51375
51375
b
a
a
c
d
a
b
a
a-Transom Mount Bolts (2)
b-Tilt Tube Nut (flush with end of thread)
c-Screws (3)
d-Washers (3)
IMPORTANT: Cross pin (a) should not be reused. Replace with new cross pin.
7. Drive out cross pin, push out upper swivel pin, and remove 3 screws and washers re-
taining trim system. Remove system from outboard.
51339
a
b
c
a
b
c
a-Cross Pin
b-Upper Swivel Pin
c-Port Transom Bracket Screws and Washers (3). Remove to Release Trim
System from Outboard.

 Loading...


