RIGHT HAND NON-RATCHETING
Page 6A-42 90-883728 JULY 2001
NOTE: Before torquing bearing carrier cover nut, gear case should either be mounted in
a stand specifically designed for holding gear cases or bolted to a driveshaft housing to
avoid possible damage to the gear case.
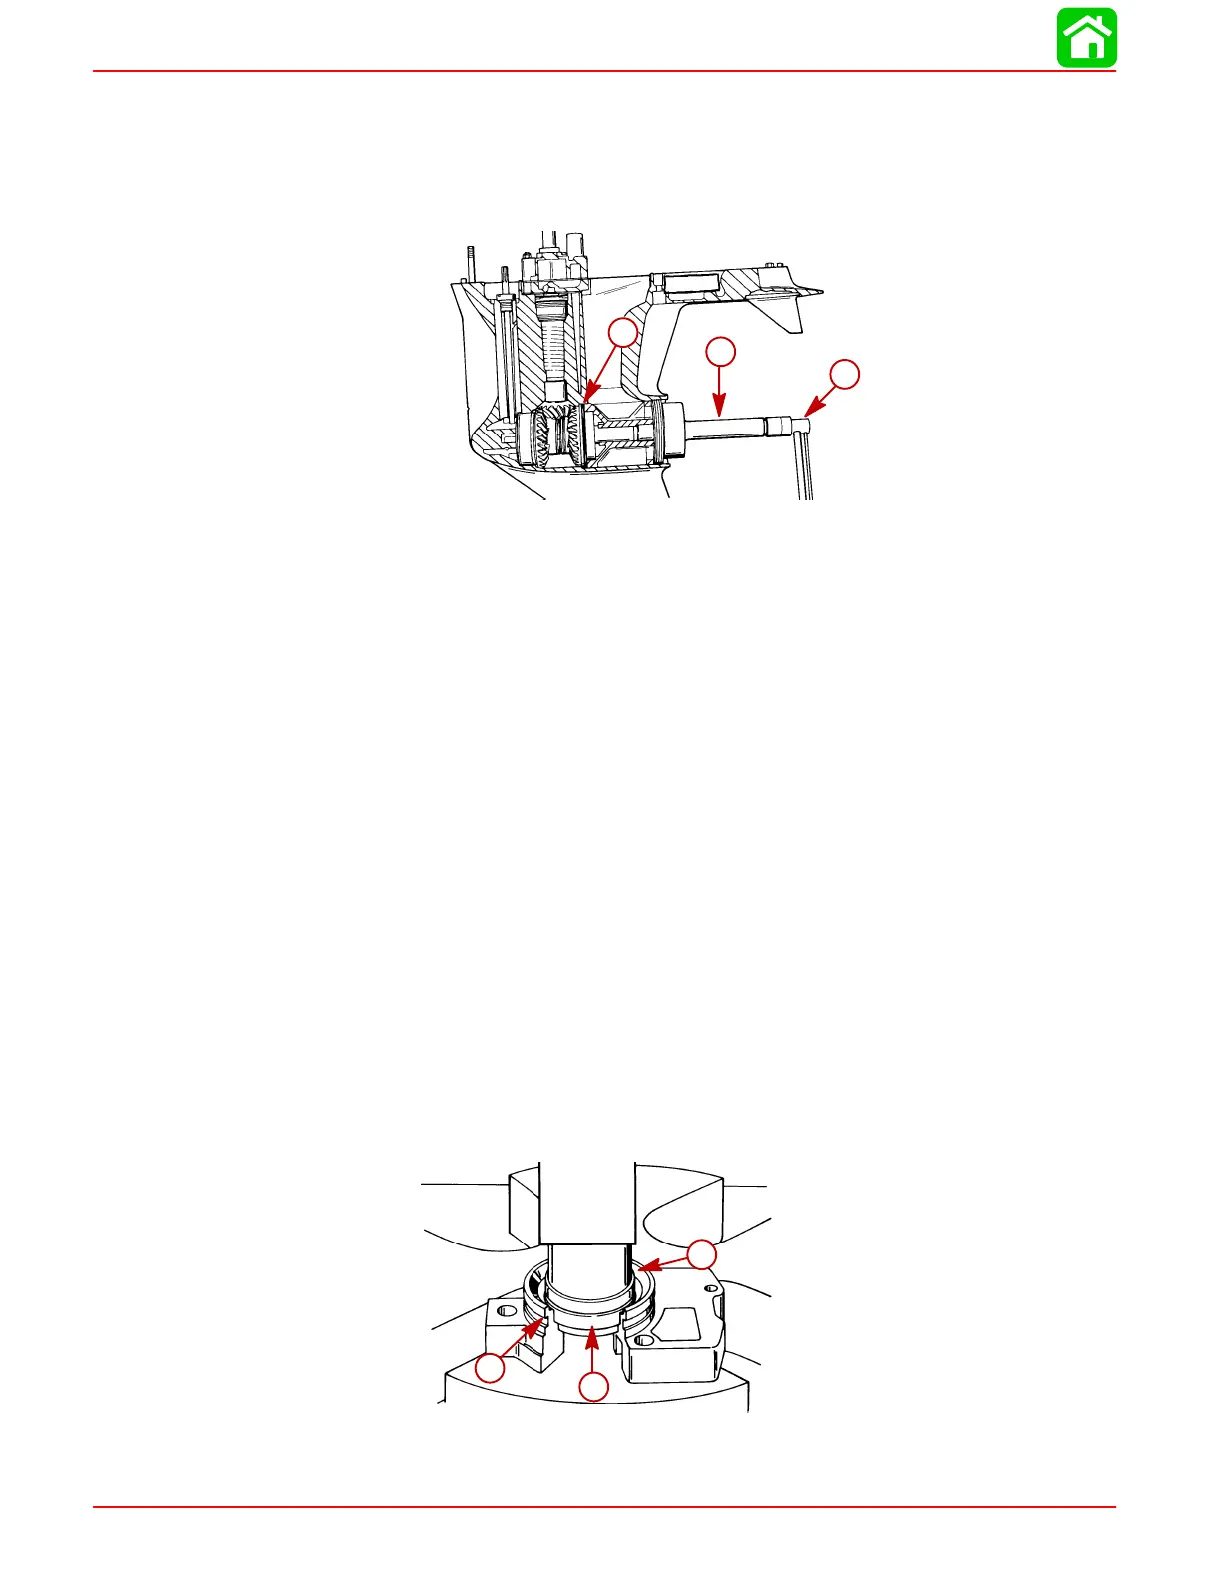
19. Start cover nut a few turns by hand, then using Cover Nut Tool (91-61069T) and torque
wrench, torque cover nut to 210 Ib. ft. (285 Nm).
b
c
a
51871
a
b
c
a-O-ring
b-Cover Nut Tool
c-Torque Wrench
20. Bend one lock tab of tab washer into cover nut (only one will align).
21. Bend remaining tabs of tab washer toward front of gear housing.
22. Use Shift Shaft Bushing Tool (91-31107T) and torque shift shaft bushing to 30 Ib. ft.
(41 Nm).
Water Pump
REASSEMBLY/INSTALLATION
1. Install oil seals into water pump base, as follows:
a. Place water pump base on a press.
b. Just before installing each seal apply Loctite 271 on outside diameter of oil seal.
c. With a suitable mandrel, press the smaller diameter oil seal into pump base with
lip of oil seal toward impeller side of base.
d. With a suitable mandrel, press the larger diameter oil seal into pump base with lip
of oil seal toward gear housing side of base.
e. Wipe any excess Loctite from oil seals and water pump base.
2. Install O-ring into O-ring groove of water pump base. Lubricate O-ring and oil seals
with 2-4-C with Teflon Marine Lubricant.
a
b
c
51869
a
b
c
a-Mandrel
b-Oil Seal (Smaller OD)
c-O-ring Groove
 Loading...