Merlin Power Systems version: 2.0.2
SmartGauge Installation and User Guide
Page 10
SmartGauge must be permanently connected to the battery terminals of the battery bank being
monitored in order to operate. It cannot operate and accurately track the State of Charge of the
batteries if its power feed is not permanent. In the event of power failure or interruption, the
SmartGauge will retain most settings in memory. On re-application of power, the unit it will continue
to operate as before except for the following:
2. Charge Status will not initially be accurate. It will probably be necessary to revert to one of the
four methods described in section 5.2 “Set-Up Menu – Charge Status” to re-calibrate this
function. However, if the batteries have been through 2 -3 discharge/charge cycles since the
power interruption, SmartGauge will have already re-synchronized itself.
3. If Primary alarms were set to operate on low charge status, then the alarm will have been
disabled. Low or high voltage alarms will remain active. All the set points such as voltage or
status activate and deactivate levels, low status timer etc. will remain as they were, but an
actual low status alarm will be switched off. Secondary alarms will remain as they were set prior
to the power failure (alarm functionality is explained later in this manual).
There is no need to reset any other functions. SmartGauge will remember all settings. If necessary,
refer to the flow chart headed “Re-power up following power failure” at the end of this manual for
details of the expected display.
Note that re-powering up SmartGauge results in different displays than the initial power-up (or
following a reset to factory defaults). There is now no System Check (“SC”) and the unit does not ask
for the battery type. Both these parameters will have been retained in memory from previous use.
If there is a requirement to revert the unit to “as new” status, (perhaps the unit is being moved to a
new installation, for instance), then refer to section XXX “Reset to factory defaults”.
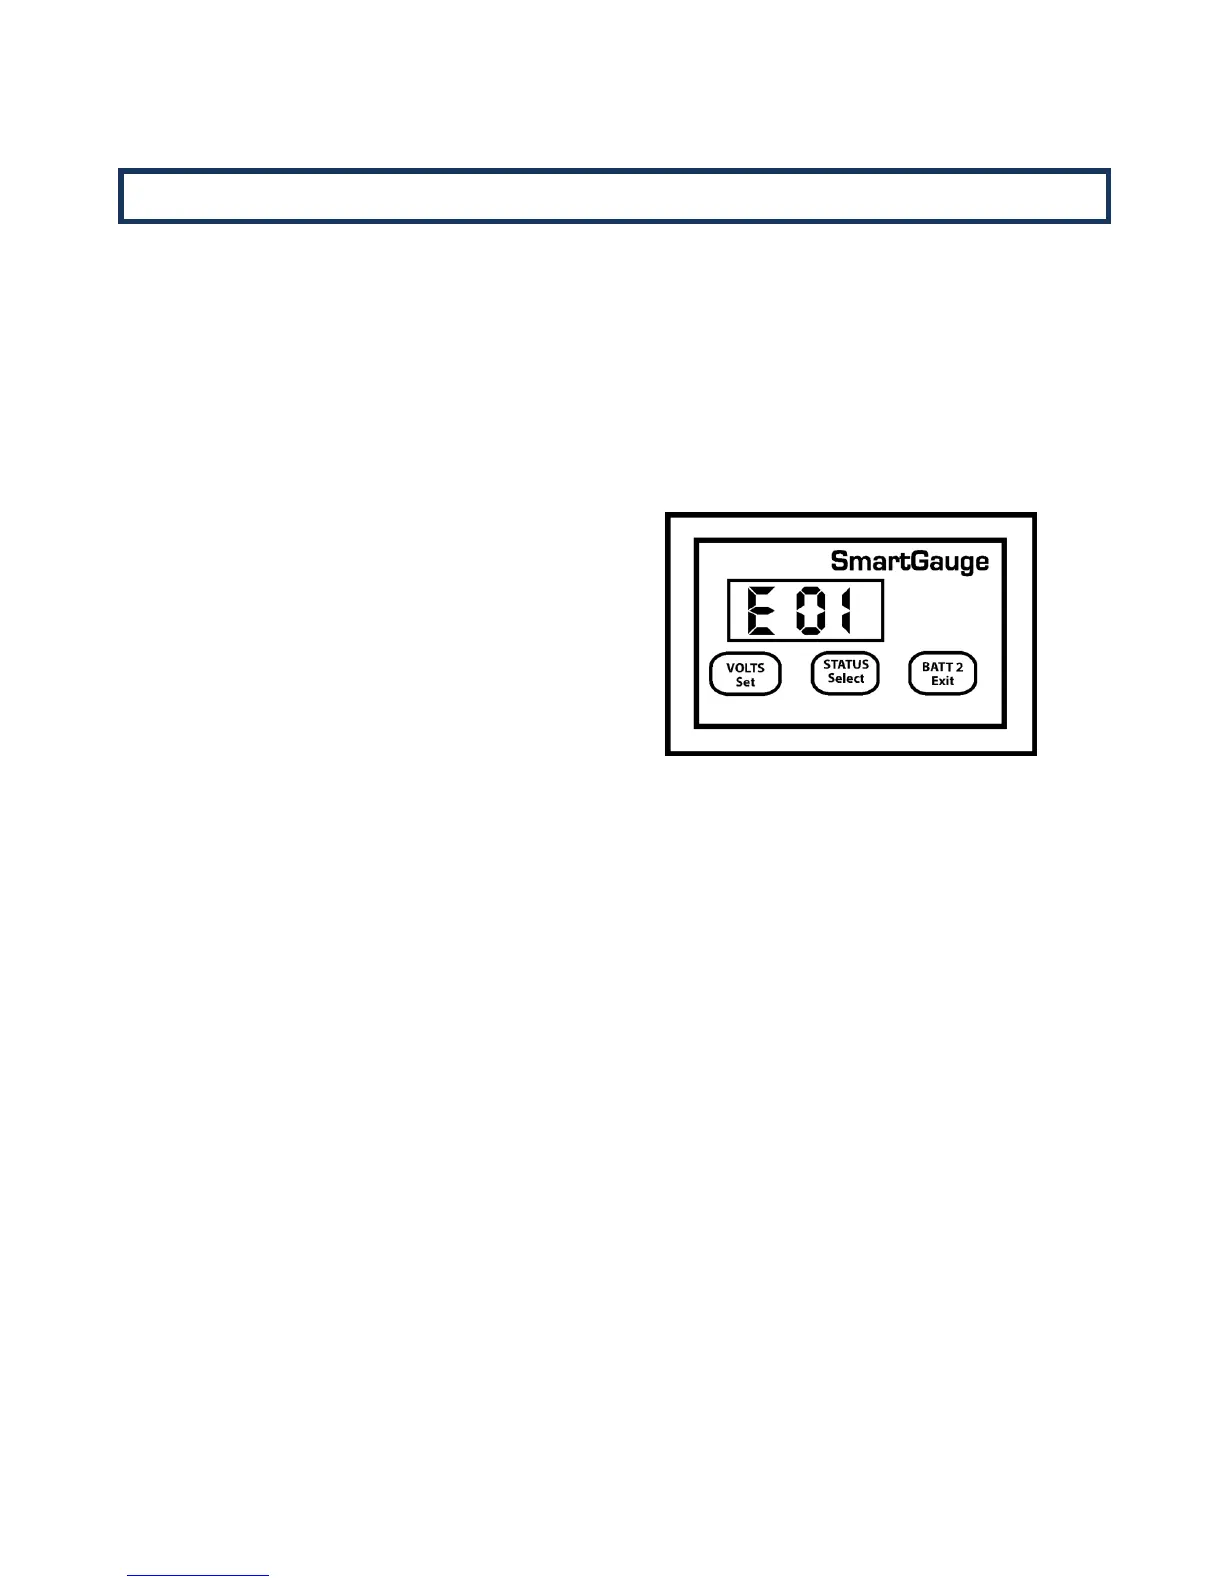
1. The display will alternate between “VOLTS” and
“E 01” (error 01 – lost power) until a key is
pressed. This is to alert the user to the fact that
power has been lost. E 01 will continue to flash
until a button is pressed, if another error occurs
the new error will not take over, E 01 will remain
as the priority error. If the display goes into
sleep mode (a simple power saving feature
described later in this manual), the ”E 01” code
will still continue to flash.
Once a button is pressed the display will move
on to show a figure – for example, 2.36 or 17.49
This is the approximate time in hours and
minutes since power was re-applied. It will count
up to a maximum of 99 hours and 59 minutes
and will then remain at that display. This time
display may help the user decide if Charge Status
re-calibration is necessary.
 Loading...