Merlin Power Systems version: 2.0.2
SmartGauge Installation and User Guide
Page 5
CAUTION & WARNING:
Batteries are hazardous
items. Please follow
battery manufacturer’s
recommendations for
health and safety. Use
only the appropriate tools
in conjunction with
manufacturer’s
instructions. Isolate both
battery and AC power
supplies before
attempting installation.
CAUTION & WARNING:
The Quick Start Guide
does not refer to each
and every Caution &
Warning Statement in this
manual. Be sure to
observe safe working
practices at all times.
Refer to the full manual if
you are unsure of any
practices that may
damage the SmartGauge
unit, your system wiring
or health.
This Quick Start guide assumes SmartGauge is being installed for
the first time. Following this guide will enable a first time user to
set up and start using SmartGauge basic functions. If more in depth
functionality is required, or the SmartGauge being used has been
connected to a battery before, please refer to the main sections of
this user guide.
CAUTION! As the Merlin SmartGauge significantly differs from most battery monitoring
equipment, it is highly recommended that the user carefully reads the main section of this user
guide in order to fully understand the correct method of installation and full range of user
functions. Failure to do so may result in permanent damage to the SmartGauge and/or other
electrical systems.
Once the unit has been correctly installed, the benefits of acquiring the Merlin SmartGauge will
become fully evident.
If any questions arise after reading the main section of the user guide, further technical support can
be obtained from your local dealer or Merlin Power Systems directly:
Europe: Tel: +44 (0) 1202 697979 North America: Tel: +1(631) 594 5102
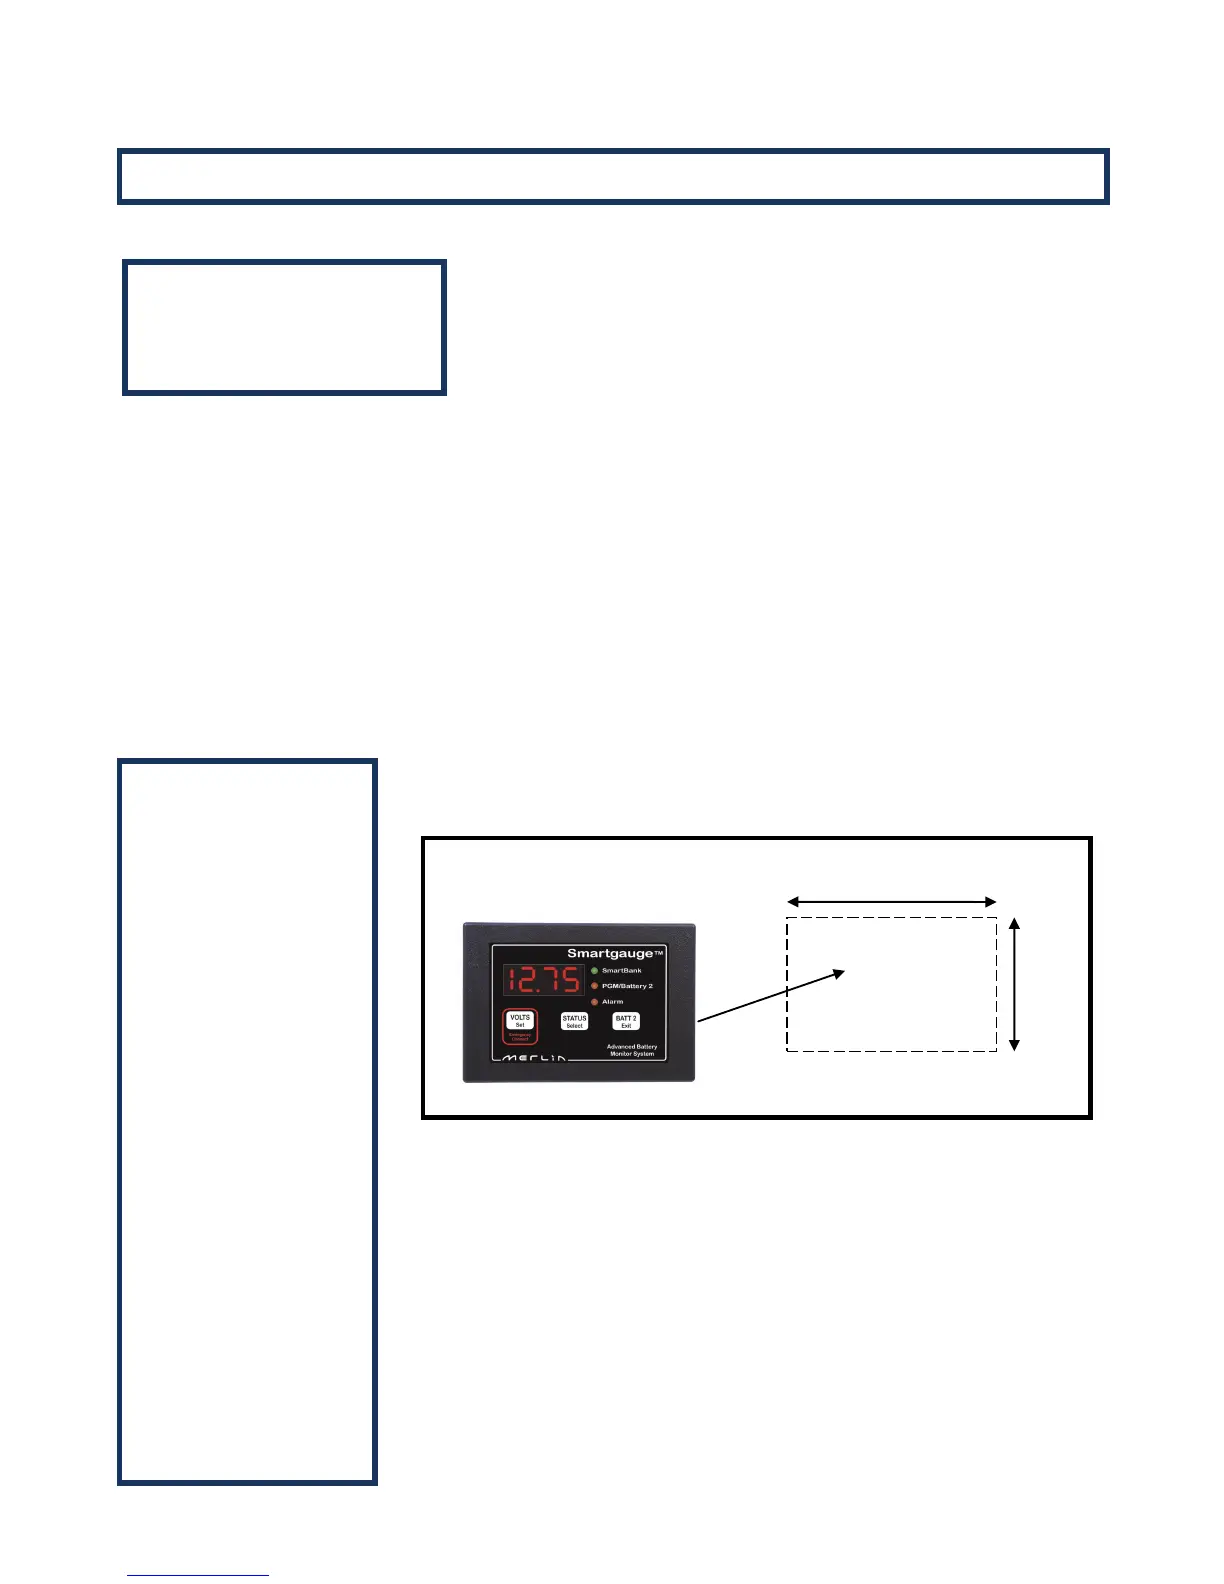
The SmartGauge display panel is typically mounted at the dash or navigation
area, or in other locations where it can be easily accessed for viewing. The
rectangular display panel requires a rough opening measuring 96.0mm wide
by 65.0mm tall, as illustrated in Figure 1 above. Access to the rear of the
monitor will be required to install ground and positive sense wires from the
monitor directly to the battery banks. In addition, there are terminals for
wiring connections to install separate wires for an audible or visual low-
voltage/low-battery capacity alarm.
Once a location has been determined for the monitor panel, sensing and
ground wires can be run to the batteries, as described in Figure 2 on the
following page.
Quick Start
Important Note: