54 Meru Access Point Installation Guide © 2010 Meru Networks, Inc.
Installation Requirements
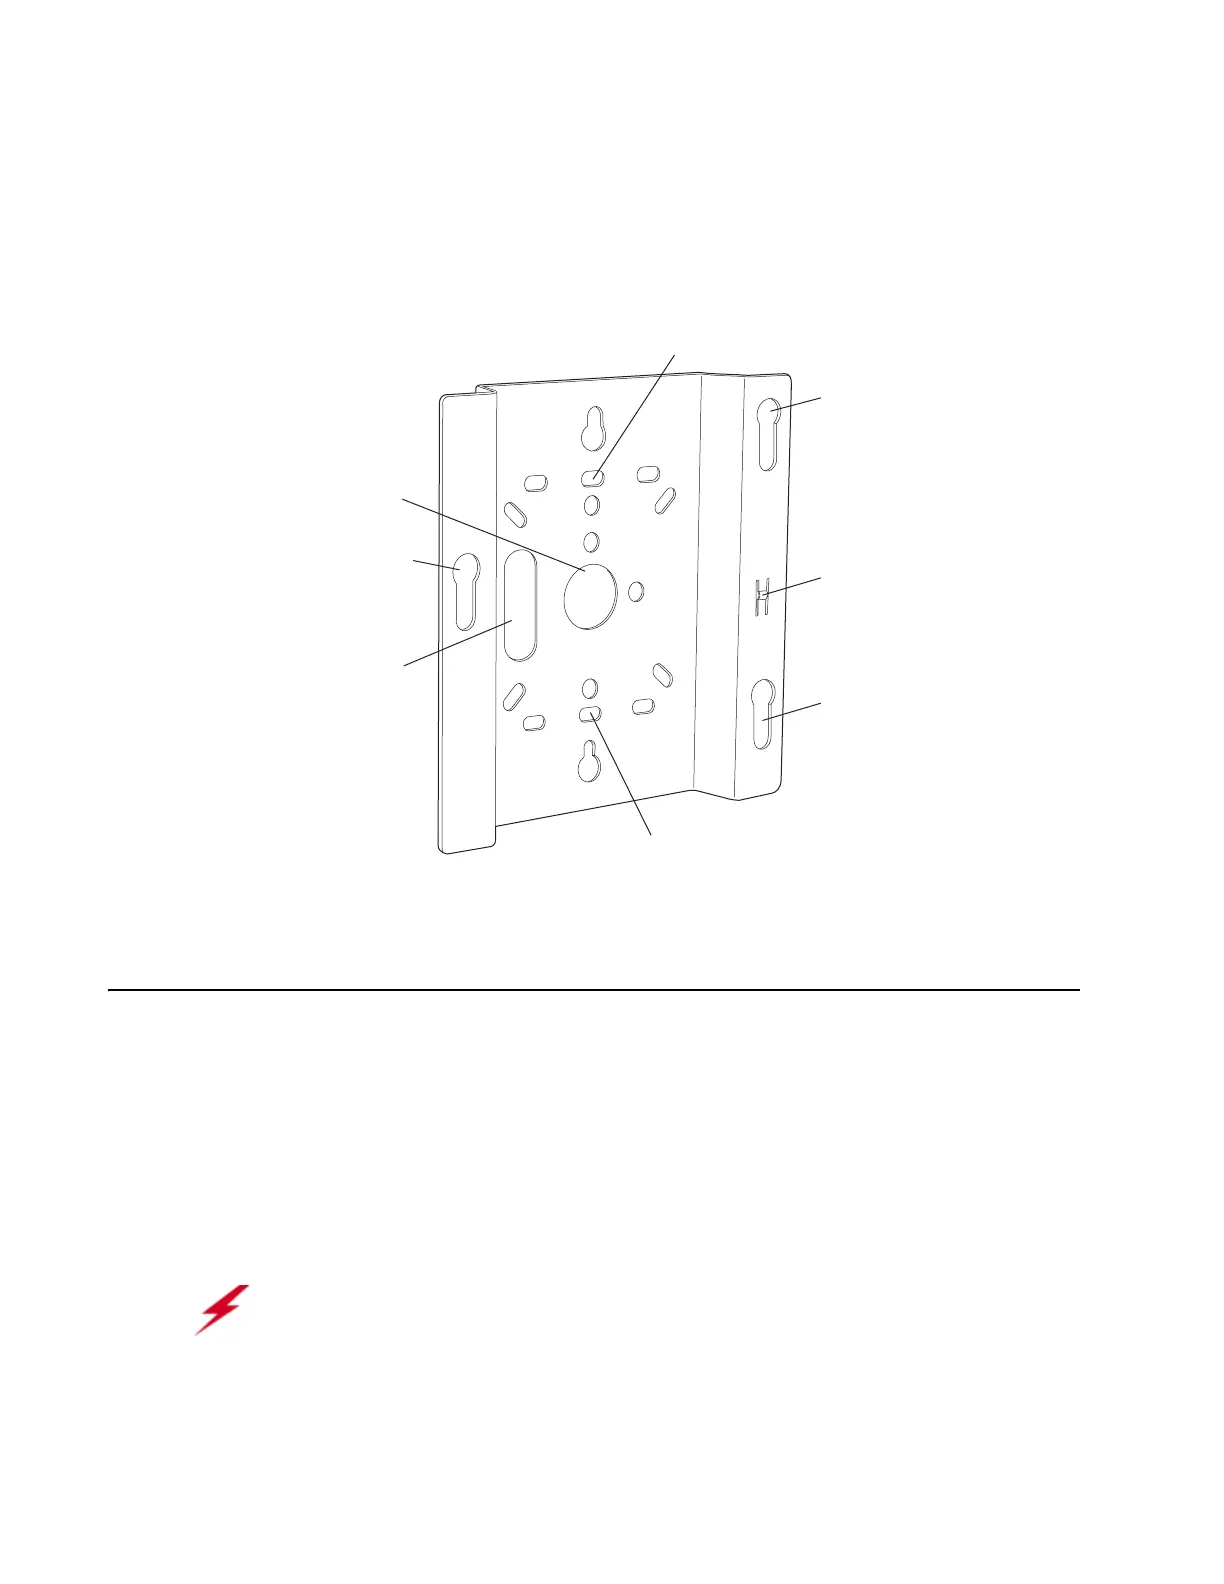
An array of holes on the mounting bracket (see Figure 15) allows it to be mounted on
the wall and over junction boxes or molly bolts. There are also holes for passing the
PoE Ethernet or external power supply cable through the bracket if the bracket is
mounted on a junction box or over the ceiling T-bar box hanger.
Figure 15: AP200 Mounting Bracket
Installation Requirements
The following recommended mounting locations provide the best reception for the
AP200:
On a horizontal surface, such as a table or a desk
On a vertical surface, usually a wall
Below a hanging ceiling
Above a hanging ceiling tiles (this installation is supported only for the AP200 with
the plastic enclosure removed)
Access point mount
Ceiling mount hole
Ceiling mount hole
Access point mount
Access point mount
Locking detent
Wall cable access
Suspended ceiling
cable access
00100
Warning!
With plastic covers removed, this product is suitable for use in
environmental air space in accordance with the Section 300-22(c) of the National
Electric Code and Sections 2- 128.12 - 010 (3) and 12 - 100 of the Canadian Electrical
Code. Part 1. C22. 1. For other countries, consult local authorities for regulations.
 Loading...