82 Meru Access Point Installation Guide © 2010 Meru Networks, Inc.
Installing the Access Points
Note:
To comply with NEC code, attach a grounding wire to any of the screws used
to attach the AP150 to the mounting bracket.
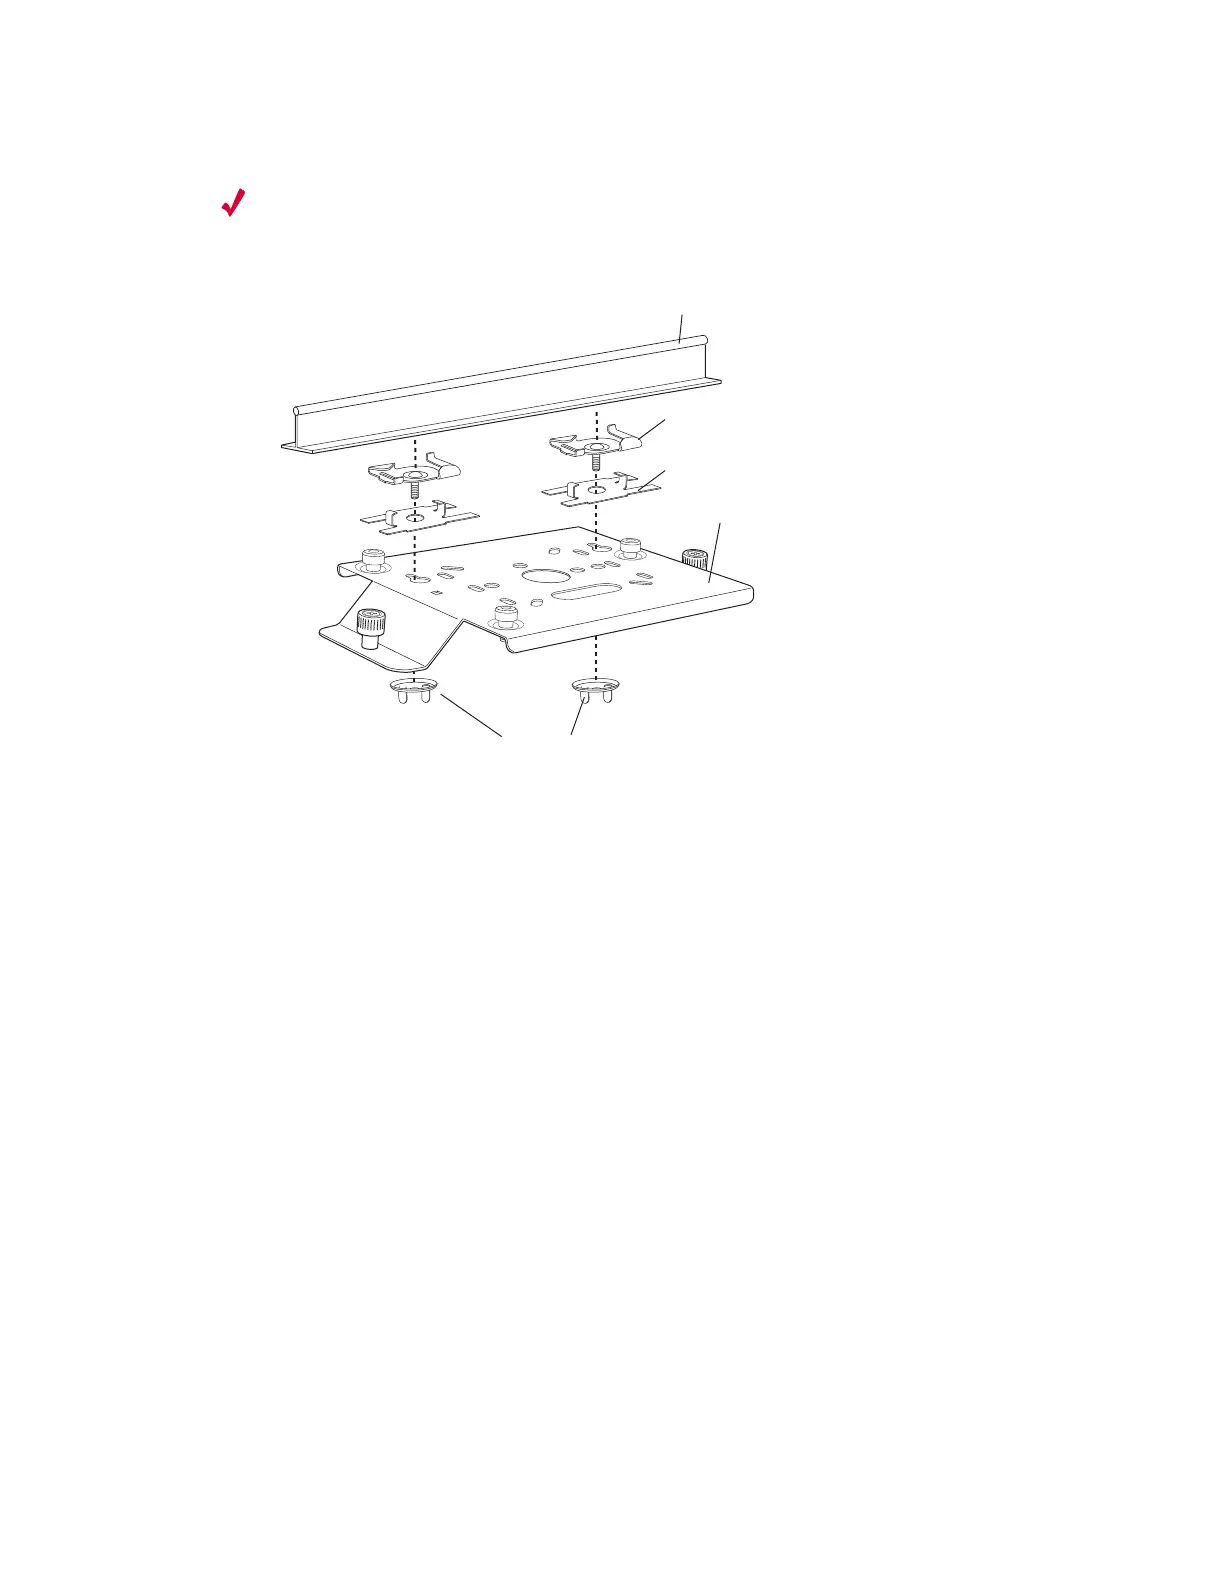
Figure 32: Mounting the AP150 to a Suspended Ceiling Rail
To mount an AP150 below a suspended ceiling:
1. Using a 1/8” Allen wrench, remove the shoulder screws from the mounting
bracket, if already attached.
2. Determine the location on the ceiling rail where the AP will be mounted and
remove the ceiling tiles.
3. Place each of the two caddy fasteners on the ceiling T-rail and twist to attach to
the rail.
4. Adjust the distance between the caddy fasteners by using the mounting bracket
holes as a guide.
5. Tighten the caddy fasteners in place using a standard screwdriver. Do not
overtighten.
6. Place each spacer on the caddy fastener stud. The spacer legs should contact the
ceiling T-rail.
7. Align the mounting bracket keyholes with the caddy fastener studs and slide the
AP150 to the narrow end of the hole.
8. Attach a keps nut to each caddy fastener stud and hand tighten. Do not
overtighten.
9. Align the AP150 with the bracket thumbscrews (see Figure 31) and tighten the
thumbscrews to attach the bracket.
00170
Washers
Suspended ceiling T-rail
Mounting bracket
Caddy fastener(s)
Spacer(s)
 Loading...