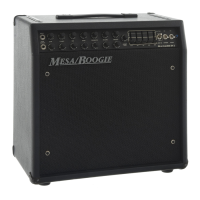
as simple as a quick flick of the wrist. It opens up the usefulness and flexibility of a Single Channel traditional amplifier and allows a
much wider range of sounds based on power section performance and saturation.
Five Power Ratings Featuring 2 Operating Classes and 3 Wiring Options are provided;
• 40 Watts utilizing 4 x 6V6s operating in Class AB Pentode
• 30 Watts utilizing 4 x 6V6s; 2 operating in Class AB Pentode, 2 in Class AB Triode
• 20 Watts running 2 x 6V6s operating in Class AB Pentode
• 10 Watts running 2 x 6V6s operating in Class AB Triode
• 2 Watts harnessing 2 x 6V6s operating in Class A Parallel, 1 6V6 wired Pentode, 1 wired Triode
Among these different wattage selections and voicings (as each has its own character, clip threshold and EQ curve) you will find
many different Tones and optimum combinations of preamp settings that allow you to roam much farther than any traditional amp
before this. Spend time exploring each of the wattage settings to learn its character and best application… you’ll quickly understand
that whether clean or overdriven, the California Tweed is also California Gold when it comes to iconic guitar sounds in the 6V6 realm.
POWER
This switch controls the AC power Mains in your amplifier. Always make sure the (supplied) IEC Power Cable is connected
to a grounded Outlet delivering the proper AC voltage –117v USA. Never alter the Power Cable as doing so may cause damage to
the amplifier, increase the risk of electric shock for you, and will void your Warranty. Always follow the Cold Start Procedure below
and allow the tubes to warm up before turning the STANDBY on (switch Right) as this will help the tubes and all other components
in your amplifier to provide years of reliable service.
STANDBY
This large toggle controls the high voltage to the power tubes and from cold start, helps minimize the inrush of cur-
rent and reduces the “shock” on them, which ultimately helps increase their useful life. Just like a light bulb, much of the wear on
tubes happens at the instant of power up. Minimizing this shock and allowing them to warm up more slowly ensures they will give
you the longest life possible.
Before POWER is switched on, make sure the amp is in STANDBY (Switch Left). Wait at least 30 seconds and then flip the STANDBY
switch to the ON position (Switch Right). STANDBY is also very useful as a MUTE for either short interruptions–like changing instru-
ments or patching cables, as well as longer intervals such as Set Breaks or other extended periods. While you can leave the amplifier
in STANDBY mode for hours with no harm, it is probably wise to power down if you know you won’t be playing for an hour or two.
Why waste the electricity? Just remember to follow the Cold Start procedure mentioned above when you power back up, even if the
amp is still “warm”. The filaments in the tubes cool much more quickly than even the glass they are encased in, and they return to
their “cold” state even after a short time with the power off. This procedure, when followed religiously, will help prevent tube problems
and extend their useful life substantially.
COLD START PROCEDURE:
(Use every time amplifier has been switched off for more than 3 minutes)
1. Switch to STANDBY (STANDBY Switch Left)
2. Turn POWER to ON (POWER Switch Right).
3. Wait AT LEAST 30 Seconds, preferably longer, for tubes to warm up.
4. Flip STANDBY to ON (STANDBY Switch Right)
NOTE: This Cold Start Procedure is an important part of ensuring maximum tube life and reliability. Like a light bulb, the most wear
occurs in the instant (short period, first few seconds) voltage is first applied. Like a light bulb, if a dimmer is used to reduce the volt-
age for the first few seconds or so of use, increased longevity is the result. The STANDBY is the amp’s equivalent to a dimmer and
using it in the above described method will ensure the longest life and best performance from a set of tubes (especially Output tubes).
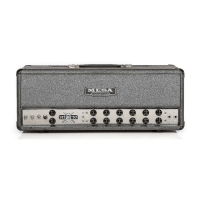
That’s it for the Front Panel Features and Controls, now let’s jump to the Rear Panel.
PAGE 10

 Loading...