PULL BACK RIGGING OPERATING INSTRUCTIONS
4
TOP GRID TO PULL BACK RIGGING ARRANGEMENT
Assemble the Array
Before you can achieve a pull back rigging configuration, the full array must first be set up as a regular top grid rigging system.
1. Maneuver the top grid motors to assemble the full array with the intended splay angles.
2. Fasten any locking pins in place when appropriate.
NOTE: Refer to each product’s rigging manual/operating instructions for specific rigging instructions and pro-
cedures.
Get the System Off the Ground
When the array is fully assembled including the pull back bar:
3. Raise the array slightly above the ground.
4. Inspect all links, pins, and rigging accessories.
5. Raise the array to trim height (resting height of array).
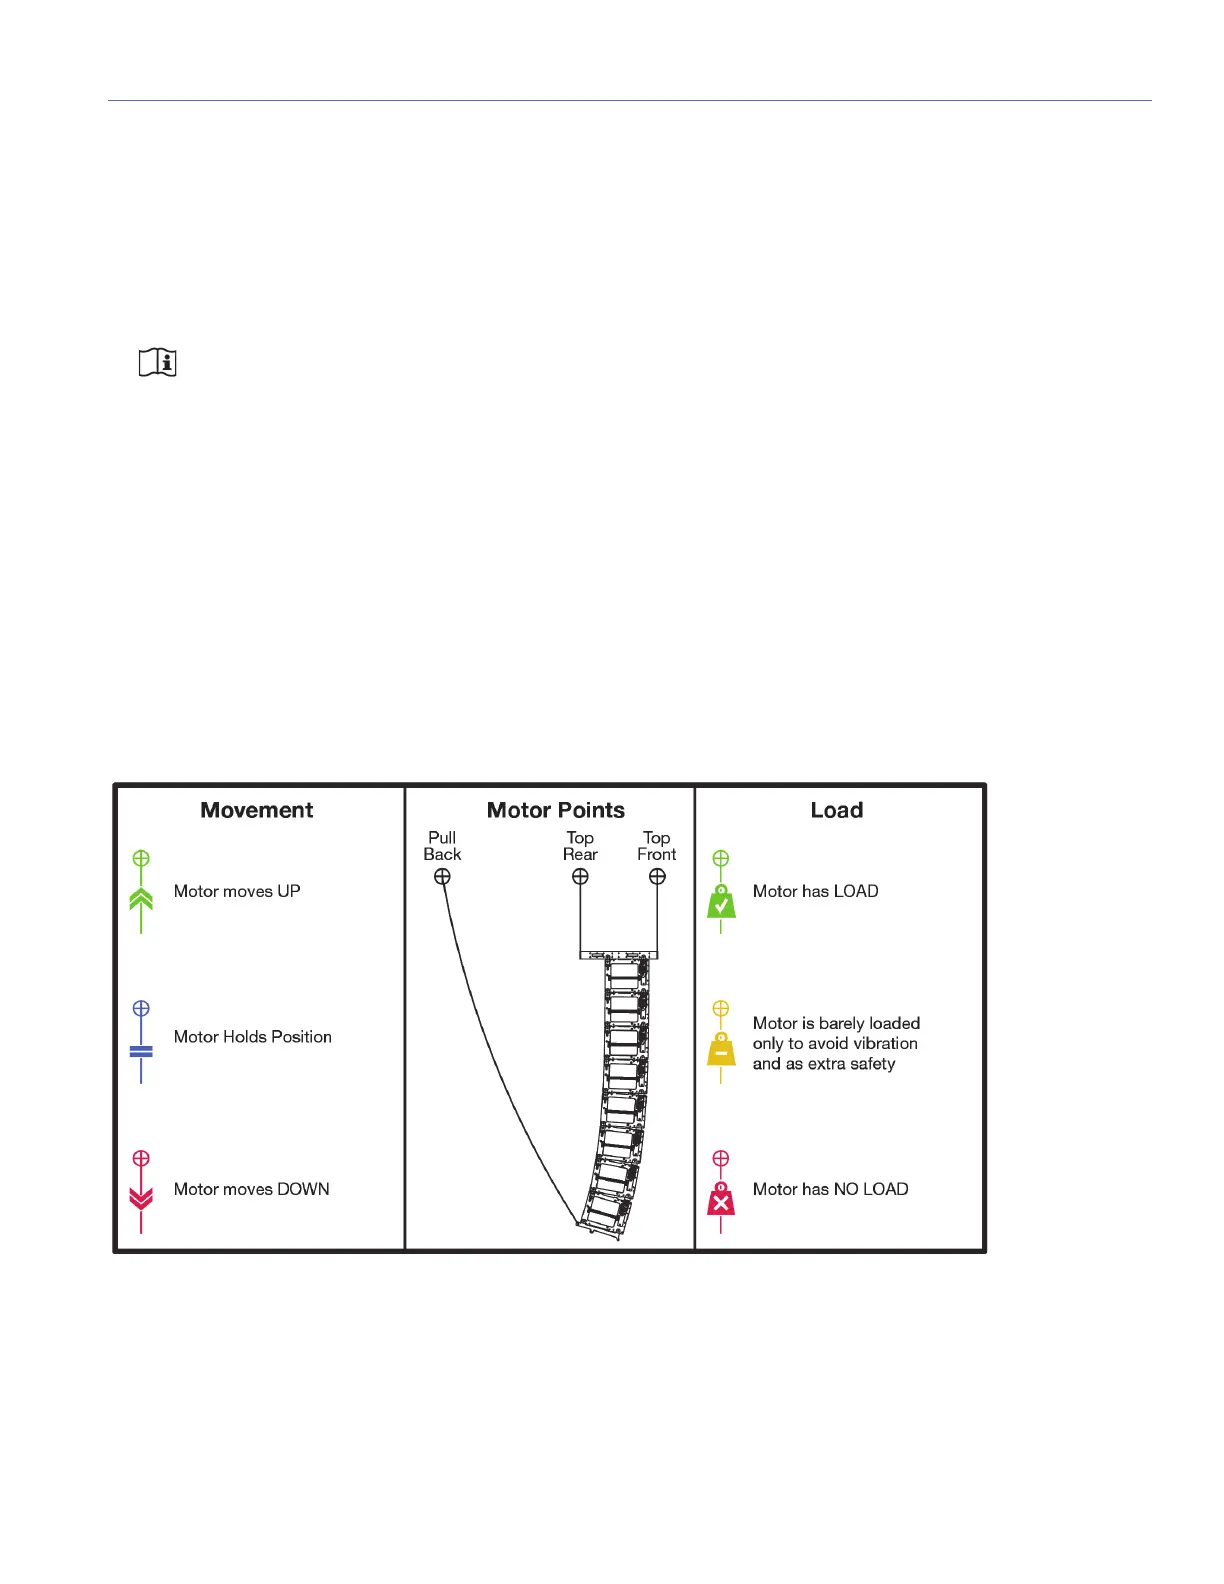
During the transition, only the top rear of array rigging points will remain at a constant height. It is therefore essential to
measure and set the trim height for these reference points.
TRANSITIONING
Transitioning can be divided into movement and load procedures. The symbols used are shown below.
Symbols used for movement and load procedures