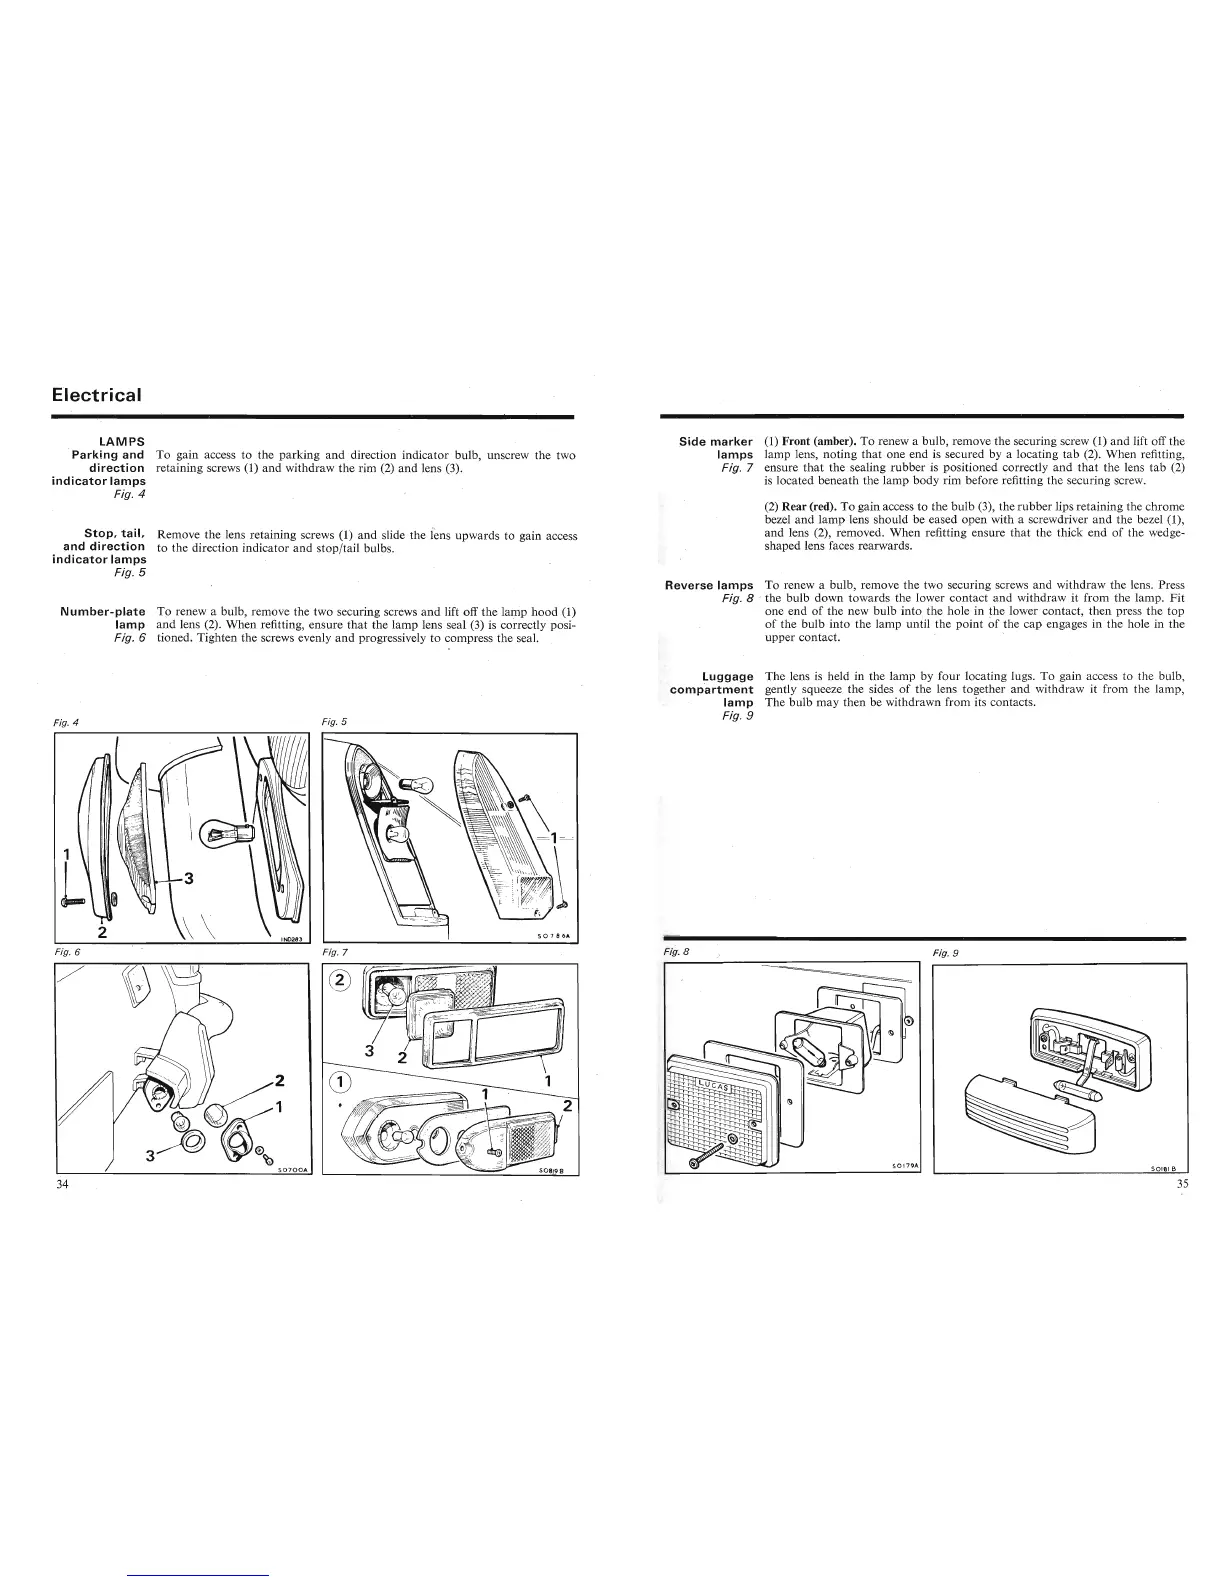
Electrical
LAMPS
.
Parking
and
To gain access to the parking
and
direction indicator bulb, unscrew the two
direc
tion
retaining screws (1) and withdraw the rim (2)
and
lens (3).
indicator
lamps
Fig. 4
St op,
tail,
Remove the lens retaining screws (1)
and
slide the fens upwards to gain access
and d ire c
ti
on to the direction indicator and stop/tail bulbs.
in
di
cato
r
lamps
Fig. 5
Nu
mber-plate
. To renew a bulb, remove the two securing screws
and
lift off the lamp
hood
(1)
l
amp
and
lens (2). When refitting, ensure
that
the lamp lens seal (3) is correctly posi-
Fig. 6 tioned. Tighten the screws evenly and progressively to compress the seal.
Sid
e
marker
(1) Front (amber). To renew a bulb, remove the securing screw (1)
and
lift off the
lamps
lamp lens, noting
that
one
end is secured by a locating
tab
(2). When refitting,
Fig. 7 ensure
that
the sealing
rubber
is positioned correctly
and
that
the lens
tab
(2)
is located beneath the lamp body rim before refitting the securing screw.
(2)
Rear
(red). To gain access to the bulb (3), the
rubber
lips retaining the chrome
bezel
and
lamp
lens should be eased open with a screwdriver
and
the bezel (1),
and
lens (2), removed. When refitting ensure
that
the thick end of the wedge-
shaped lens faces rearwards.
Rev
erse la
mp
s To renew a bulb, remove the two securing screws and withdraw the lens. Press
Fig. 8 "the bulb
down
towards the lower contact
and
withdraw it from the lamp.
Fit
one end of the new bulb into the hole in the lower contact, then press the top
of the bulb into the lamp until the point of the cap engages in the hole in the
upper contact. '
Fig. 6
Fig. 7
Luggage
The lens is held in the lamp by four locating lugs. To gain access to the bulb,
comp
a
rtment
gently squeeze the sides of the lens together
and
withdraw it from the lamp,
lam
p The bulb
may
then be withdrawn from its contacts.
Fig. 9
Fig. 9
®
Stop
,
tail,
Remove the lens retaining screws (1)
and
slide the fens upwards to gain access
and d ire c
ti
on to the direction indicator and stop/tail bulbs.
in
di
cato
r l
amps
Fig. 5
Num
ber
-p
lat e . To renew a bulb, remove the two securing screws
and
lift off the lamp
hood
(1)
l
amp
and
lens (2). When refitting, ensure
that
the lamp lens seal (3) is correctly posi-
Fig . 6 tioned. Tighten the screws evenly and progressively to compress the seal.
~
~
~~
u
uaouu
uyuu
~uua
Ei~~1t
""
and
lens (2), removed. When refitting ensure
that
the thick end of the wedge-
shaped lens faces rearwards.
Rev
erse la
mp
s To renew a bulb, remove the two securing screws and withdraw the lens. Press
Fig. 8 "the bulb
down
towards the lower contact
and
withdraw it from the lamp.
Fit
one end of the new bulb into the hole in the lower contact, then press the top
of the bulb into the lamp until the point of the cap engages in the hole in the
upper contact. '
Lugg
age
The lens is held in the lamp by four locating lugs. To gain access to the bulb,