Copyright © 2009-2018 Micca. All rights reserved. 180201
3 Connections and Buttons
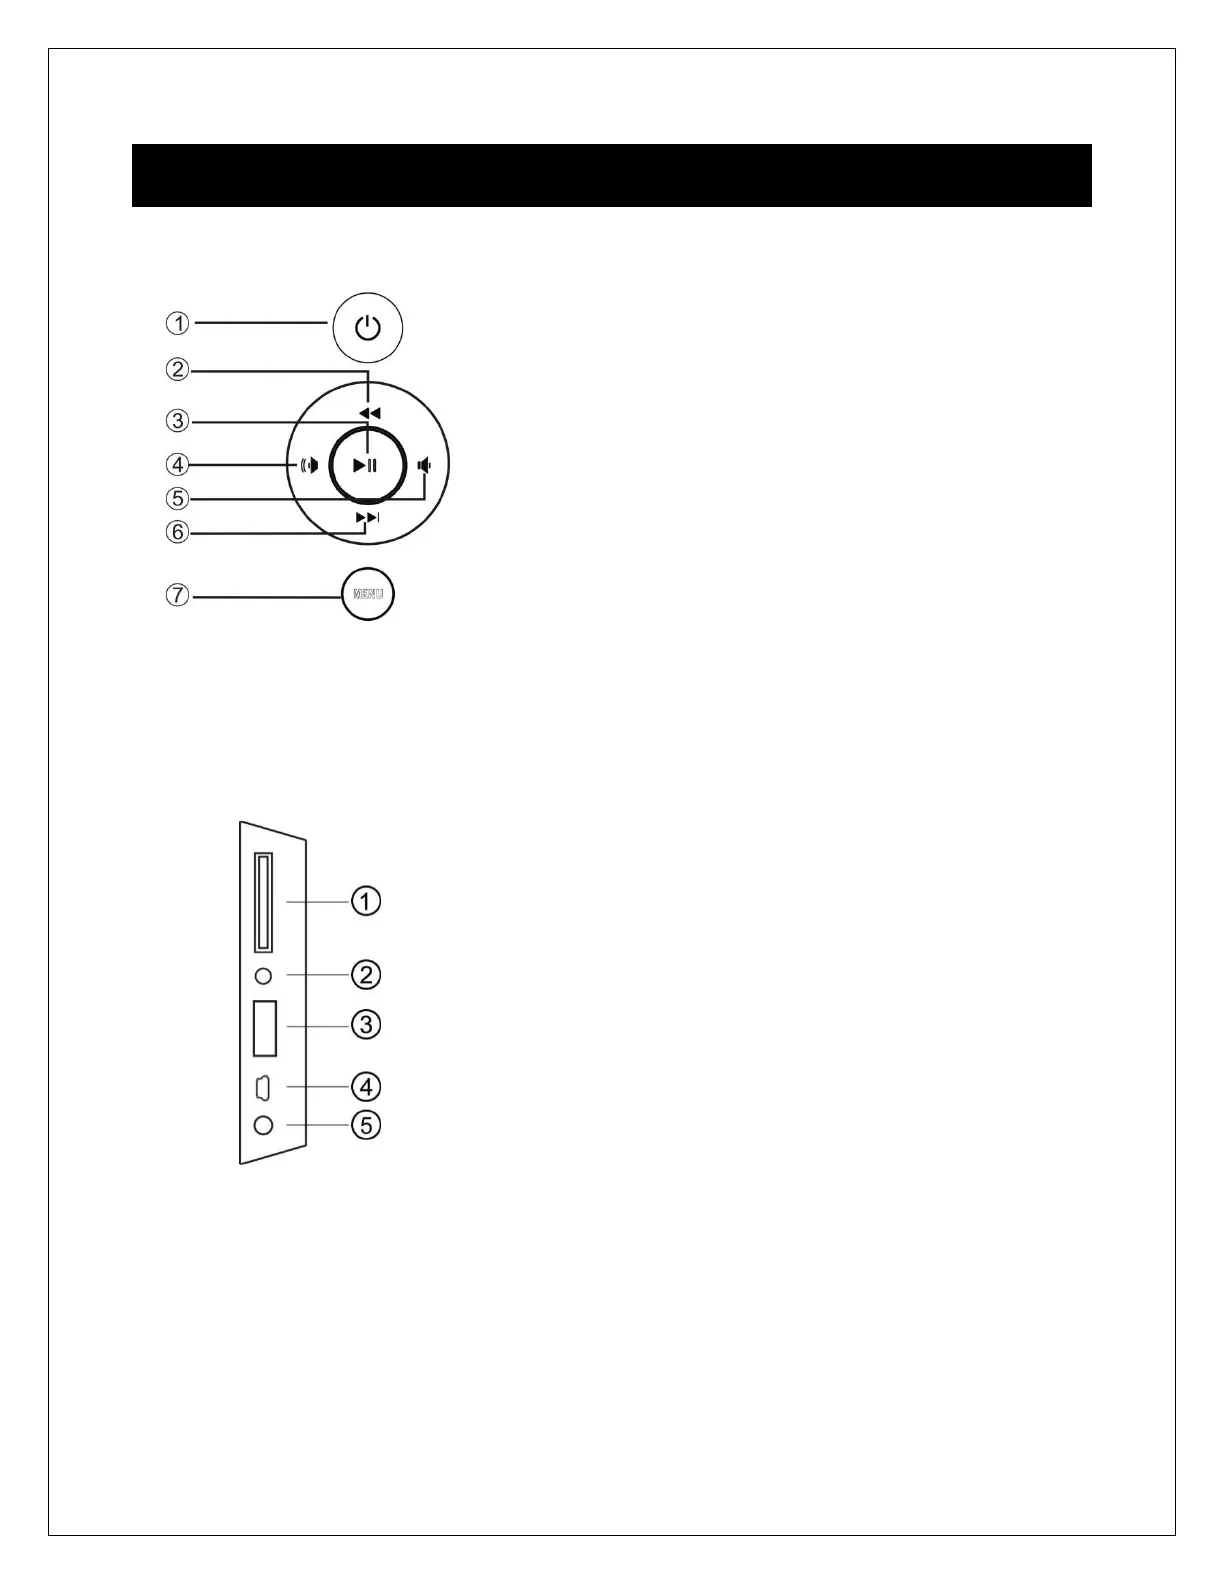
3.1 Buttons
1. Power
2. Previous or Up
3. Play/Pause or Enter
4. Right (Short Press) or Volume+ (Long Press)
5. Left (Short Press) or Volume- (Long Press)
6. Next or Down
7. Menu (Long Press) or Return (Short Press)
Note: The left and right buttons are named in accordance of their function when the
user is looking at the photo frame. Thus, pressing the “Left” button will move the cursor
to the left and the “Right” button will move the cursor to the right.
3.2 Connections
1. SD Card Reader
2. Headphone Output
3. USB 2.0 Port
4. Mini USB Port (Optional)
5. DC Power Input
Note: Only use the AC adapter that is provided with the digital photo frame. Using a
different AC adapter may damage the unit. The Mini USB port is optional and may not
be present.