LVS-7510 Integrated System Installation and Quick Start Guide for Zebra Printers
LVS-7510 Integrated System Installation and Quick Start Guide for Zebra Printers Page 9 of 16
Step 3: Install and Mount the Light Tower
The steps below explain how to connect and mount the light tower interface unit using two screws (8-32 or M4
size – customer-supplied). You may follow the steps below using the customer-supplied screws, or choose a
different mounting solution such as using velcro or magnets to affix the light tower to the desired location.
Items Needed:
Light Tower Interface Unit (LTIU) package (contents listed in Step 1 below)
Mounting solution (if following the mounting steps listed below, you will need two customer-supplied screws
in 8-32 or M4 size)
Instructions:
1. Open the LTIU package and verify the contents listed below are included in the package.
Light Tower Interface Unit
USB Cable
Power Supply (24-volt)
AC Line Cord
2. Mount the light tower to the desired location by inserting a 8-32 or M4 screw (customer-supplied) into each
flange located on the left and right side of the light tower.
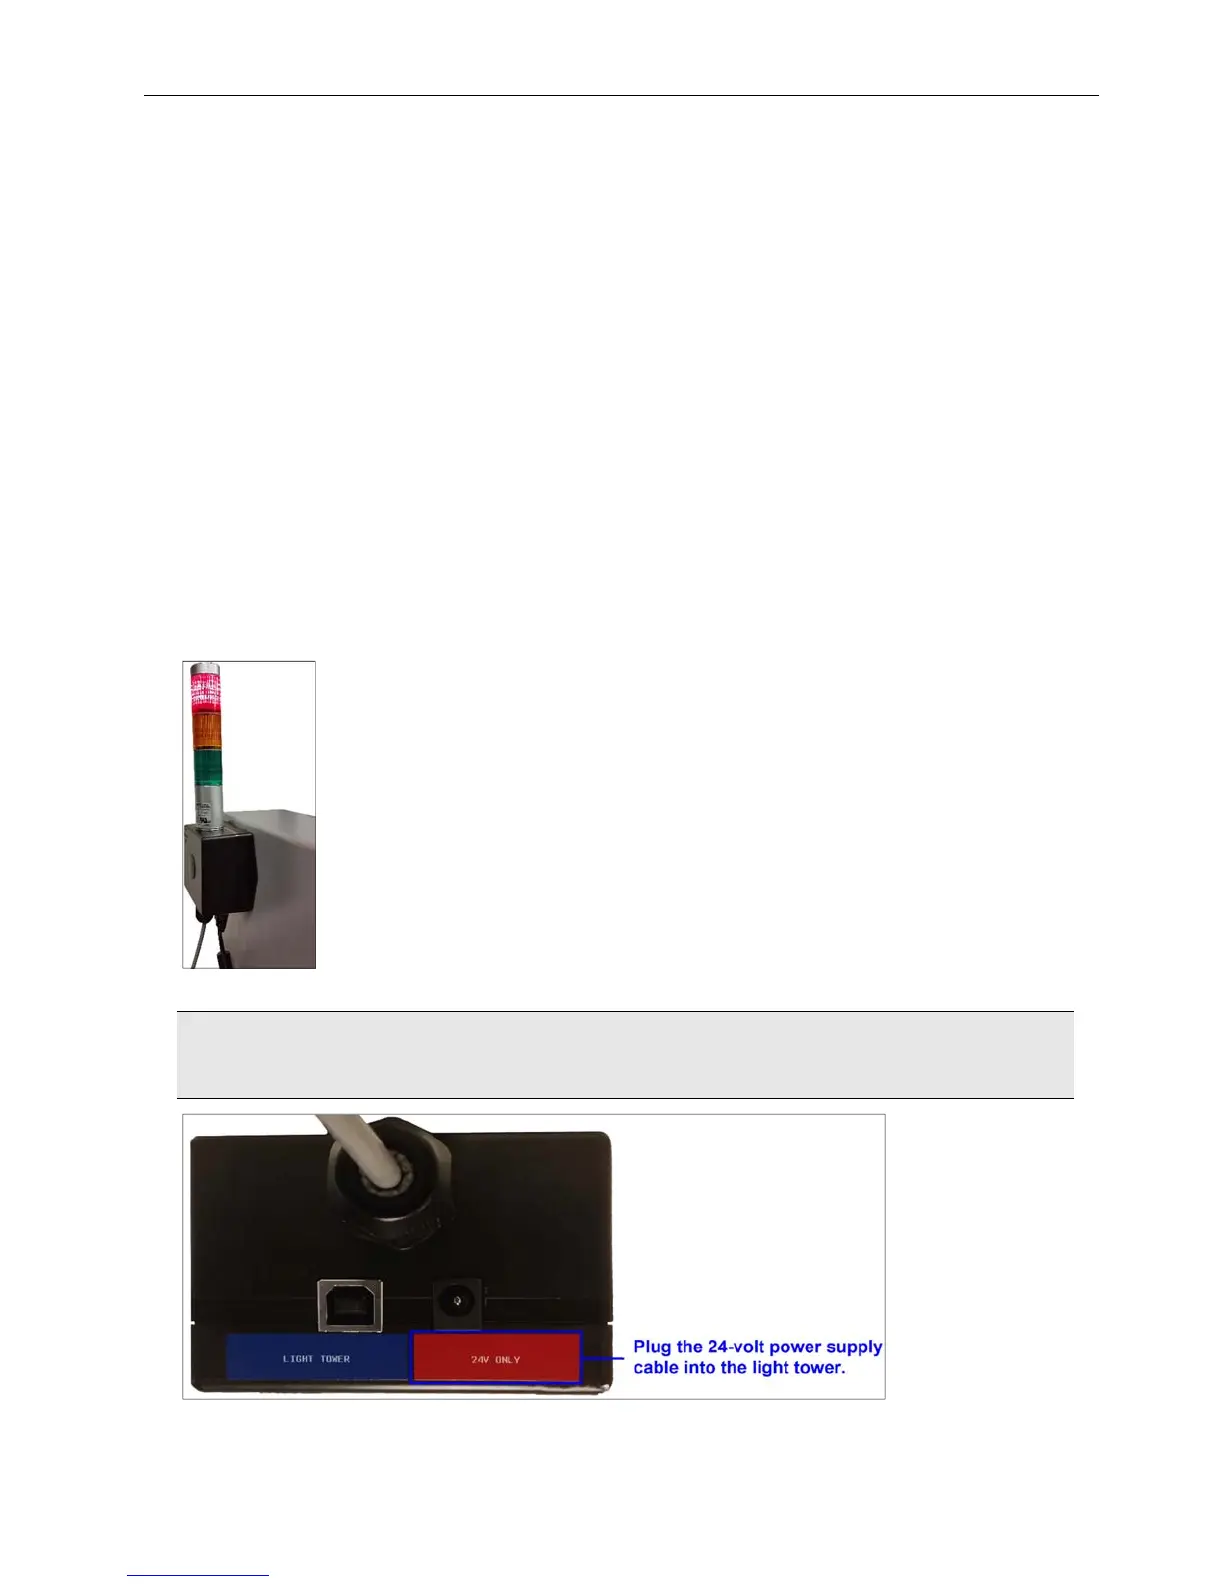
3. Plug the 24-volt power supply cable (color coded in red) into the light tower connector.
WARNING: Do not use the 5-volt power supply. Using the wrong power supply will result in system
failure.