5
Assembly and mounting instructions
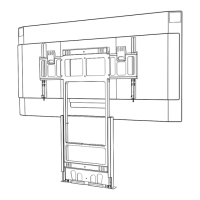
Step 1: Build the oor support mount assembly
A. Lay the upright on a horizontal surface at side down and with the alignment bolts pointing up.
B. Lay the wall plate on the upright, with the alignment bolts on the upright protruding through the wall plate.
Note: When the upright and the wall plate are aligned properly,
● The alignment bolts on the upright will protrude through the wall plate.
● The orientation arrows on the wall plate will point to the top of the assembly.
C. Begin connecting the wall plate to the upright by threading the M6 nuts on the two center alignment bolts.
Note: Leave the nuts loose enough to allow the wall plate to move freely. You will tighten them later.
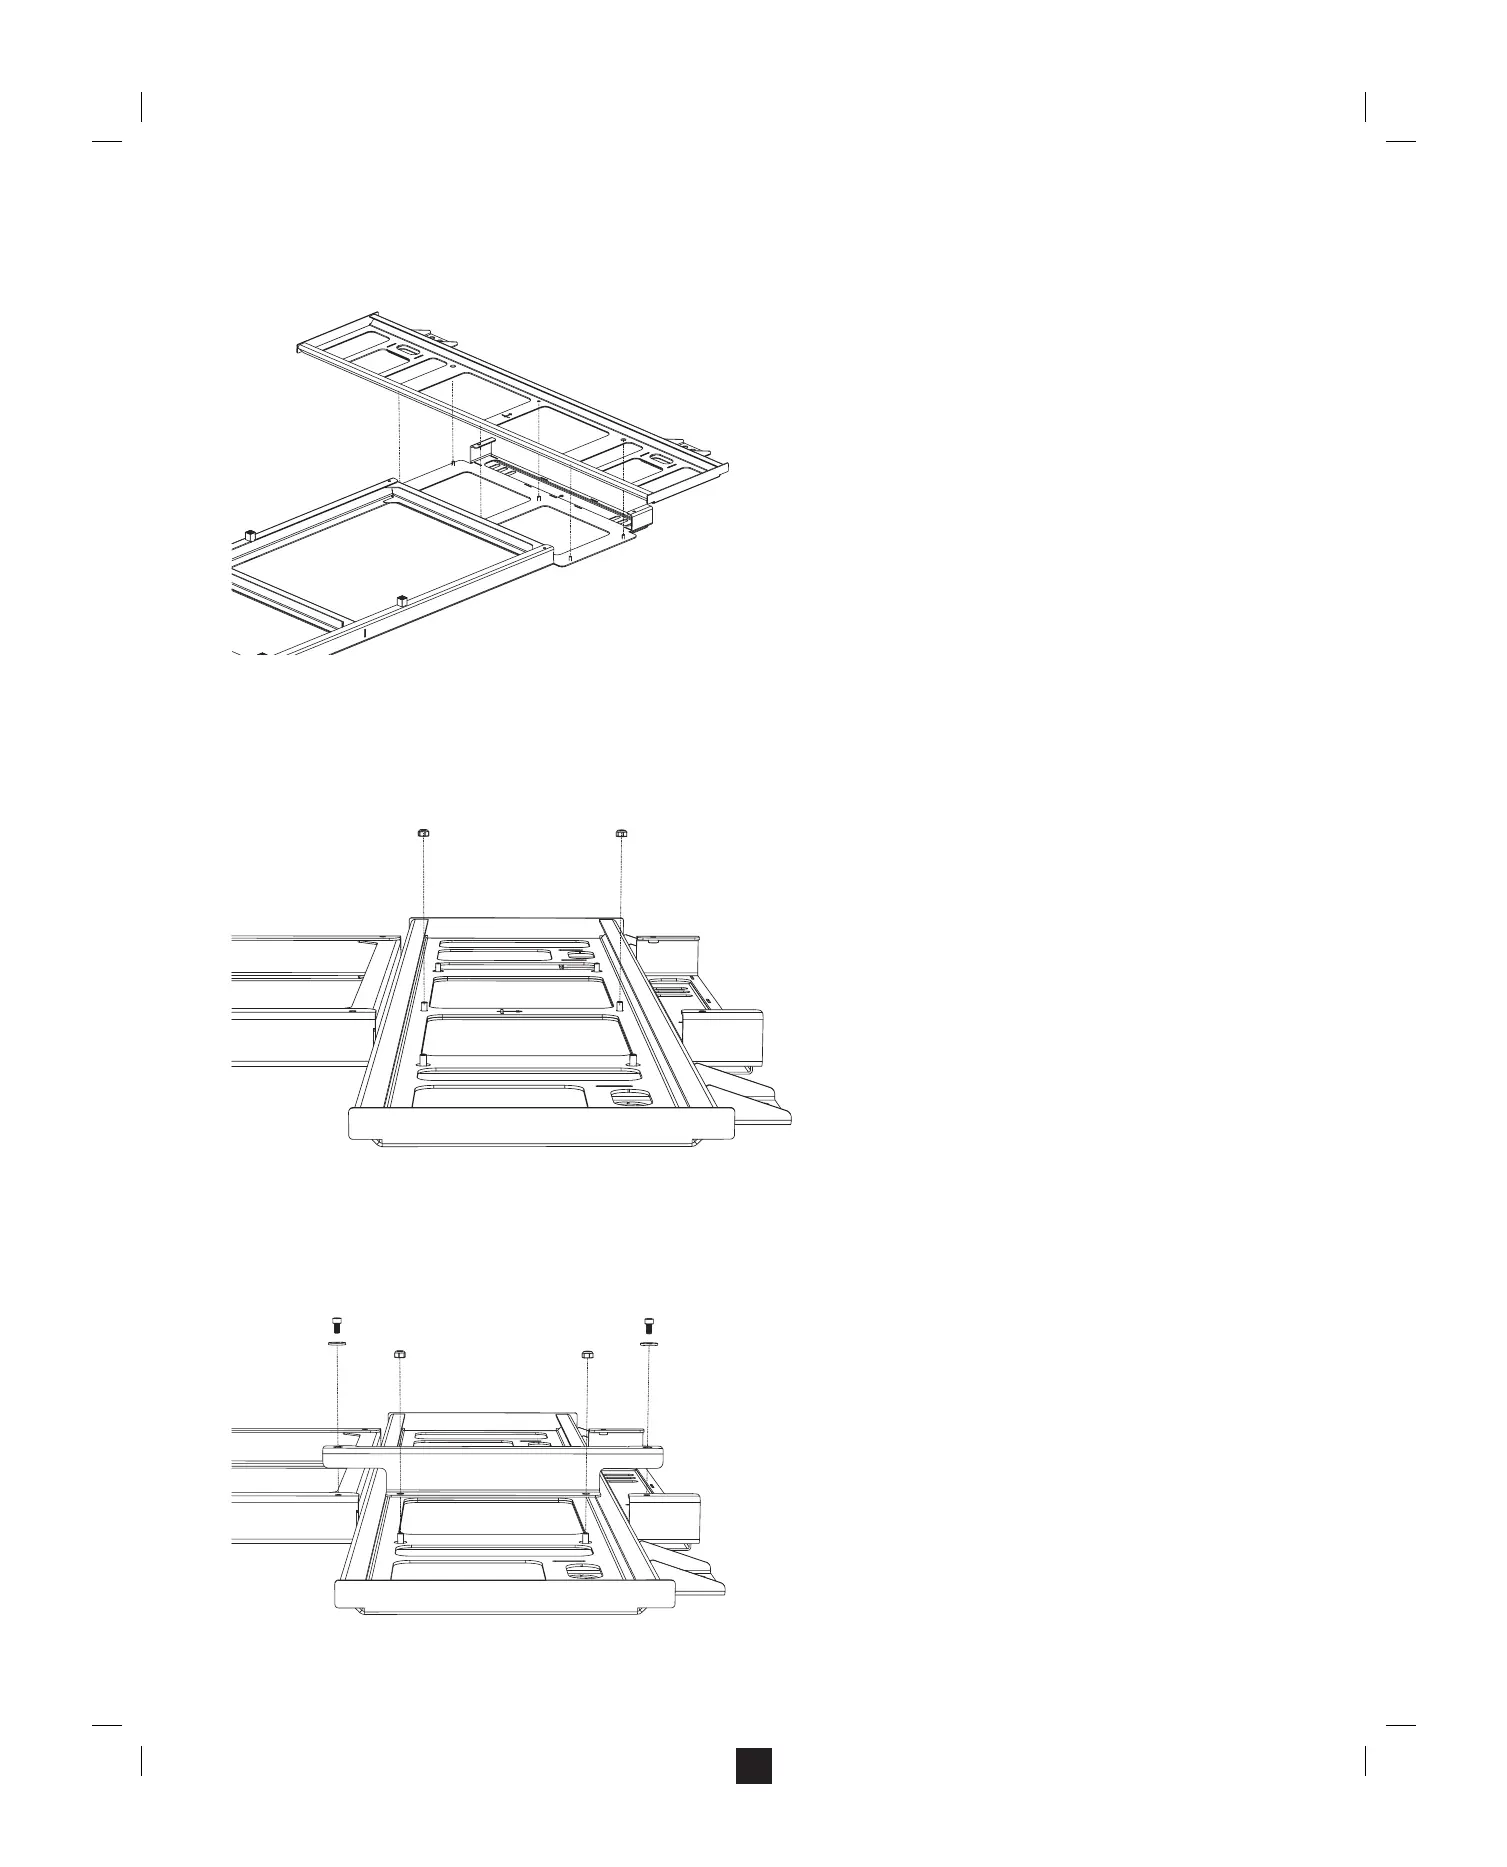
D. Attach the right-hand brace to the assembly.
a. With the assembly still horizontal, place one of the braces over the two right-hand bolts.
b. Thread M6 screws into the holes at the top and bottom of the brace.
c. Thread M6 nuts onto the alignment bolts protruding through the wall plate.
Note: Leave the nuts loose enough to allow the wall plate to move freely. You will tighten them later.
K