14 X22-19688-01
Procedure – Removal (C-cover Keyboard Metal Type)
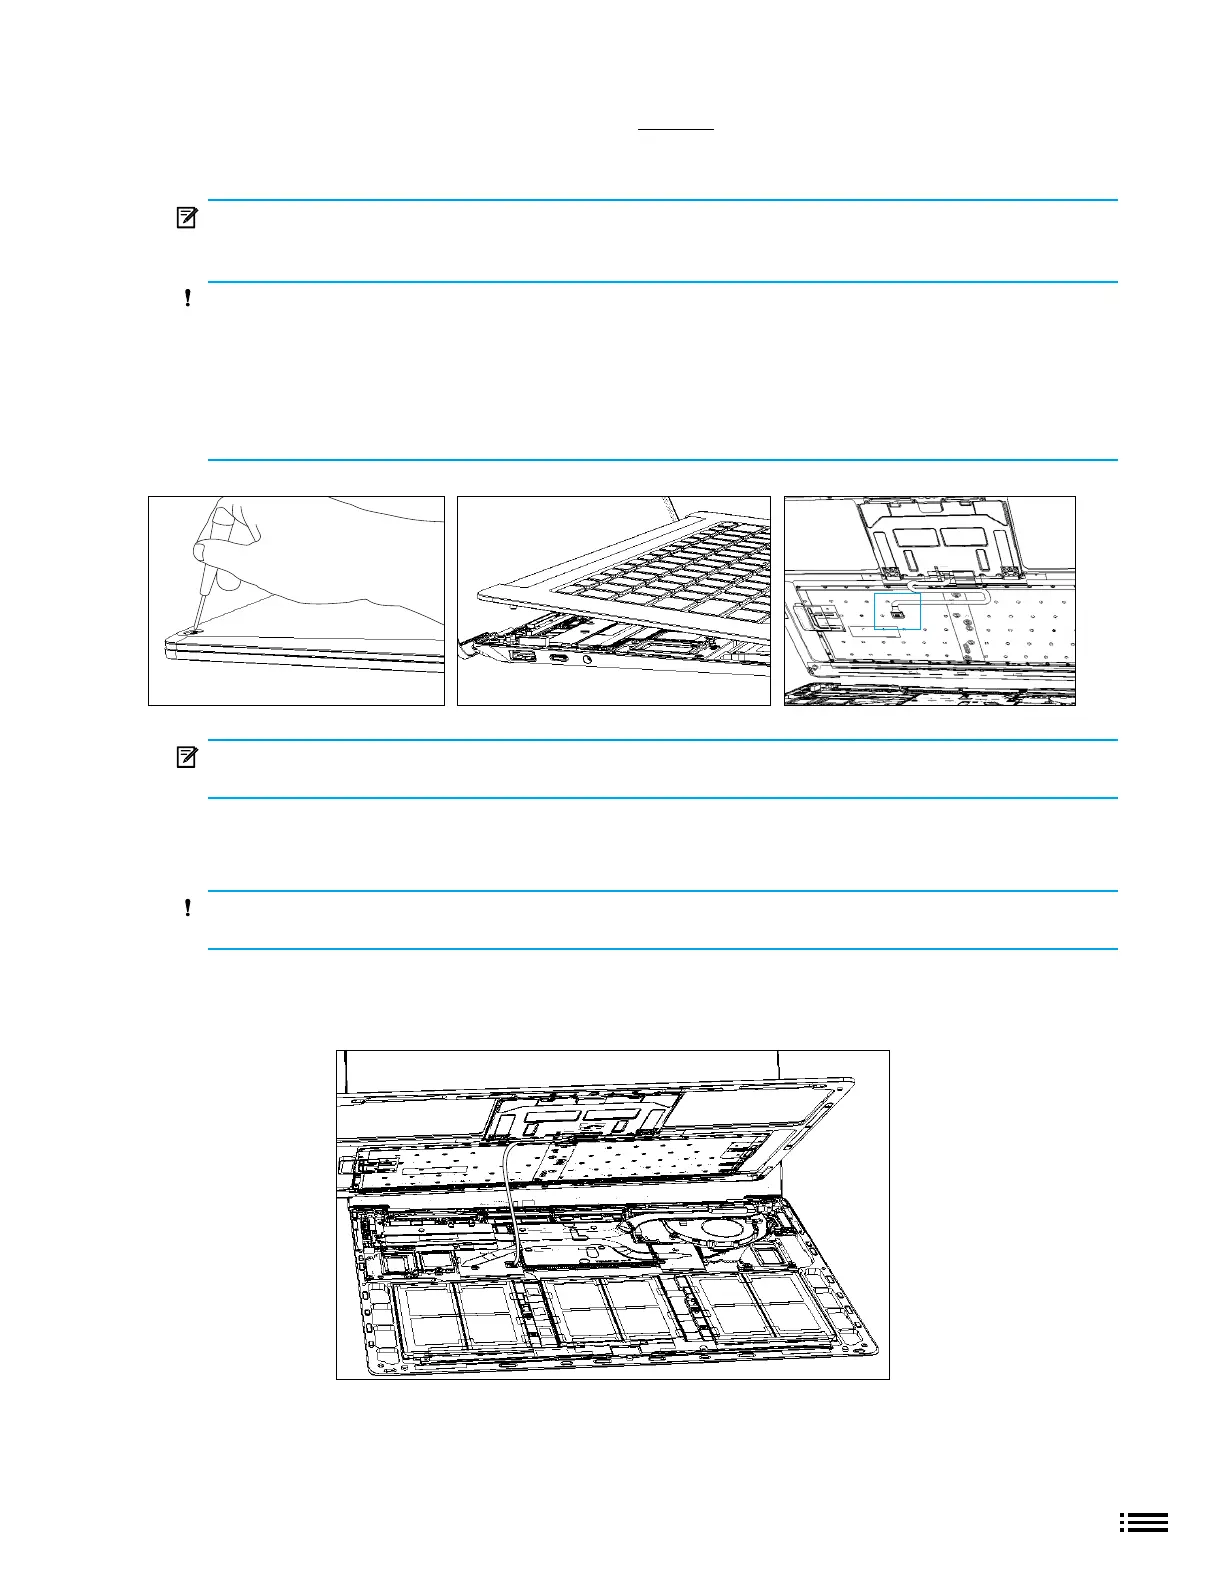
1. Remove C-cover screws - Using a 5IP (Torx-Plus) driver, uninstall 1 screw from each foot socket (4)
IMPORTANT: Take caution to prevent from depressing the keyboard power button during this step. If
power button is accidentally depressed and device turns on, shut down device as normal through OS
Start menu.
CAUTION: Ensure all (4) screws are removed from the enclosure before starting C-cover removal,
otherwise there is a high risk of irreversibly damaging the C-cover
CAUTION: Remove C-Cover exactly as described in this step to avoid damaging the Flexible Printed
Circuit (FPC) connected between the C-Cover and the Main Board.
CAUTION: Remove C-cover and hold in a hover position as described below to avoid damaging the
display glass. Never rest the rear edge of the C-cover on the device at the display hinge point or allow the
C-cover to impact or touch the display during this step.
IMPORTANT: In addition to the (4) C-cover screws, the C-cover is further secured to the device body
with magnets. Further separation of the C-cover should be carried out in the following steps.
2. Separate C-cover from device - Place your hand in the antenna position area closest to the display and
slowly remove the C-cover at an angle as shown in photo.
CAUTION: Do not pull the C-cover apart beyond 45 degrees otherwise damage to C-cover FPC
could occur.
3. Position C-cover for FPC removal - After lifting the C-cover completely from the magnets on the device,
angle and hover the C-cover so that the antenna side is facing down towards the device and C-cover FPC
is accessible.