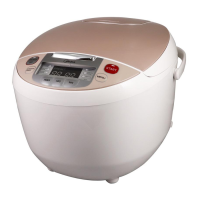
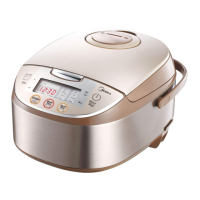
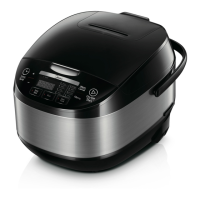
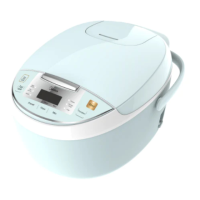
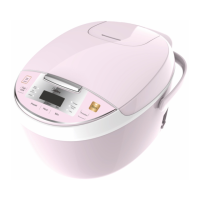
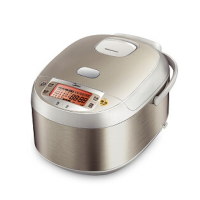
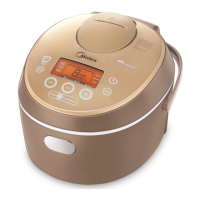
This document is the user manual for the Midea electric rice cooker, model MB-FS5018. It provides comprehensive instructions for safe operation, usage, maintenance, and troubleshooting.
Function Description
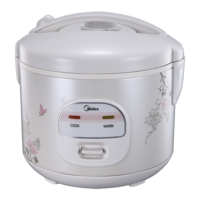
The Midea electric rice cooker is designed for various cooking functions, primarily focusing on different types of rice and other cereals. Its core function is to cook rice efficiently and maintain its warmth. The device features a control panel with several function buttons, allowing users to select specific cooking modes.
Usage Features
The rice cooker offers a range of cooking modes, accessible via the "Menu" button. These include:
- Standard Cooking: For regular rice preparation.
- Super-quick Cooking: A faster option for when time is limited.
- Refined Cooking: Likely for achieving a specific texture or quality of cooked rice.
- Congee: For preparing rice porridge.
- Porridge/Soup: A versatile setting for both porridge and soup.
- Steaming: For steaming various foods.
- Minor Cereals: For cooking other types of grains.
- Cold Rice Heating: To reheat previously cooked cold rice.
The "Start" button initiates the selected function and confirms the choice. An indicator light changes from twinkling to steady to show that the device has entered the working state.
The "KEEP WARM/OFF" button serves a dual purpose. After cooking, the rice cooker automatically transitions to an insulating (keep warm) state, indicated by a shining light. If the device is in a working state, pressing this button once will put it into standby. Pressing it again will re-enter the insulation state. It is recommended to keep food warm for no more than 5 hours to prevent discoloration or staleness. Some functions, like Porridge/Soup and Congee, directly enter standby after completion.
The "HRS" and "MIN" buttons are used to adjust time settings, typically for the preset function. Time can be increased or decreased, and the display cycles through options. Holding these buttons down will cause the time to increase continuously.
The "TIMER" key is for setting a preset time for the cooking to be completed. This feature is available for Standard cooking, Super-quick cooking, Refined cooking, Congee, Porridge/Soup, Steaming, and Minor cereals. Cold rice heating does not support the preset function.
For products with a "one-key pass" feature, corresponding function buttons allow for direct activation of a cooking mode with a single press. For example, pressing a "cooking" button will automatically start the cooking process and then enter the nutritional insulation state after the food is cooked.
Cooking Method:
- Measure Rice: Use the provided measuring cup (one cup is approximately 150g of rice).
- Wash Rice: It is advised not to wash rice directly in the inner pot to avoid scratching it.
- Soak Grains: For dry cereals, soaking in hot water for 2-3 hours beforehand is recommended.
- Add Water: Place the washed rice into the inner pot. Refer to the water level marks inside the pot, which correspond to the amount of rice. Users can adjust the water level slightly based on personal taste.
- Avoid Overflow: Do not exceed the maximum water level mark for the selected function to prevent overflow and short circuits.
Water Line Usage:
- Cooking Rice: For example, when cooking 3 cups of rice, add water up to the "3" mark on the rice line.
- Congee: For 1 cup of congee, add water up to the "congee" and "1" mark on the middle congee line.
- Porridge: For half a cup of porridge, add water up to the "porridge" and "1/2" mark on the right porridge line.
- Steaming: Add an appropriate amount of water as needed, ensuring it doesn't overflow the steaming rack.
- Customization: Users can fine-tune the rice-to-water ratio based on individual preferences, but the total quantity of rice and water should not exceed the highest water level in the pot.
Preparation before Cooking:
- Clean Inner Pot: Wipe the external surface of the inner pot and any water from the coil panel.
- Place Inner Pot: Insert the inner pot into the rice cooker. Rotate it left and right 2-3 times to ensure the pot bottom and heating plate are tightly attached.
- Close Cover: Install the cover until a "click" sound is heard.
- Power Connection: Plug in the power cord, ensuring both the pot body plug and the power plug are securely inserted.
- Start Cooking: Select the desired function using the function button, then press "Start" to begin. Alternatively, for "one-key pass" products, press the corresponding function button directly.
Preset Cooking Method (for applicable models):
- Method One: Press "Menu," select the function, then press "Preset," followed by "Hour" and "Min" to set the desired completion time. Finally, press "Start."
- Method Two: Press "Preset," then "Hour" and "Min" to set the completion time. Then, press "Menu" to select the function and "Start" to enter the preset status.
Cooking Time Setting Method (for applicable models):
This feature is available for "Porridge/Soup" and "Steaming."
- Porridge/Soup: Default cooking time is 2 hours, with a setting range of 1 to 4 hours.
- Steaming: Default cooking time is 30 minutes, with a setting range of 30 minutes to 2 hours 30 minutes (some products may not have a time setting for steaming).
- Procedure: Press "Function" to select Porridge/Soup or Steaming. Then press "Cooking time," followed by "Hour" and "Min" to set the duration. Finally, press "Start."
Maintenance Features
Regular cleaning and maintenance are crucial for the longevity and optimal performance of the rice cooker.
General Cleaning:
- Insulation Seat Board: Wipe with a damp cloth. Do not wash directly with water.
- Heating Plate: Wipe any water dry with a rag. Cooked rice grains can be removed with steel wool or sandpaper.
- Water Storage Tank: Wipe dry with a semi-dry rag.
- Inner Pot: Before placing it back, ensure to wipe away any water and rice grains from around and on the bottom of the pot.
- Rice Grains: Use a toothpick or rag to remove any rice grains.
Cover Plate Removal and Cleaning:
- Open Upper Cover: Open the upper cover of the rice cooker.
- Remove Cover Plate: Press the designated area to release and remove the cover plate.
- Clean Cover Plate: Clean the cover plate thoroughly.
- Install Cover Plate: Reinstall the cover plate by pressing it down until it clicks into place.
Steam Valve Removal, Cleaning, and Installation:
- Importance: The movable cover plate and steam valve must be cleaned after every use to ensure the steam vent remains smooth and to prevent scalding. Allow the device to cool down before cleaning.
- Removal:
- Hold the rear side of the steam valve and lift it up.
- Rotate it counterclockwise to open.
- Cleaning: Wash the steam valve with water. If the gasket falls off, push it back into place.
- Installation:
- Align the valve cover with the valve seat's slots.
- Rotate it clockwise until a "click" sound is heard, indicating it is securely closed.
- Press down to ensure the steam valve is fully installed.
Troubleshooting (Check abnormal phenomenon):
The manual provides a detailed table to help users identify the root cause of common cooking issues, such as:
- Rice and water volume incorrect (too much or too little).
- Exceeding maximum capacity.
- Incorrect function selection.
- Distortion or unevenness of the inner pot.
- Cooking with hot water or continuous cooking without cooling.
- Rice grains or foreign objects on the inner pot base, heating plate, or control panel.
- Power cut off.
- Rice not fluffed after cooking.
- Steam valve not fixed properly.
- Excessive long hours on preset timer.
- Top lid cover not closed properly.
- Rice not fully washed.
- Rice grains or foreign objects at sealing packed & inner pot border areas.
- Excessive long hours on keep warm function.
- Not preset keep warm but rice kept in the inner pot for long hours.
- Inner pot not cleaned.
- Rice spoon placed in the inner pot.
- Uneven mixture of water and rice.
If, after checking these points, the problem persists, users are advised to send the unit to a designated service center for repair.