DM17-01.01.08en Light Commercial R410A on-off
144
3.4 MSP duct (MTI) indoor unit installation
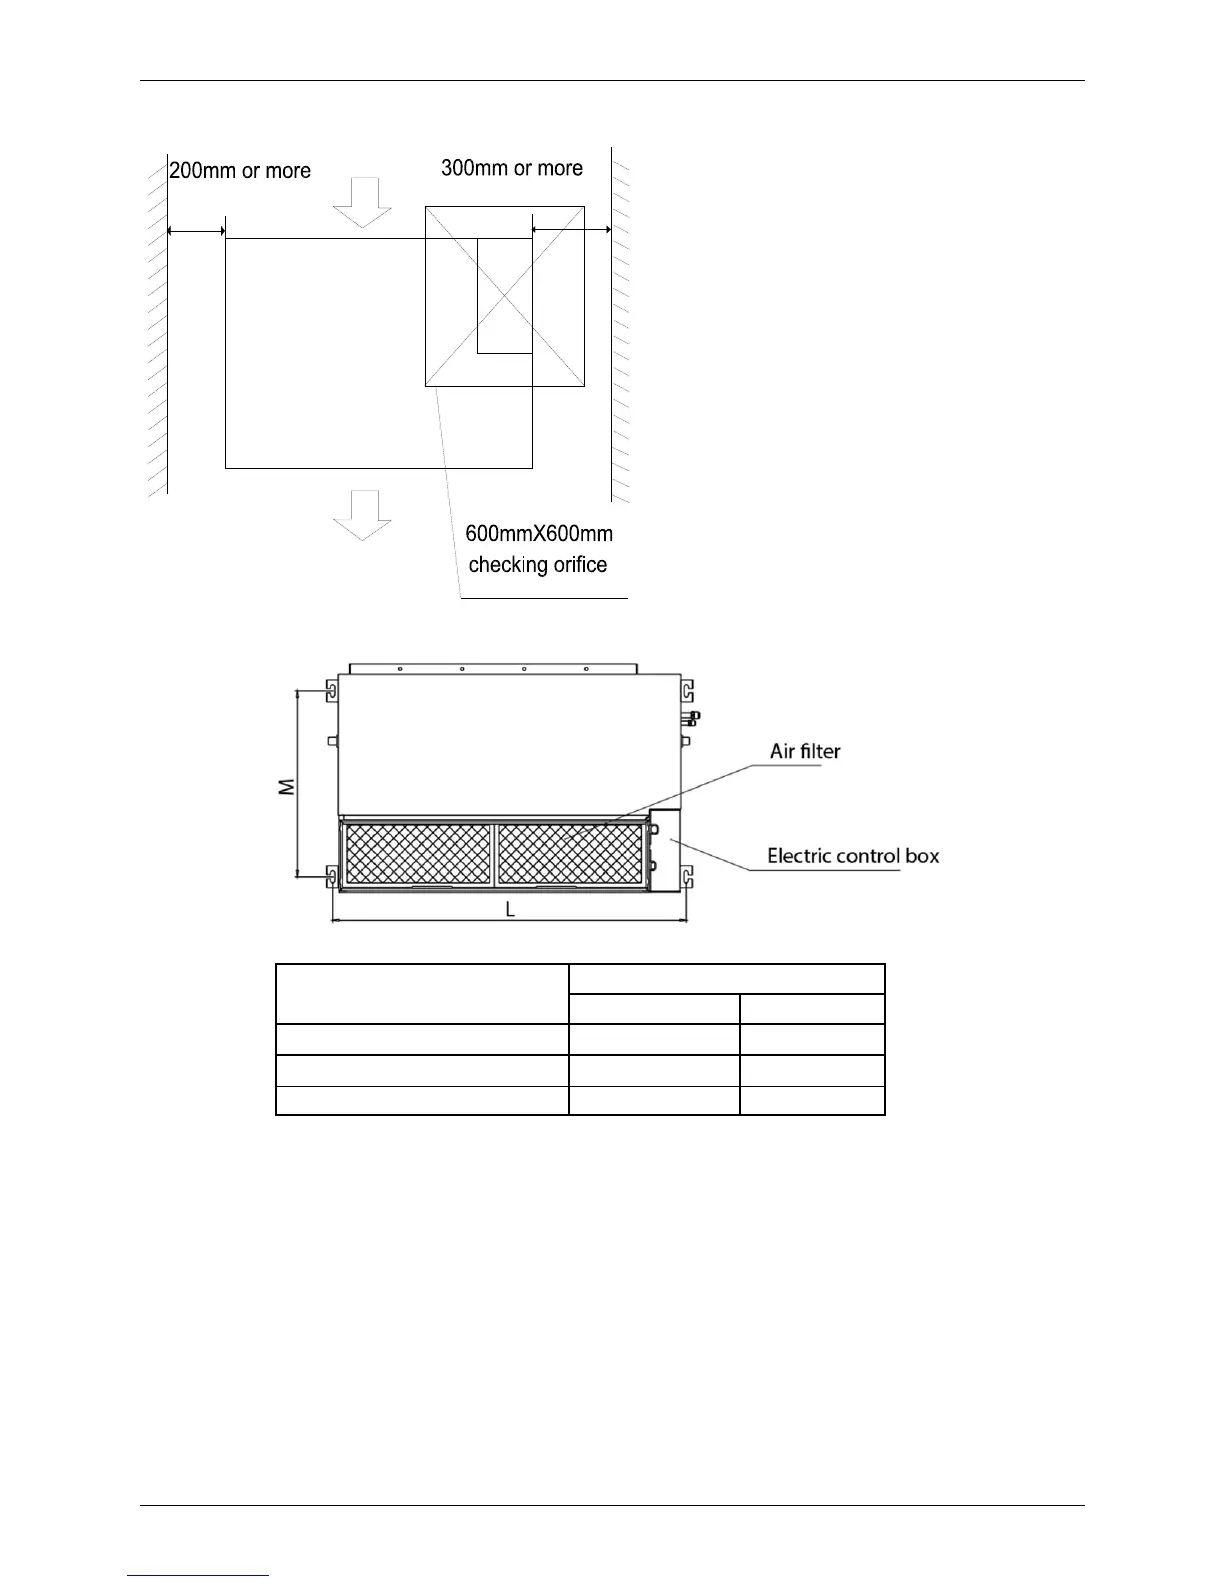
3.4.1 Service space for indoor unit
3.4.2 Bolt pitch
Capacity
Size of outline dimension mounted plug
L M
18K 920 508
24K~36K
1140 598
48K~60K 1240 697
3.4.3 Hang indoor unit
1.Please refer to the upper data to locate the four positioning screw bolt hole on the ceiling. Be sure to mark
the areas where ceiling hook holes will be drilled.
2. Carry out the pipe and line operation in the ceiling after finishing the installation of the main body. While
choosing where to start the operation, determine the direction of the pipes to be drawn out. Especially in
case there is a ceiling, position the refrigerant pipes, drain pipes, indoor & outdoor lines to the connection
places before hanging up the machine.
3.The installation of hanging screw bolts.
• Cut off the roof beam.
• Strengthen the place that has been cut off, and consolidate the roof beam.
4.After the selection of installation location position the refrigerant pipes, drain pipes, indoor & outdoor wires
to the connection places before hanging up the machine.
 Loading...