Or
Window slider A
Window slider B
(if required)
Installation
NOTE: Once the Exhaust Hose assembly and Adjustable Window Slider are prepared, choose from one of
the following two installation methods.
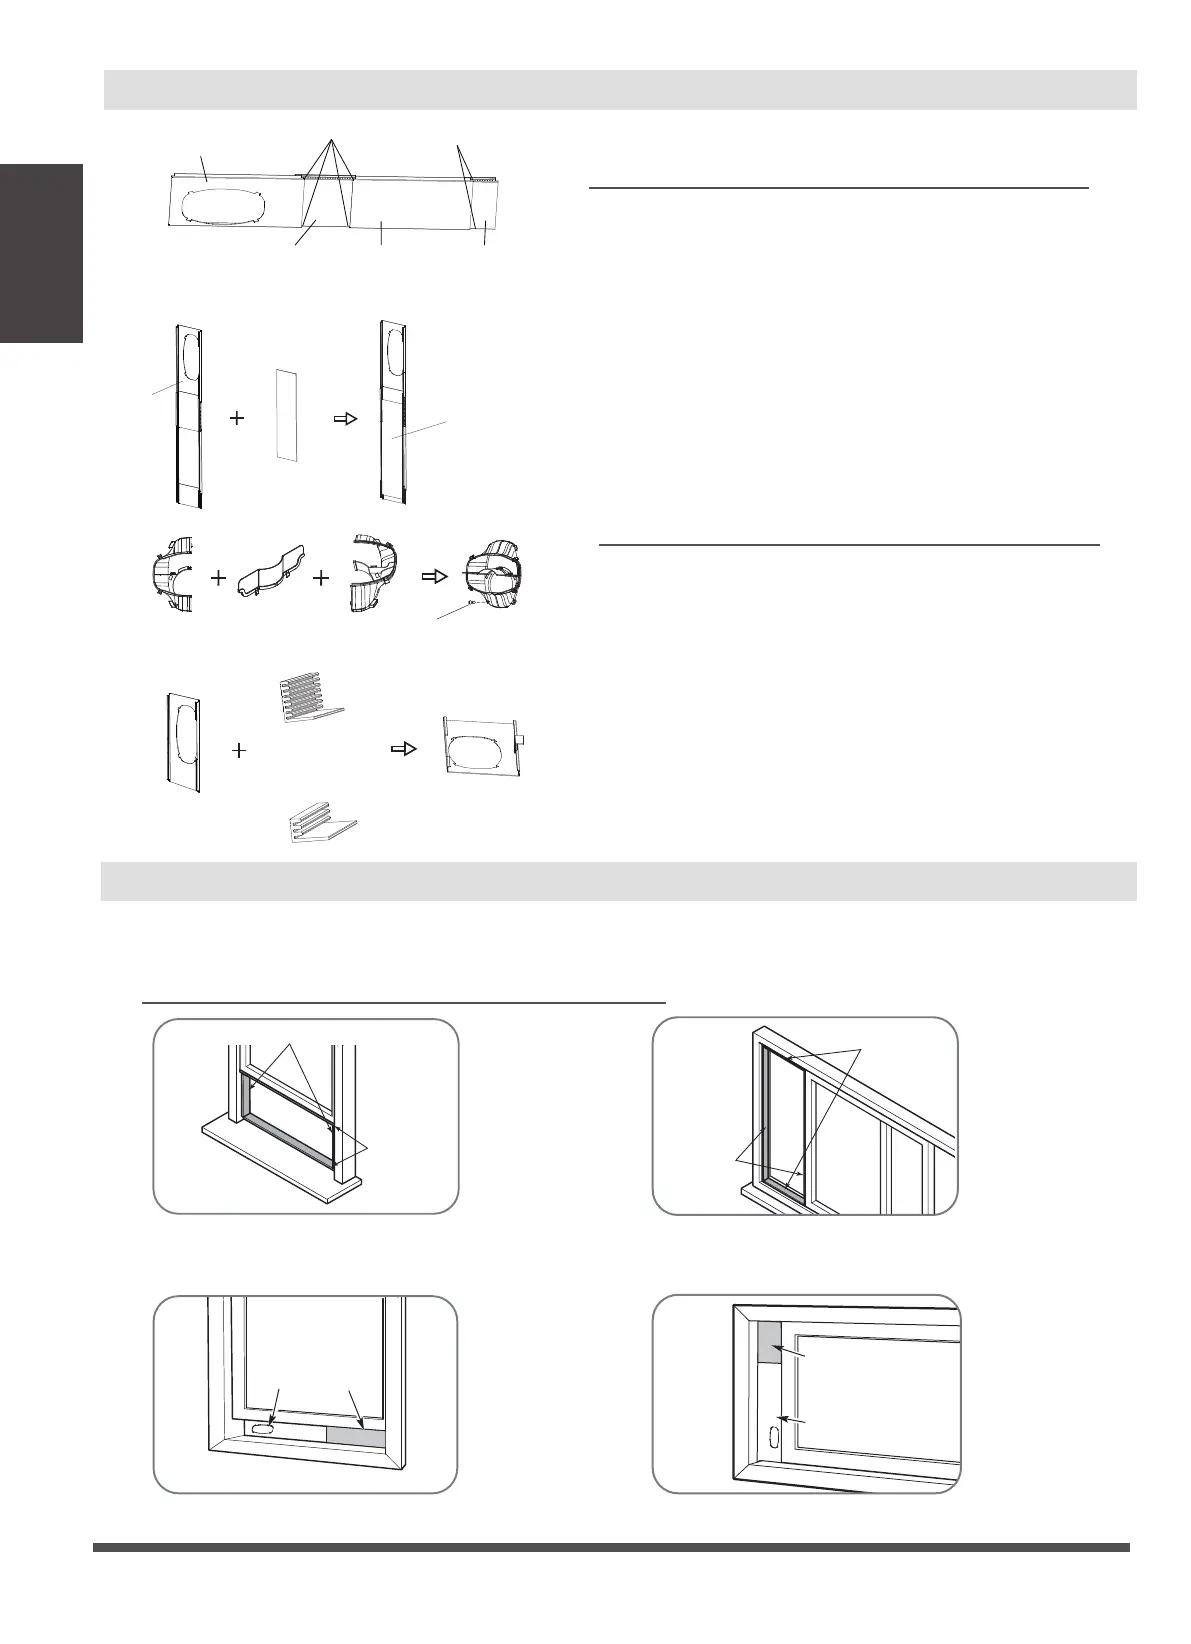
Type 1: Hung Window or Sliding Window Installation
1. Cut the adhesive foam seal A and B strips to the proper lengths, and attach them to the window sash
and frame as shown.
2. Insert the window slider assembly into the window opening.
Or
Foam seal B
(Adhesive type-shorter)
Foam seal A
(Adhesive type)
Foam seal B
(Adhesive type-shorter)
Foam seal A
(Adhesive type)
Window slider A
Window slider B
(if required)
Page 12
Installation
Instructions
Window Installation Kit
Step One: Preparing the Adjustable Window Slider
1. Choose the window sliders according the size of
your window. Sometimes, it needs to be cut short
to meet the window size, please take extra care to
cut it properly.
2. Use bolts to fasten the window sliders once they
are adjusted to the Proper length.
Step Two: Preparing the Exhuast Adaptor Module
(For Sliding Window)
Assemble the Exhuast Adaptor Modules for Sliding
Window. Install the Exhuast Adaptor Modules with 1
screw as shown. The window slider hole is eccentric,
so the Exhuast Adaptor needs to be installed atside
away from the wall.
module B module Cmodule A Exhuast Adaptor
1 screw
Window Slider A
Window Slider B
Window Slider C
Window Slider D
(or Window slider E
based on actual
window size)
Bolt
Bolt
inside
insulator
Insulator
(Use one or
two piece)
or
(trim shorter to
fit the window size)
Window Slider A
3. Paste the insulator on the inside of the Window sliders.
In addition, Install the Retainer plate before installing
the window slider, if you want to fix the air hose
strongly.
 Loading...