14
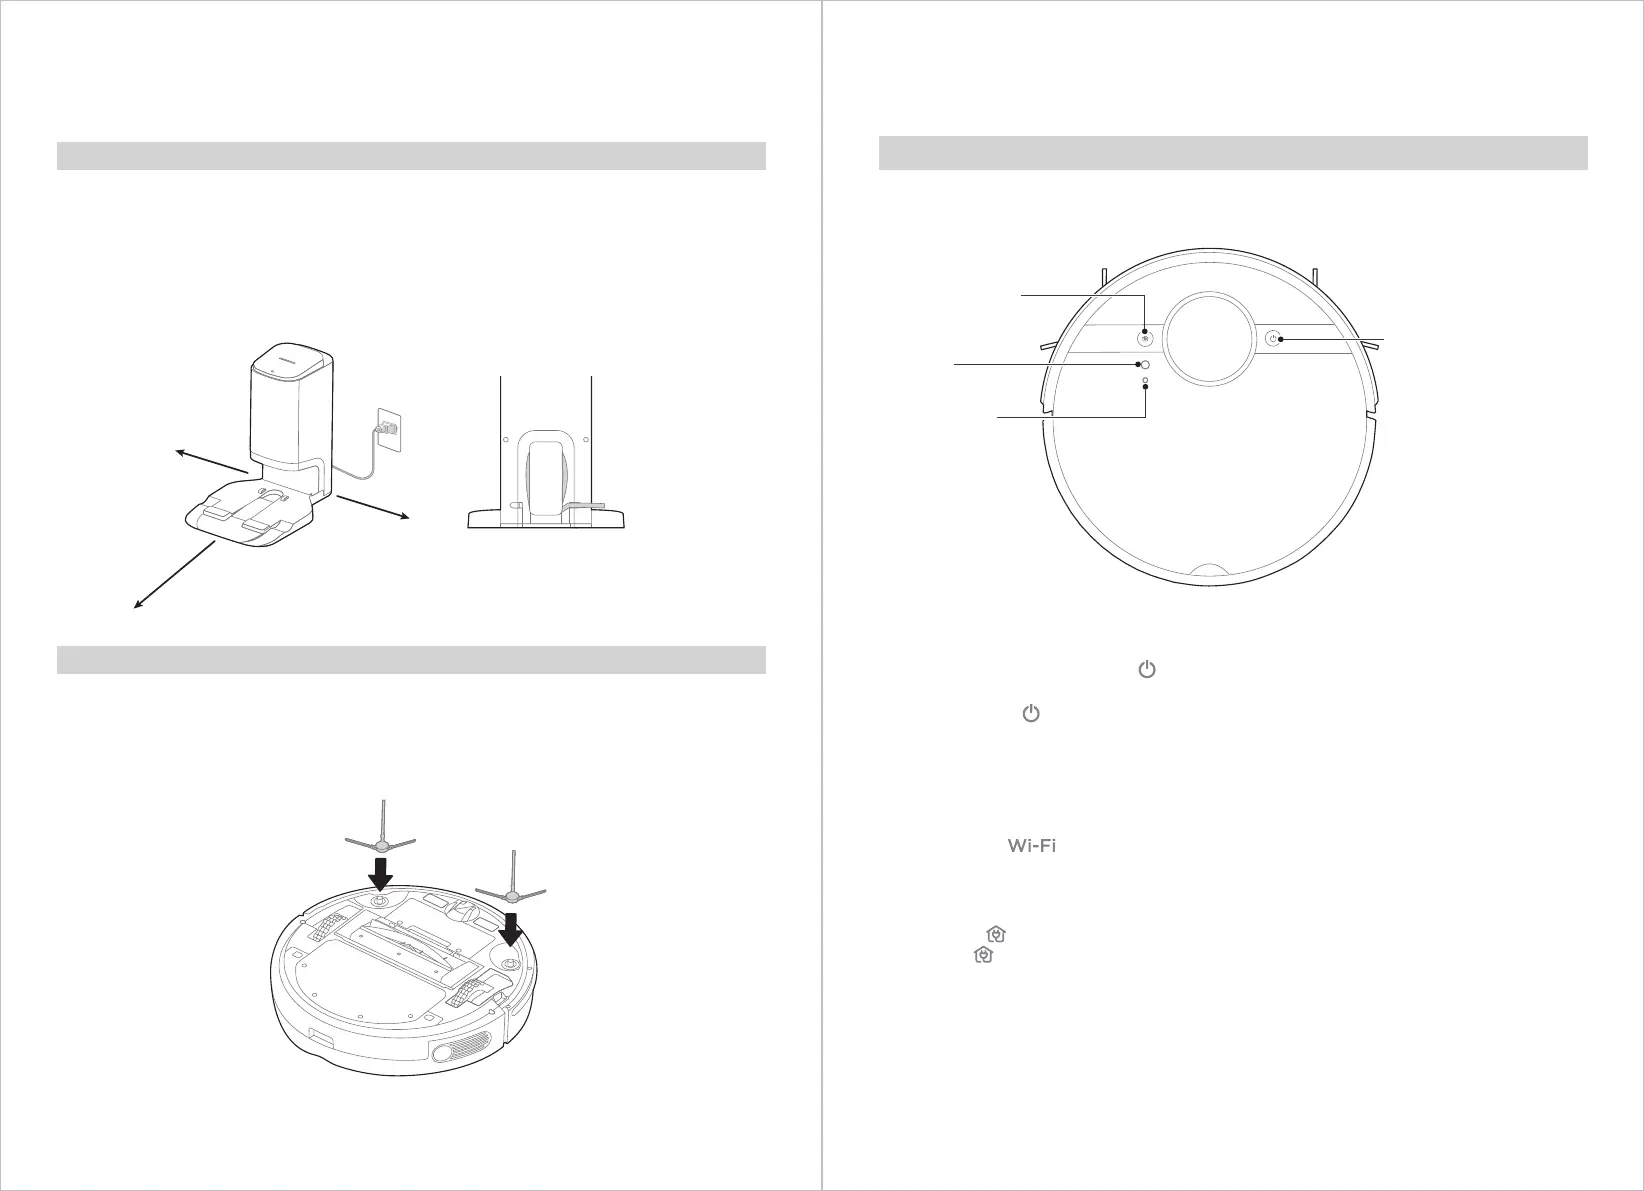
Installation of Self-emptying Base
PRODUCT INSTALLATION
13
Place the self-emptying base flat against a wall. Please leave at least 0.5m of clearance
on either side, 1.5m in front of the base.
Ensure the power cable of the self-emptying base is plugged into a working electrical
outlet.
Store the excess cords into the slot at the back of the base to avoid aecting the
proper function of the robot vacuum.
1.
2.
3.
Function of Buttons
OPERATION INSTRUCTIONS
Start / Pause / Shut Down
Reset Button
(under the cover)
Network Pairing
Button
(under the cover)
Recharge Button
Start / Pause / Shut Down
Press and hold to turn on the robot.
Start: Short press button or use App to start cleaning.
Pause: Short press to pause the cleaning. To resume cleaning, briefly press again.
Shut Down: Press and hold the power button to turn o the robot. A shut down sound
will be heard. Note that robot will not be turned o if it is on the charging base.
Networking
Press and hold the network pairing button for network configuration. Robot is in pairing
status if the light is flashing.
Recharge
Short press button to recharge.
Reset
Press “Reset” button to reset the robot if it is not responding or does not
function properly.
Installing the Side Brushes
Turn the unit over.
Attach the correct color side brush to the matching post and press down until they
fit into place.
Ensure side brushes can rotate freely.
1.
2.
3.
0.5m
0.5m
1.5m