R410A 380~415V 3Ph 50Hz TempMaker Series Split AC MCAC-UTSM-2014-03
85
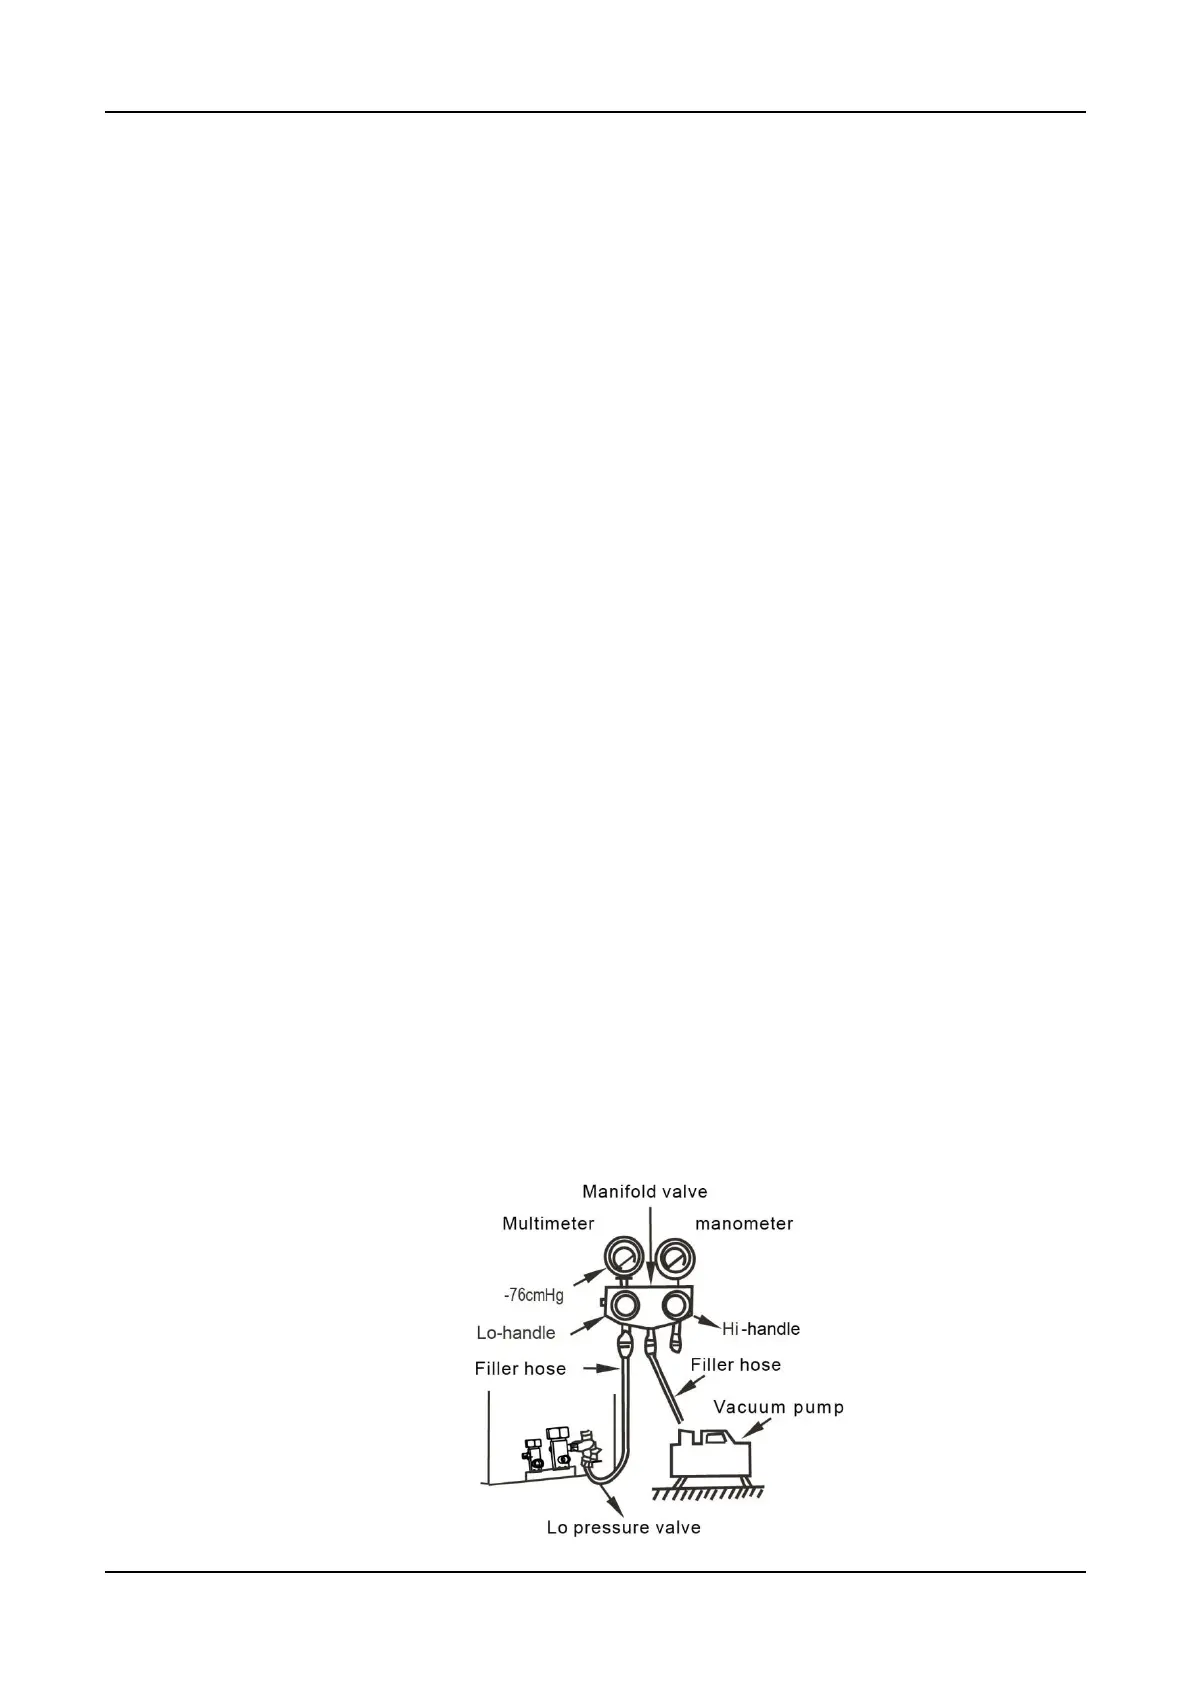
spool of valve B counter-clockwise for 45 degrees and stay for about 10 seconds, and
then close the spool of valve B tightly.
Detect leak for all adapters at A, B, C and D. After making sure that no leak exists, open
the maintenance orifice nut of valve A. After all air is expelled, tighten the maintenance
orifice nut of valve A.
Open the spools of valves A and B completely.
Tighten the square-head cover of valves A and B completely.
Use refrigerant tank to expel air.
Screw up the pipe nuts at A, B, C and D completely.
Loosen and remove the square-head cover and maintenance orifice nut of valves A
and B.
Connect the filler hose of refrigerant tank with the maintenance orifice of valve A.
Loosen the valve of the refrigerant tank, continue filling refrigerant for 6 seconds to
expel the air, and tighten the nut of valve B quickly.
Loosen the valve of the refrigerant tank again, and fill the refrigerant for 6 seconds.
Detect leak for all adapters at A, B, C and D. After making sure that no leak exists,
screw off the filler hose. After all the filled refrigerant is expelled, screw up the
maintenance orifice nut of valve A quickly.
Open the square-head pools of valves A and B completely.
Tighten the square-head cover of valves A and B.
Use a vacuum pump