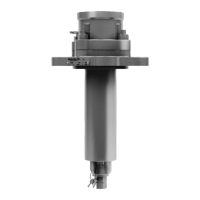
9.2.7 Put a wrench on the flats of the O-ring retainer (item 3) and another wrench on the top locknut
(item 7). See Table 1-2 for recommended wrenches. Hold the retainer in place to prevent it from
rotating while backing off and removing the top locknut.
Figure 9-4 Remove Top Locknut, then Retainer
CAUTION: Valve Discharge. When the O-ring retainer cap is raised up, there will
be a significant amount of product discharging. Have the emery paper, cleaning
cloth, replacement O-ring retainer cap (with epoxied O-rings) and silicone grease
close at hand. Use a wheel puller, or two screwdrivers 180° apart, to quickly
dislodge the O-ring retainer.
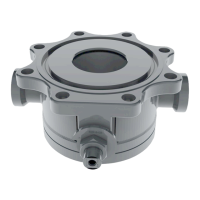
9.2.8 Remove the O-ring retainer (item 3). Remove the two (2) O-rings (items 8 and 9) from the retainer
and inspect the O-ring grooves.
Figure 9-5 Remove Retainer and Inspect O-rings
9.2.9 Look carefully for nicks, rust, scale, solidified product and other foreign material on the valve seat.
The O-ring makes its seal on the top of the crown of the valve seat and on a small area (on the
outboard side) past the top of the seat. Use emery paper (400 grit) to clean this surface then wipe
away any loose residue. Visually inspect this surface to detect any irregularities that may still be
there.
Figure 9-6 Inspect Seat Surfaces
Inspect the O-rings
Inspect Valve Seat for Nicks, Rust and Foreign
Material. Clean with 400-grit emery paper.

 Loading...