ENGLISH
3
operating band, which will be visualised on the displayed.
If you select a frequency band operating in FM mode only, this button enables
the LCR function (Last Channel Recall).
7. "SCAN" button: With this control, you can automatically seek for a busy chan-
nel.
Turn the Squelch clockwise until the background noise is no longer heard.
3UHVVWKH6&$1EXWWRQWKHWUDQVFHLYHUZLOOVFDQDXWRPDWLFDOO\DOOWKHFKDQ-
nels until a carrier is being received. If you switch on the unit and push “SCAN”
and “AM/FM”(LCR) at the same time, you will select the operating band, which
will be visualised on the displayed.
8. "Squelch" Control: For the maximum receiver sensitivity, the control must be
regulated exactly where the receiver background noise disappears.
9. “ON/OFF Volume” Control.,Q2))SRVLWLRQ\RXUWUDQVFHLYHULV2))7XUQ
this control clockwise to switch on the unit. Turn the knob clockwise a little
more to set the audio level, until you get a comfortable reception.
10. Microphone jack: Insert the mic connector into this jack.
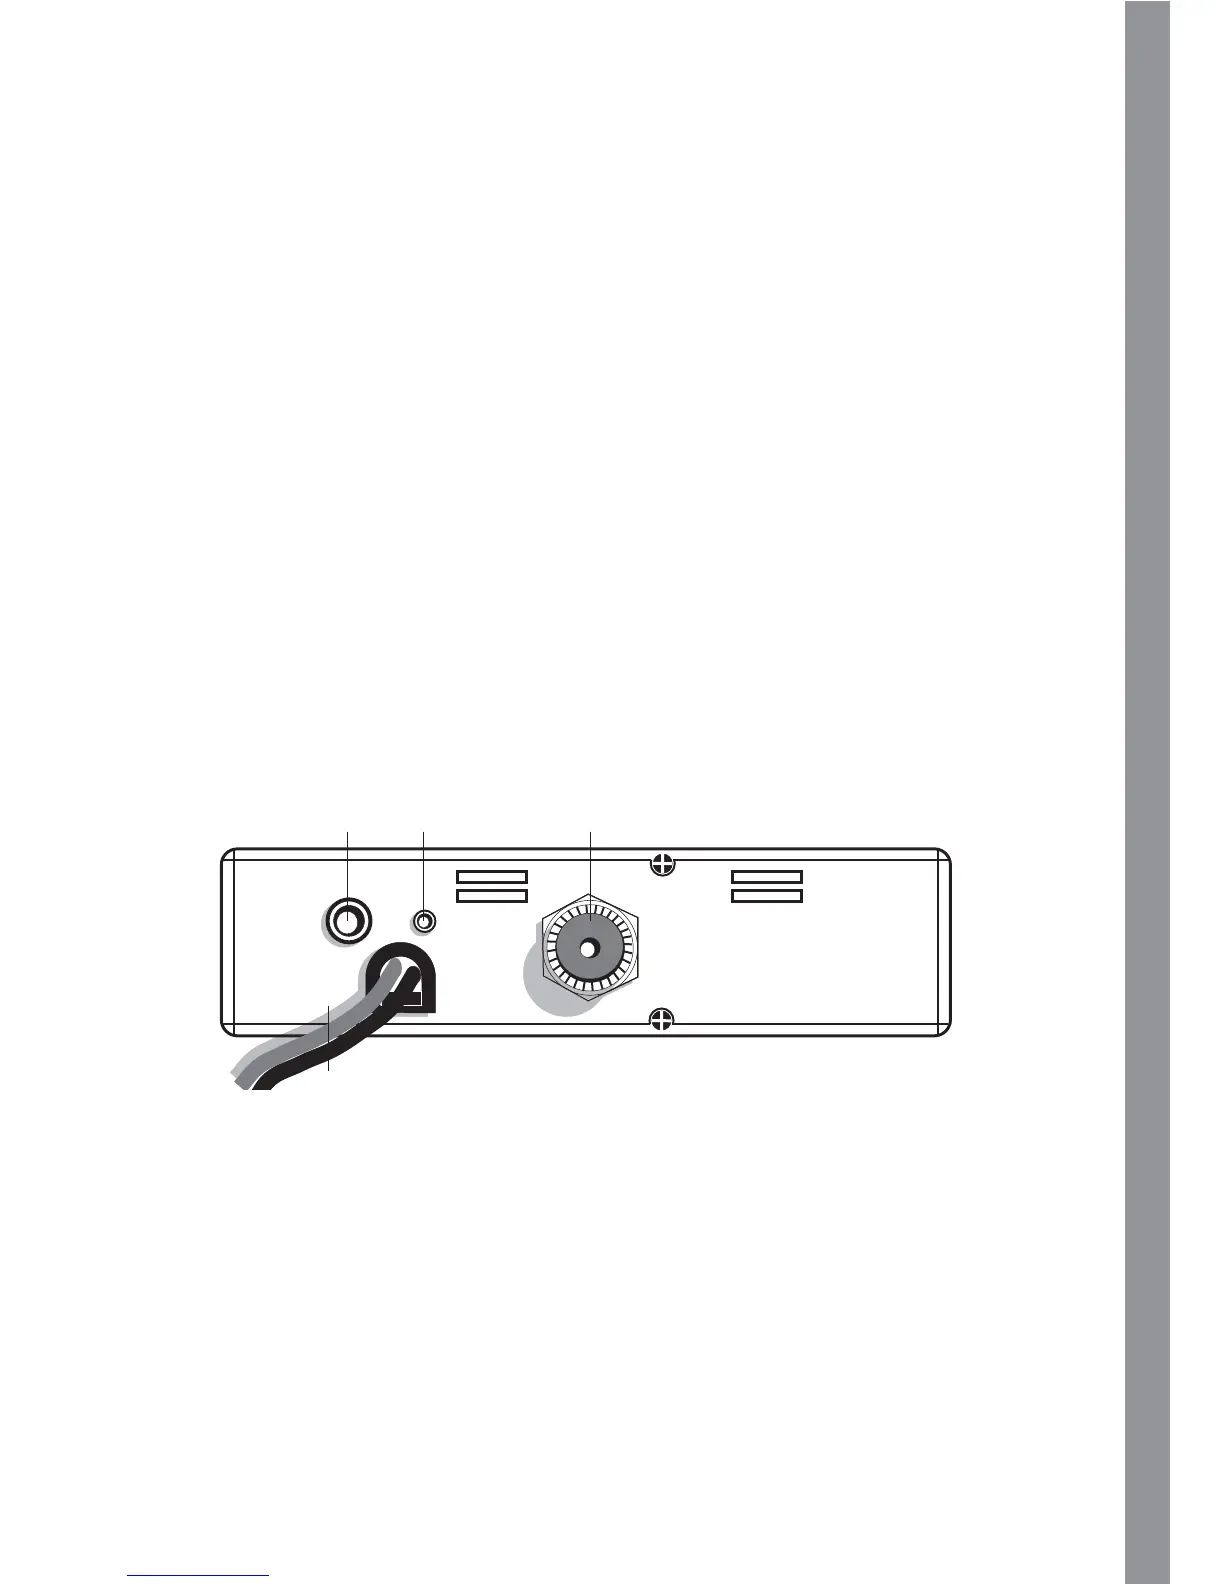
REAR PANEL
11. ”EXT” jack: external loudspeaker jack.(the internal loudspeaker is excluded)
12. Power 13.8V DC: power supply cable
13. S.Meter jack: it allows an external “S. Meter” connection
14. Antenna connector (SO239 connector type)
EXT
S. METER
DC13,8V
ANTENNA
11
12
13 14