UK
Midland BTX2 - 17
16 - Midland BTX2
UK
rigid cover of the helmet, so that the microphone is correctly positioned in front of
your mouth and that the white symbol is facing your mouth. This type of micro-
phone is suited for Open Faced and Flip Front helmets.
Wired microphone
Using the Velcro/adhesive strip, place the microphone inside the helmet in front
of your mouth. This type of microphone is more suited for Full Faced helmets. The
mini connector on the microphone allows you choose the microphone that best
suits the helmet you are using.
Audio kit jack
The audio kit must then be connected to the central jack of the Midland BTX2 unit
using the “L” shaped connector.
Description of the installation brackets
The Midland BTX2 can be xed onto the helmet in two dierent ways: By either
using the plate with bi-adhesive strip, or the clamp. These methods allow you to
safely “x” the BTX2 unit onto your helmet and to remove it at any time in order
to recharge or store it.
Plate with bi-adhesive strip
The xing plate has a bi-adhesive strip on one of
its sides. To x the plate in place, clean the appli-
cation area on the helmet surface, remove the bi-
adhesive lm and
place the xing plate on the helmet by keeping it
contact with the surface for a few seconds.
Screw Clamp
Using the Allen Key, loosen the two screws on the clamp and place the rear plate
between the helmet padding and the external rigid protection. Then, tighten the
two screws in order to rmly x the clamp in place. Inside the clamp is included a
small plastic spacer that can be removed to give a tighter t if required.
Fitting and removing your Midland BTX2
The BTX2 can be easily tted onto the helmet by sliding it downwards so that
it ts into the slot of the selected xing device (plate with bi-adhesive strip or
clamp). BTX2 is maintained in position thanks to the xing clip located on the
upper section (A).
To detach the BTX2, simply press the xing clip and push the unit upwards.
Switching your Midland BTX2 on and off
Switching the unit on:
Press and hold “Middle” button down for approximately 3 seconds until the BLUE
indicator lights.
Switching the unit off:
Press and hold both “Middle” and “Rear” buttons together for approximately 3 se-
conds until the RED indicator ashes 3 times, thus lessening the chances that you
might turn o the unit accidentally (especially whilst wearing gloves).
Operative “mode”
The BTX2 can operate in two main “mode”: Intercom and Phone.
The 3 multi function buttons can have dierent functionality depending on which
mode the unit is at that moment.
› In “Intercom mode” the middle buttons let you manage the communications
between driver and passanger
› In “Phone mode” you can manage your Bluetooth cellular phone to place/
answer a phone call or to listen to the music (in stereo mode). Please use your
phone responsibly and safely.
You can switch (toggle) from one mode to the other simply pressing the Middle
button for 3 seconds. A voice announcement will tell in which mode you are on.
The toggle sequence is the following:
› Intercom mode (if another unit has been paired)
› Phone mode (if a phone has been paired)
Every time you turn on the unit, the default mode is Intercom (if it was previously
paired to another unit), otherwise it will be Phone (If was paired to a phone).
If you need to know in which mode the unit currently is, just press the “Volume +
“ and “Volume –“ button together. A voice announcement will tell you the current
mode.
Maximum Distance
You can reach 800mt intercom distance if the ip up antenna is up and if you are
in line of site without obstructions and interferences (the riders must be always
in sight).
How to pair two BTX2 unit
The two units supplied in the same BTX2 box, are already paired and ready to use,
which mean you don’t need to perform this procedure. The unit are already paired
using the Middle button.
If the devices are not part of the same kit, or the units has been purchased sepa-
rately, you need to rst pair it in order to use it.
To pair the BTX2 to another BTX2 unit
To pair the BTX2 to another BTX2 unit, you must rst enter the setup mode:
1. Turn o the unit
2. Press and hold down the middle button about 7 sec., until the Red light is on
permanently.
3. Now press the Middle button for 3 seconds. The Blue and Red light will ash.
4. Do the same procedure on the other unit, When successfully paired, each unit
will have the Blue light on for one second and than go back to the setup mode
(Red light always on).
5. Now the pairing procedure is complete, you just need to exit the setup mode
before you can use the units:
6. Double click on the Middle button, the Red light will turn o and the Blue
light will start ashing.
You can use now your BTX2.
How to use the Intercom
To use the intercom feature, be sure the both units are turned on and correctly
paired together.
Manual activation
Press the Middle button on one of the two units. Communication is enabled and
remains active until you press again the middle button. The intercom need some
second to activate, you will hear a beep tone when the intercom is open.
Voice activation (VOX)
Simply start talking, after some seconds the communication will be opened and
will remain active for the time you are talking. If there is no conversation the
intercom will be closed after 40 seconds. If needed you can close the intercom
manually without waiting 40 seconds (just press the middle button).
If needed, you can temporarily disable the VOX feature simply by pressing the
Backward button for 7 sec. Two sound beep will advise you when the VOX is di-
sabled. To turn the VOX on again, just press the same button, one beep sound
will advise you that the VOX is now active (or just turn the unit o and on again).
Adjusting the volume
Your Midland BTX2 uses AGC technology, which automatically adjusts the liste-
ning volume in relation to background noises.
However, it is also possible to manually adjust the volume by means of the “Volu-
me +” and “Volume -“buttons.
Attention: volume can be adjust only when an audio connection is active.
Attention: the volume buttons (Vol + and Vol -) cannot be used to adjust the vo-
lume of the wired audio source. The AGC system with automatically increase the
volume on higher speed.
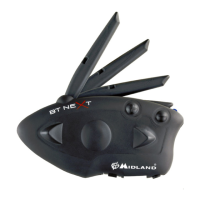
How to pair the BTX2 to previous Midland BT line unit
The BTX2 is compatible with all the BT line unit from Midland. You can pair the
BTX2 to a BT2, BT1 or BTX1, BT Next and BT City/Eva unit and the max distance of
the intercom is dened from the lower possible.
To pair the BTX2 to another BT line unit, you must rst enter the setup mode:
1. Turn o the unit
2. Press and hold down the Middle button about 7 sec., until the Red light is on
permanently.
3. Now press long (3 sec) the Middle button, the Blue and Red light will ash.
4. Follow the procedure on the other unit’s instruction manual
 Loading...