4 - Midland BTX2
midlandusa.com
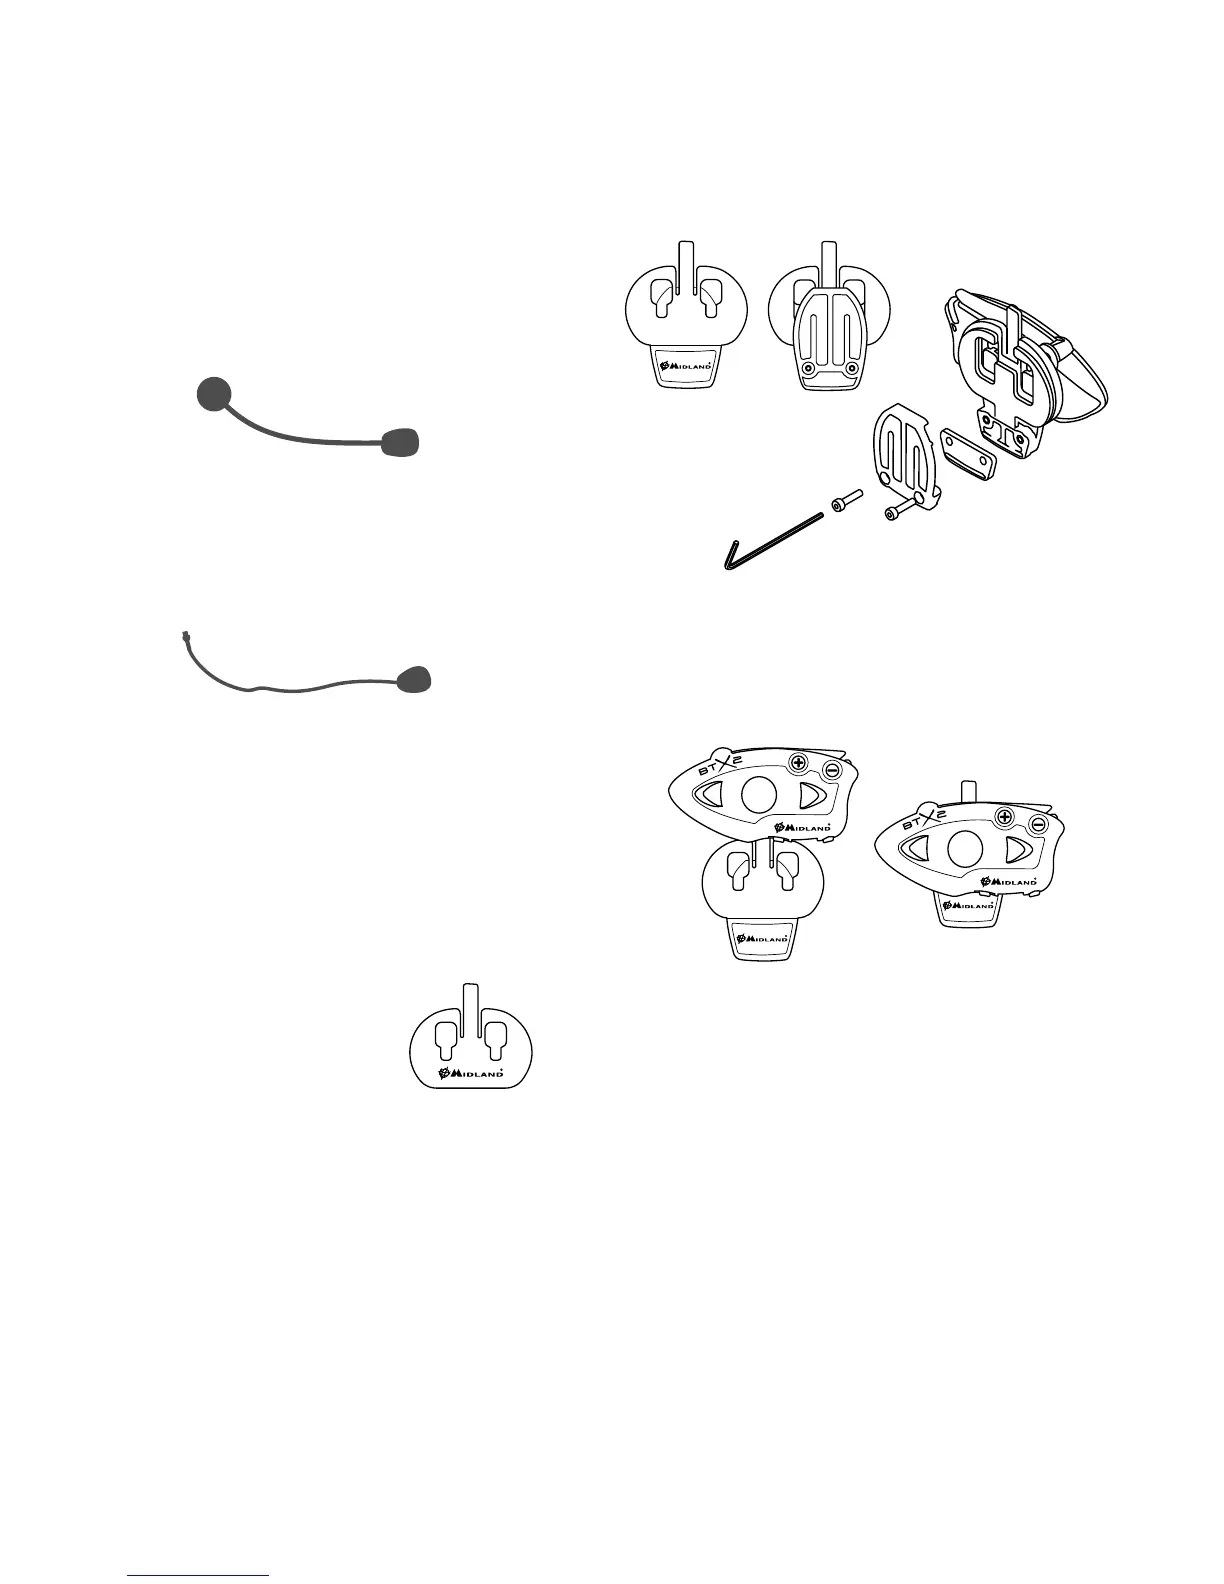
Boom Microphone
Place the section with the Velcro/adhesive strip between the padding and the
rigid cover of the helmet so that the microphone is correctly positioned in front of
your mouth and that the white symbol is facing your mouth. This type of micro-
phone is suited for Open Faced and Flip Front helmets.
Wired microphone
Using the Velcro/adhesive strip, place the microphone inside the helmet in front
of your mouth. This type of microphone is more suited for Full Faced helmets. The
mini connector on the microphone allows you to choose the microphone that best
suits the helmet you are using.
Audio kit jack
The audio kit must then be connected to the central jack of the Midland BTX2 unit
using the “L” shaped connector.
Description of the installation brackets
The Midland BTX2 can be mounted onto the helmet in two dierent ways: By
either using the plate with bi-adhesive strip, or the clamp. These methods allow
you to safely “mount” the BTX2 unit onto your helmet and to remove it at any time
in order to recharge or store it.
Plate with bi-adhesive strip
The mounting plate has a bi-adhesive strip on one
of its sides. To mount the plate in place, clean the
application area on the helmet surface, remove the
bi-adhesive lm and place the mounting plate on
the helmet by applying pressure for a few seconds
to ensure it bonds with the helmet’s surface.
Screw Clamp
Using the Allen Key, loosen the two screws on the clamp and place the rear plate
between the helmet padding and the external rigid protection. Then, tighten the
two screws in order to rmly mount the clamp in place. Inside the clamp is a small
plastic spacer that can be removed to give a tighter t if required.
Fitting and removing your Midland BTX2
The BTX2 can be easily tted onto the helmet by sliding it downwards so that it
ts into the slot of the selected mounting device (plate with bi-adhesive strip or
clamp). BTX2 is maintained in position thanks to the mounting clip located on
the upper section (A).
To detach the BTX2, simply press the mounting clip and push the unit upwards.
Switching your Midland BTX2 on and o
Switching the unit on:
Press and hold the “Middle” button down for approximately 3 seconds until the
BLUE indicator lights.
Switching the unit o:
Press and hold both “Middle” and “Back” buttons together for approximately 3
seconds until the Red indicator ashes 3 times, thus lessening the chances that
you might turn o the unit accidentally (especially while wearing gloves).