5 | Page
1 0-293-1 REV E
The Brat Solar Charge Controller Instructions
Warnings.............................................................................................. 2
Dimensions.......................................................................................... 5
Mounting the Brat.................................................................................5
Part Locator......................................................................................... 6
Wiring the Brat..................................................................................... 7
Setting up the Brat............................................................................... 8
Dipswitch Settings................................................................................8
Charger set points................................................................................8
Lighting Controller................................................................................ 9
Lighting Modes.....................................................................................1 0
Stopping a Manual EQ......................................................................... 11
Error Codes..........................................................................................11
Temperature sensing and compensation............................................. 1 2
Troubleshooting................................................................................... 1 3
Ratings................................................................................................. 1 3
Glossary of Terms................................................................................ 1 3
Wiring Diagrams.................................................................................. 1 4
Warranty...............................................................................................24
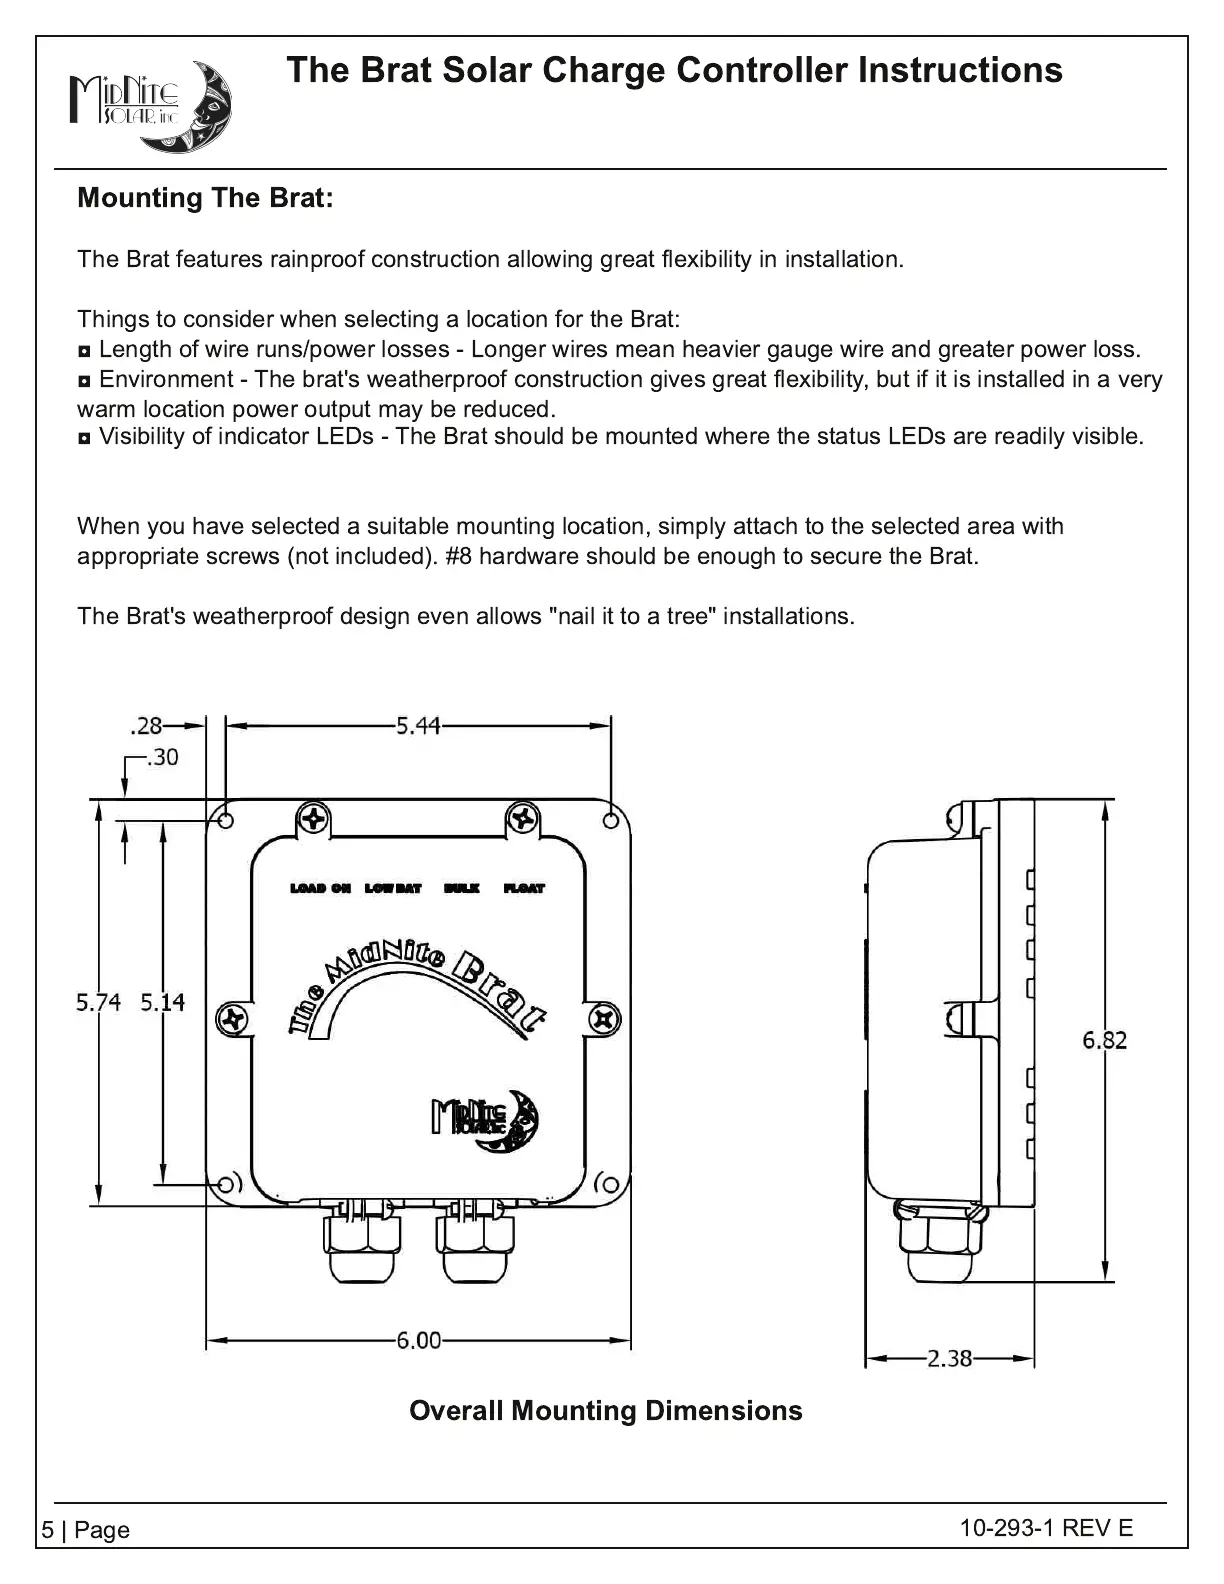
Overall Mounting Dimensions
Mounting The Brat:
The Brat features rainproof construction allowing great flexibility in installation.
Things to consider when selecting a location for the Brat:
◘ Length of wire runs/power losses - Longer wires mean heavier gauge wire and greater power loss.
◘ Environment - The brat's weatherproof construction gives great flexibility, but if it is installed in a very
warm location power output may be reduced.
◘ Visibility of indicator LEDs - The Brat should be mounted where the status LEDs are readily visible.
When you have selected a suitable mounting location, simply attach to the selected area with
appropriate screws (not included). #8 hardware should be enough to secure the Brat.
The Brat's weatherproof design even allows "nail it to a tree" installations.