7 | Page
1 0-293-1 REV E
The Brat Solar Charge Controller Instructions
Wiring the Brat:
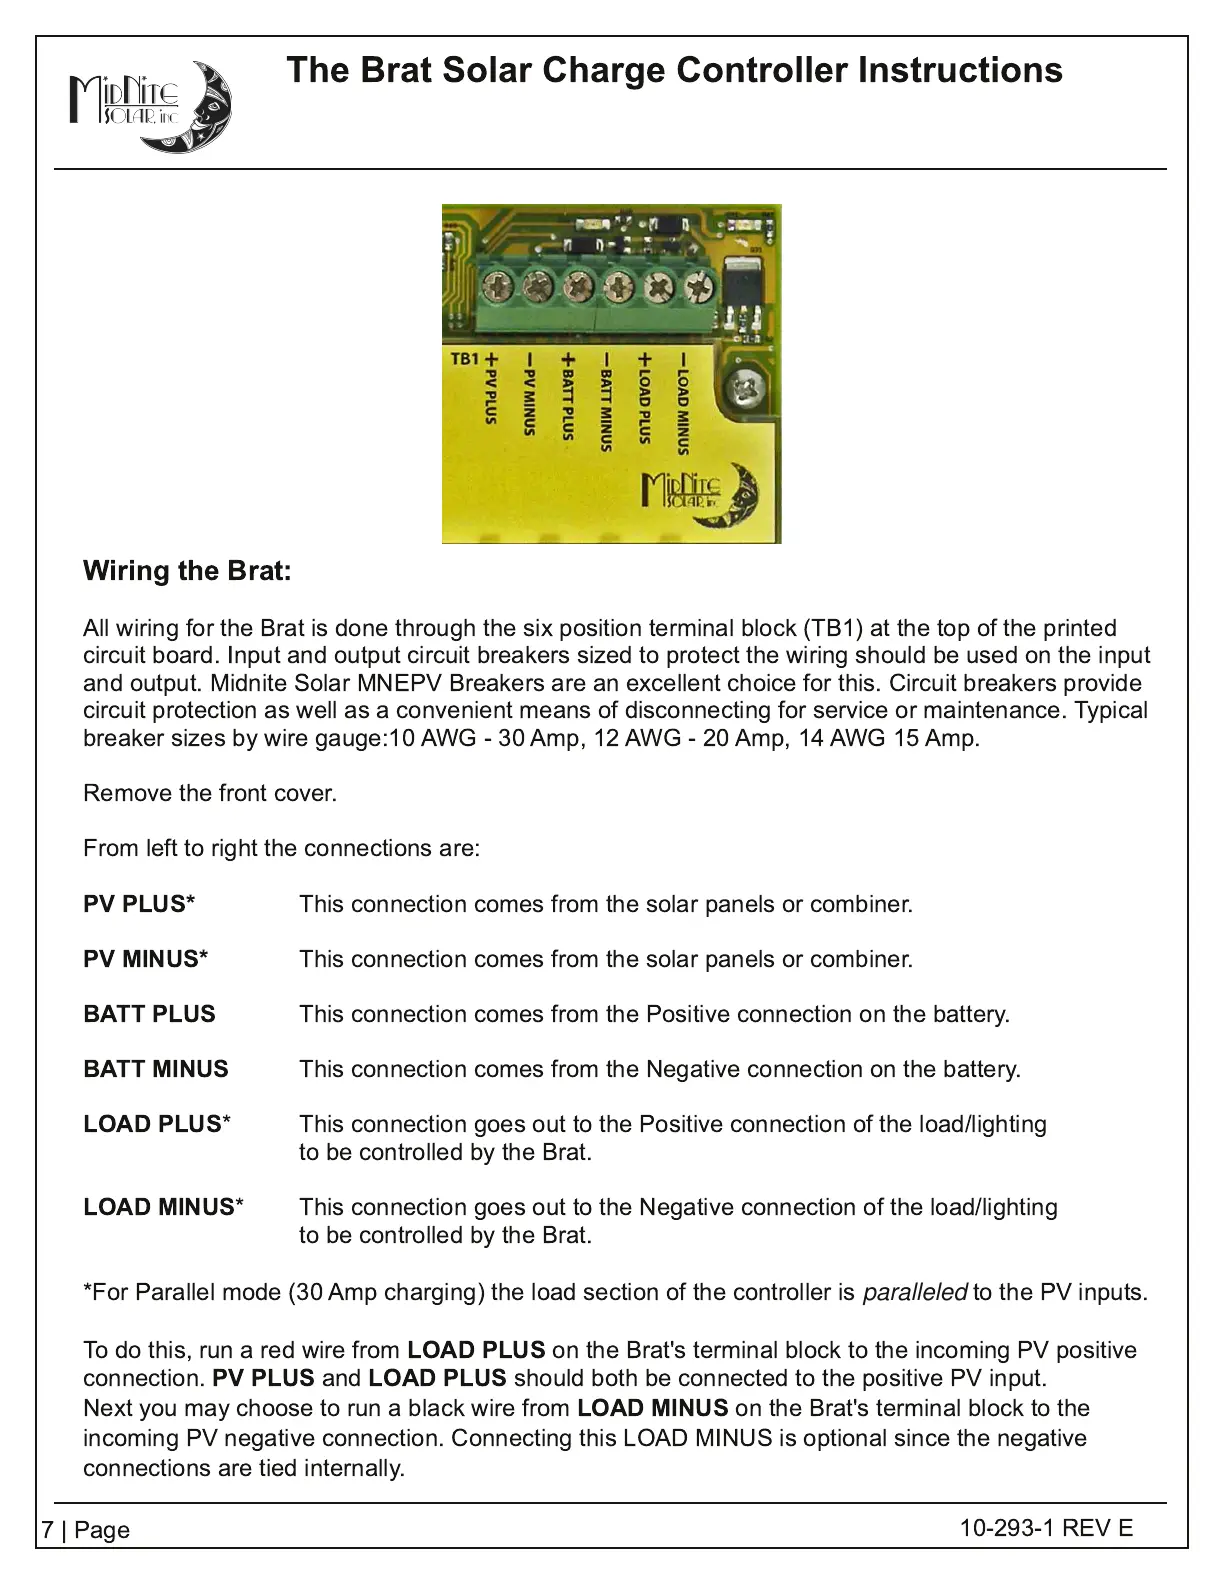
All wiring for the Brat is done through the six position terminal block (TB1 ) at the top of the printed
circuit board. Input and output circuit breakers sized to protect the wiring should be used on the input
and output. Midnite Solar MNEPV Breakers are an excellent choice for this. Circuit breakers provide
circuit protection as well as a convenient means of disconnecting for service or maintenance. Typical
breaker sizes by wire gauge:1 0 AWG - 30 Amp, 1 2 AWG - 20 Amp, 1 4 AWG 1 5 Amp.
Remove the front cover.
From left to right the connections are:
PV PLUS*
This connection comes from the solar panels or combiner.
PV MINUS*
This connection comes from the solar panels or combiner.
BATT PLUS
This connection comes from the Positive connection on the battery.
BATT MINUS
This connection comes from the Negative connection on the battery.
LOAD PLUS
* This connection goes out to the Positive connection of the load/lighting
to be controlled by the Brat.
LOAD MINUS
* This connection goes out to the Negative connection of the load/lighting
to be controlled by the Brat.
*For Parallel mode (30 Amp charging) the load section of the controller is
paralleled
to the PV inputs.
To do this, run a red wire from
LOAD PLUS
on the Brat's terminal block to the incoming PV positive
connection.
PV PLUS
and
LOAD PLUS
should both be connected to the positive PV input.
Next you may choose to run a black wire from
LOAD MINUS
on the Brat's terminal block to the
incoming PV negative connection. Connecting this LOAD MINUS is optional since the negative
connections are tied internally.