18
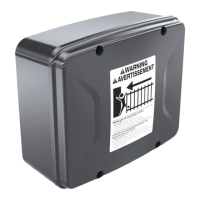
OPTIONAL SECOND BATTERY (Recommended for Solar installations)
• If you’ll be installing a second battery, connect the second set of harness connectors to the battery.
• Insert the battery into the left side of the Battery Enclosure Kit with the terminals facing outward.
NOTE: If no second battery is to be installed, leave the second battery set of connectors not connected.
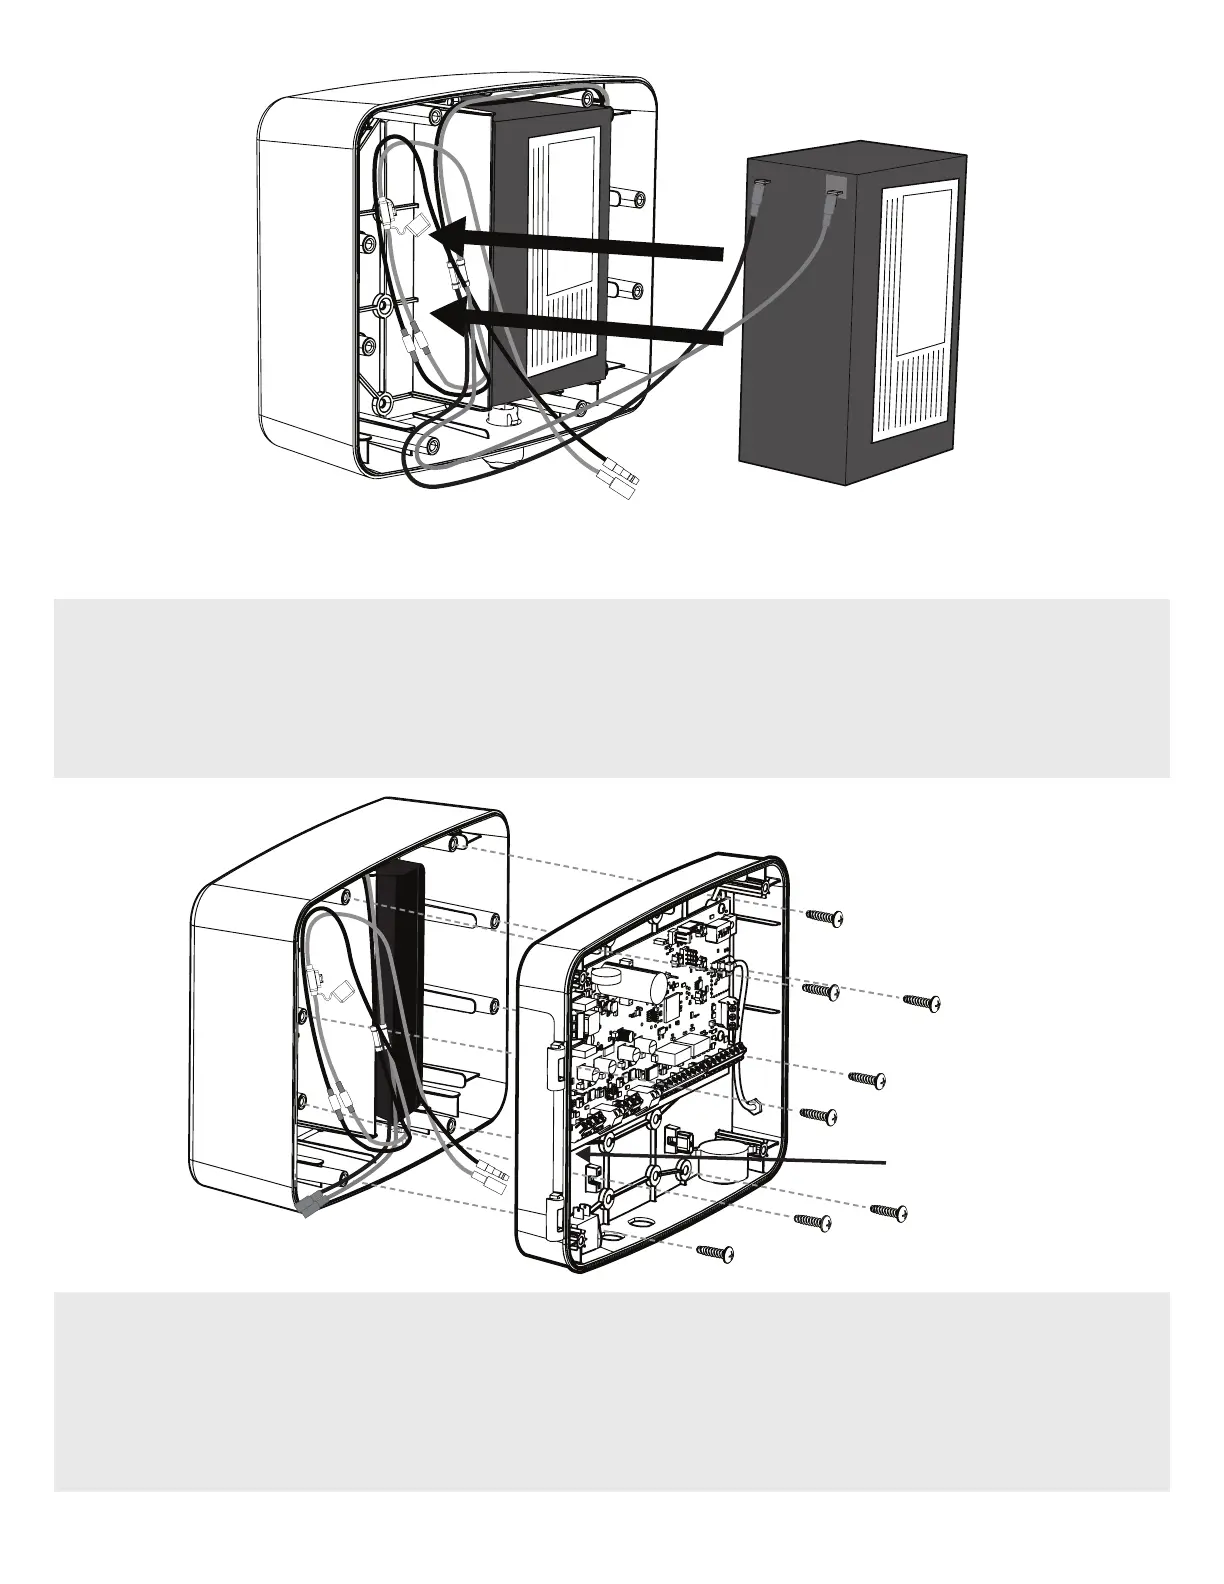
Drill Hole
Location
4. With the 1/2” hole drilled, feed the Battery Harness connectors from the Battery Enclosure Kit through the Control Box’s
newly drilled access hole.
5. Use a 7/32” drill bit to drill out the holes required to secure the Control Box to the Battery Enclosure Kit. Use #10-14 x
3/4” Screws to attach the Control Panel to the Battery Enclosure Kit.
NOTE: Control Box mounting screws are not included with MM371W and MM372W.