QUICK START GUIDE
Connection
Turn off and unplug all components before making connections.
Do not turn on the TV until connection setup is completed.
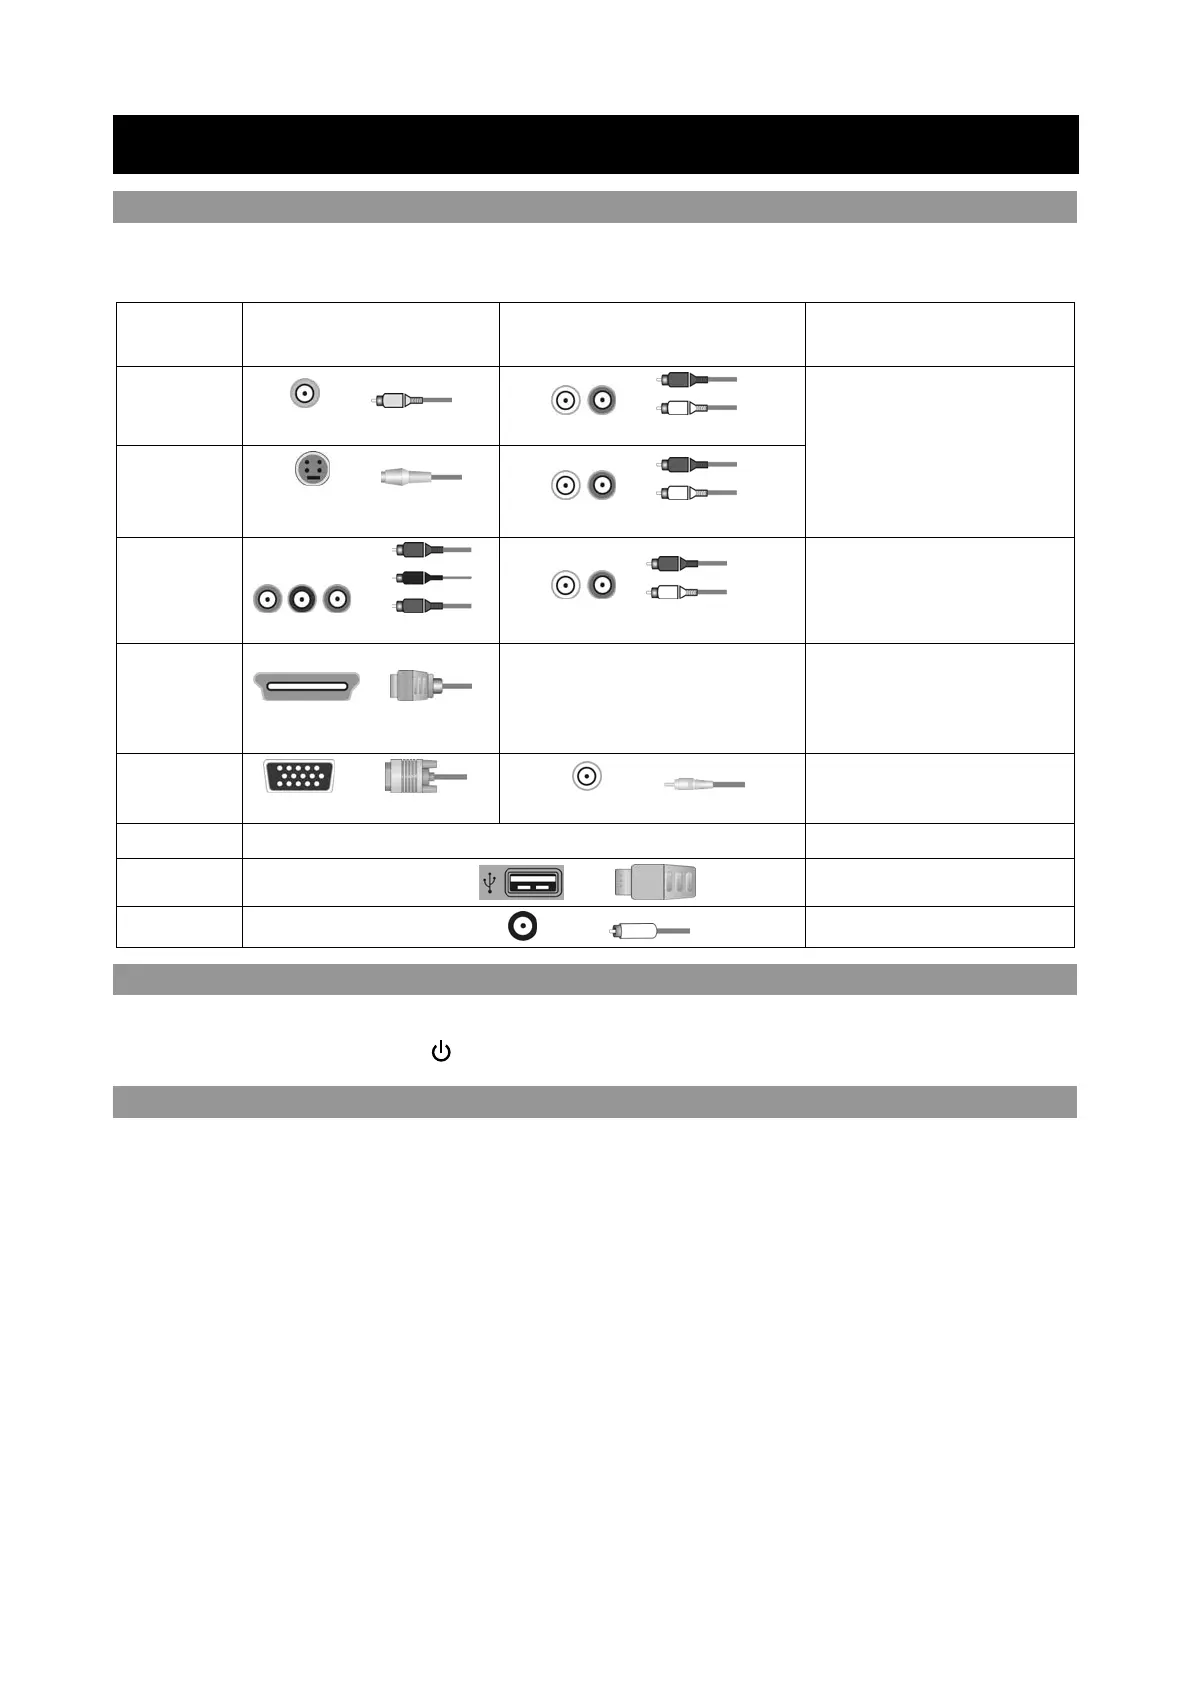
Input
Connector
Video Conn
ection Audio Connection
High or Standard
Definition Quality
AV
Composite video connector
Audio L/R
S-VIDEO
Use this connector in place of
composite video connector
Audio L/R
480P
(SD content)
YPBPR
Component connection
Audio L/R
1080p, 1080i, 720p, 480p, 480i
(Compatible with HD or SD content)
HDMI
HDMI connection
HDMI cable carries both video and audio
signals. Separate audio cable is not
needed. (When HDMI is connected to DVI
with an adapter, a separate audio L/R is
necessary)
1080p, 1080i, 720p, 480p, 480i, PC
(Compatible with HD or SD content)
VGA
VGA/PC connection
VGA/PC audio
1024×768(60Hz)
Connection
USB
USB connection
USB2.0
RF
RF connection
75Ω
Turn on the TV
1. Connect the AC input cable of the TV. At this time the TV will enter st
andby mode.
2. Switch on the TV by pressing .
Scanning channels
1. Press INPUT button, you will see the
signal source menu.
2. Press ▲/▼
button to highlight TV then press OK to confirm.
3. Press the MENU button to bring the OS
D menu up.
4. Press ◄/►
button to select CHANNEL menu, press▼ button to enter.
5. Press ▲/▼
button to highlight Auto Tuning, press OK button to perform the automatic channel
searching.
6. Then, the Auto Search Frame comes out and the system begins to search chann
els, the searched
channels can be saved automatically.
6