EasyManua.ls Logo

Miller Electric Spectrum 875 Auto-Line - User Manual

Miller Electric Spectrum 875 Auto-Line
60 pages
Print Icon
To Next Page IconTo Next Page
Loading...
Processes
Description
Air Plasma Cutting
and Gouging
Air Plasma Cutter
OM-242 880B 201005
Spectrum 875 Auto-Line
And ICE-60T/TM Torch
R
File: Plasma Cutters
Visit our website at
www.MillerWelds.com

Table of Contents

Questions and Answers

  • K
    Kathy HuffAug 13, 2025
    What to do if the arc goes out while cutting with Miller Electric Welding System?
    • T
      Thomas GarciaAug 13, 2025
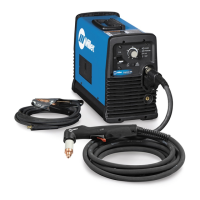
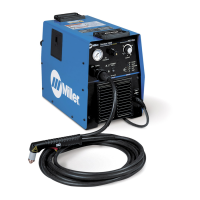
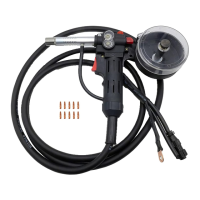
      If the arc goes out while cutting with your Miller Electric Welding System, ensure the work clamp is securely attached to a clean, paint-free, rust-free workpiece. Maintain a constant travel speed when cutting thin material. Make sure the drag shield is on the workpiece, or the extended tip is 1/16 in. (1.6 mm) to 1/8 in. (3.2 mm) from the workpiece while cutting. Check that the compressed air is clean, dry, and oil-free, using filter kit 300491 or 228926 if needed. Also, check the retaining cup, ensuring it's only hand-tightened and clean or replace worn consumables as necessary.
  • J
    Joseph HenryAug 17, 2025
    Why is the Temperature status light on my Miller Electric Spectrum 875 Auto-Line?
    • W
      Wesley ScottAug 17, 2025
      If the Temperature status light is On for your Miller Electric Welding System, it indicates the unit is overheating. Allow the fan to run to cool the unit. The light should go out once it has cooled.
  • T
    timothyvegaAug 20, 2025
    What to do if Miller Electric Spectrum 875 Auto-Line has pilot arc but no cutting output?
    • A
      Aaron SmithAug 20, 2025
      If you have a pilot arc but no cutting output with your Miller Electric Welding System, ensure the work clamp is connected to a clean, rust-free workpiece. Also, clean or replace any worn consumables.
  • S
    sharonfisherAug 25, 2025
    What to do if Pressure status light is On on Miller Electric Spectrum 875 Auto-Line?
    • A
      Anna StoutAug 25, 2025
      If the Pressure status light is On for your Miller Electric Welding System, check for sufficient gas/air supply pressure. Also, inspect the air filter for dirt and replace it if necessary. Check air lines for leaks.
  • M
    Michelle CantrellAug 28, 2025
    What to do if Cup status light is On on Miller Electric Spectrum 875 Auto-Line Welding System?
    • P
      Patrick AllenAug 29, 2025
      If the Cup status light is On for your Miller Electric Welding System, check the torch shield cup and reset the power switch.
  • C
    Caleb JohnsonSep 1, 2025
    What does it mean when the Cup status light flashes twice on my Miller Electric Spectrum 875 Auto-Line Welding System?
    • N
      nicholsjeremySep 1, 2025
      If the Cup status light on your Miller Electric Welding System flashes at a rate of two quick cycles followed by a one-second pause, it indicates that no pilot arc was established, and the power source failed to maintain it. Try using a different set of torch consumables (tip and electrode), and check for input pressure between 90-120 PSI.
  • C
    Catherine PaulSep 5, 2025
    What does it mean when the Cup status light flashes three times on my Miller Electric Welding System?
    • R
      Reginald CannonSep 5, 2025
      If the Cup status light on your Miller Electric Welding System flashes at a rate of three quick cycles followed by a one-second pause, it means the power source detected that the tip and electrode failed to separate when the gas valve turned on. Check that the cup is not too tight (finger tight only). Verify you are using the correct torch consumables and check for gas flow through the torch head.
  • J
    James BakerSep 9, 2025
    How to establish an arc with Miller Electric Spectrum 875 Auto-Line Welding System?
    • J
      johnsonkevinSep 9, 2025
      If you're experiencing difficulty establishing an arc or have no pilot arc with your Miller Electric Welding System, clean or replace worn consumables. Check for a damaged torch or torch cable. Verify the position of the cut/gouge switch, ensuring it matches the consumables you are using. Also, check the retaining cup, tightening it by hand only.

Summary

Safety Precautions

Symbol Usage and Plasma Arc Cutting Hazards

Explains safety symbols and hazards associated with plasma arc cutting processes.

Installation

Connecting Work Clamp and Gas;Air Supply

Instructions for connecting the work clamp and the gas/air supply to the unit.

Connecting Torch and Work Cable

Steps for properly connecting the plasma torch and work cable.

Electrical Service Guide

Provides recommendations for electrical service, including fuse ratings and conductor sizes.

Connecting 1-Phase Input Power

Step-by-step instructions for connecting single-phase input power.

Connecting 3-Phase Input Power

Step-by-step instructions for connecting three-phase input power.

Connecting to Generators

Instructions for connecting to generators, including optional plugs and settings.

Operation

Controls Overview

Identifies and explains the function of the primary controls on the plasma cutter.

Mechanized Operation

Maintenance

Troubleshooting

Troubleshooting the Power Source

Provides solutions for common problems related to the power source.

Troubleshooting the Torch

Provides solutions for common problems encountered with the plasma torch.

Electrical Diagram

Parts List

Miller Electric Spectrum 875 Auto-Line Specifications

General IconGeneral
Frequency50/60 Hz
Output Current Range20-80 A
Amperage Output80 A
ProcessPlasma Cutting
Plasma GasAir or Nitrogen
Auto-LineYes
Input Phase1- or 3-Phase
Wire Feed Speed RangeNot Applicable
Weight68 kg (150 lbs)
Dimensions19 in x 12.5 in x 23.5 in (483 mm x 318 mm x 597 mm)

Related product manuals