8.
9.
Wrap the foot switch cord around the cord holders
and place the foot switch on top sliding into foot
switch holder.
To collapse cart, pull to release the cart latch and
push down on the accessory carriage handles until
the locking pin is all the way down.
6
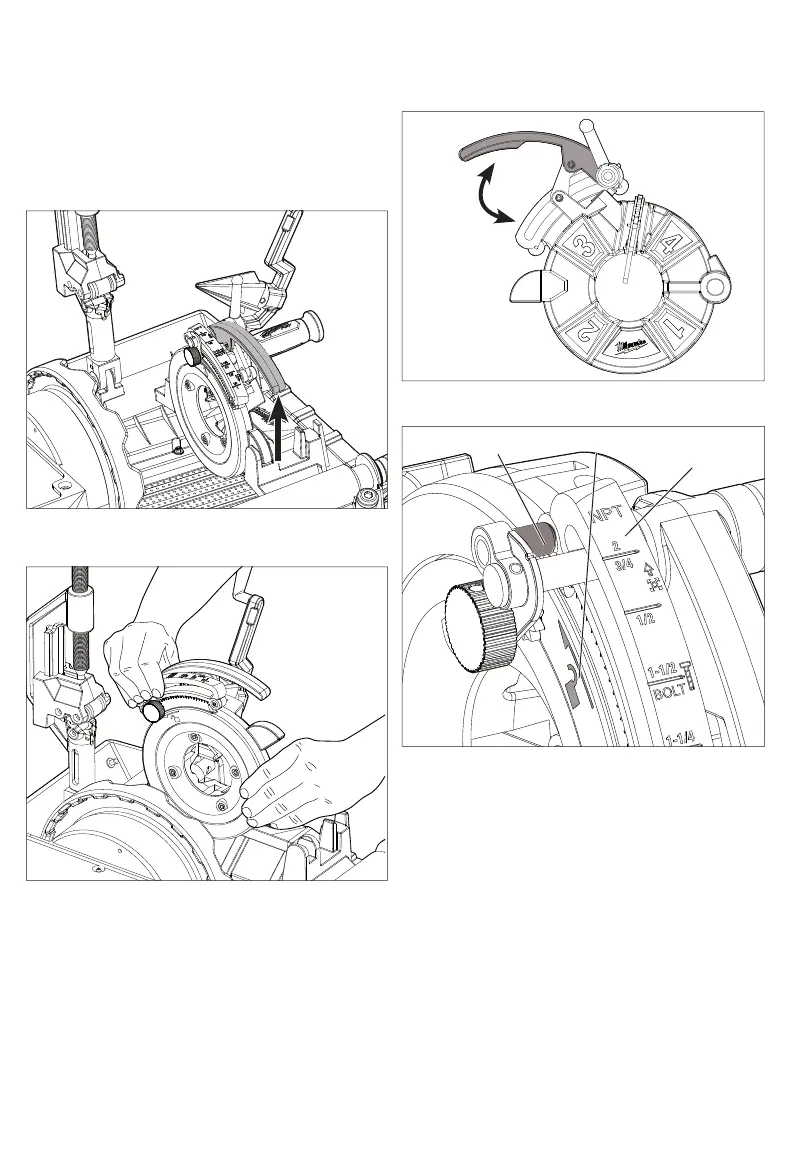
Removing/Installing Die Head
1. Remove battery pack.
2. To remove, push the reamer and cutting wheel
to open position.
3. Lift the die release lever up to open position.
4. Pull out the die head post toward the side of
the hammer chucks until the post is completely
removed.
the post is not visible.
Removing/Installing Dies
5. To install, push the die head post into the slot until
1. Remove battery pack.
2. Remove the die head. Clean the cutting chips off
the dies with a wire brush before removing from
the die head.
Open
Close
bers facing up, open the die release lever.
3. To remove dies, place the die head with the num-
Pin
Arrow/unlock
Pipe scale
4.
5. Slide the pipe scale align the arrow, and unlock.
6. Pull the dies out of the die head.
7. To install dies, insert the die with the numbers on
the die head facing upward.
NOTE: Ensure dies are going into the correct
numbers on the die head. Use dies as a set, do
not mix dies with diff erent sets.
8. Push the die in the die head up to the line etched
on the die.
9. Re-engage the pin with the pipe scale.
10. Tighten clamp lever turning clockwise.
Loosen the clamp lever turning anticlockwise
until the pin is no longer engaged with the pipe
scale.
 Loading...