Dowel Drill Manual
16
DRILLING OPERATIONS
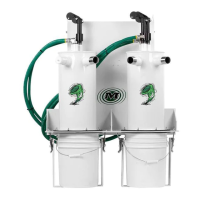
1. Make sure the lubricator is full. See
recommended lubricants on page 3-1. A-1C
series units should be lled every two hours.
2. Use a 3/4” (19mm) hose to supply air to the
drill unit for A-1C series units.
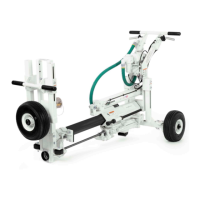
3. Install the drill steel and bit into the drill.
4. Make sure the air compressor is on.
5. Position the drill where the rst hole is to be
drilled and set the brake.
6. Remove the rail locking pin.
7. Lower the rail to the horizontal drilling posi-
tion.
8. Make sure the rub strip is against the slab.
9. Using the feed control valve, feed the bit
against the slab.
10. Using the drill control valve, feed the bit
against the slab.
11. With the drill valve turned on and the feed
switch turned on, the slider and drill will move
and the drill will turn on. When the feed switch
is turned off, the slider is retracted from the
hole and the drill will turn off automatically. If it
does not, turn the drill switch off.
12. Once the hole is drilled, disengage the
brake and move the unit to the next hole loca-
tion, en-gage the brake, and repeat steps 8-11
as necessary.
13. There is a low-level oil indicator, this must
be “green” in order for the hammers to oper-
ate. If the indicator is “red”, please ll oil reser-
voir with proper rock drill oil.
PRIOR TO OPERATION
Wear proper safety equipment as the following
hazards may be present during operation:
• Flying Debris: During drilling, chips may be
ejected.
• Dust: Concrete dust will be emitted from the
hole.
• Loud Noise: The air compressor and drill unit
will create loud noise levels.
• Pinch Points: Keep clear of all moving parts.
This is not an all inclusive list. Be aware of your
surroundings and use any and all precautionary
measures available.
OPERATOR POSITION
Failure to follow the instructions below may re-
sult in serious injury.
The operator should always stand in a safe loca-
tion with good visibility where controls can be
easily reached. The operator should always stand
in a location so he/she is following the machine.
Never lead the machine with your back towards
it. Refer to the diagram below for proper operat-
ing positions.
DRILLING
• Place the feed levers in the “in” position to
move the bits against the face of the slab.
• Place the drill levers in the “on” position to
turn on the drill motors.
• When drill motors reach the required depth,
place the feed lever in the “out” position.
• When the drill steel is clear of the hole, place
the drill lever in the “off” position.
• Release the brake, position the drill for the
next set of holes, reset the brake, and repeat the
process until all holes are drilled.
MOVING THE UNIT
Move the unit by pushing or pulling to the de-
sired position. Be sure the operator is standing
in a safe location. See diagram below.
TURNING THE UNIT
Turn the unit by rotating the steering wheel
clock-wise or counterclockwise.
 Loading...