3. Getting started
MiRCharge48V Operating guide (en) 11/2019 - v.1.3 ©Copyright 2019: Mobile Industrial Robots A/S. 13
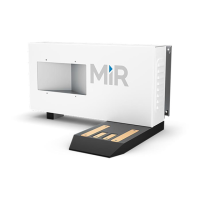
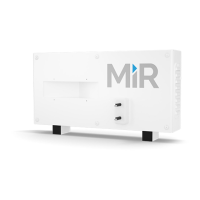
Label Description Label Description
1 Four M8 mounting holes for fix-
ation to wall (all four corners)
2 Mounting brackets
3 Air vents 4 Power inlet
5 Power button
Mounting
Follow these steps to mount MiRCharge48V to a wall:
1. Place MiRCharge48V against the wall where it should be mounted.
2. Mark the position of the four M8 mounting holes (1) on the wall.
3. Remove the charging station and drill four holes of a suitable size for M8 bolts at the
marked positions in the previous step. Consider inserting wall plugs to ensure a secure
mounting, in which case the drilled holes must accommodate the size of the chosen
plugs.
4. Place the MiRCharge48V against the wall again in the desired position. Ensure that the
drilled holes align with the M8 mounting holes.
5. Fasten the charging station securely to the wall by screwing M8 bolts through the bolting
holes and into the wall.
Powering up
NOTICE
Read Safety on page6 before powering up the charging station.
Follow these steps to power up the MiRCharge48V
1. Insert the power cord into the power inlet, then into the wall power outlet.
2. Press the power button to turn it on.
3.3 Mark potentially hazardous floor area
Before taking your MiRCharge48V into use, it is necessary to mark up the floor in the area
where MiR500/MiR1000 docks to MiRCharge48V.
 Loading...