55
6. Place aring tool onto the form.
7. Turn the handle of the aring tool clockwise
until the pipe is fully ared.
8. Remove the aring tool and are form, then
inspect the end of the pipe for cracks and even
aring.
Step 4: Connect pipes
When connecting refrigerant pipes, be careful not
to use excessive torque or to deform the piping in
any way.
You should rst connect the low-pressure pipe,
then the high-pressure pipe.
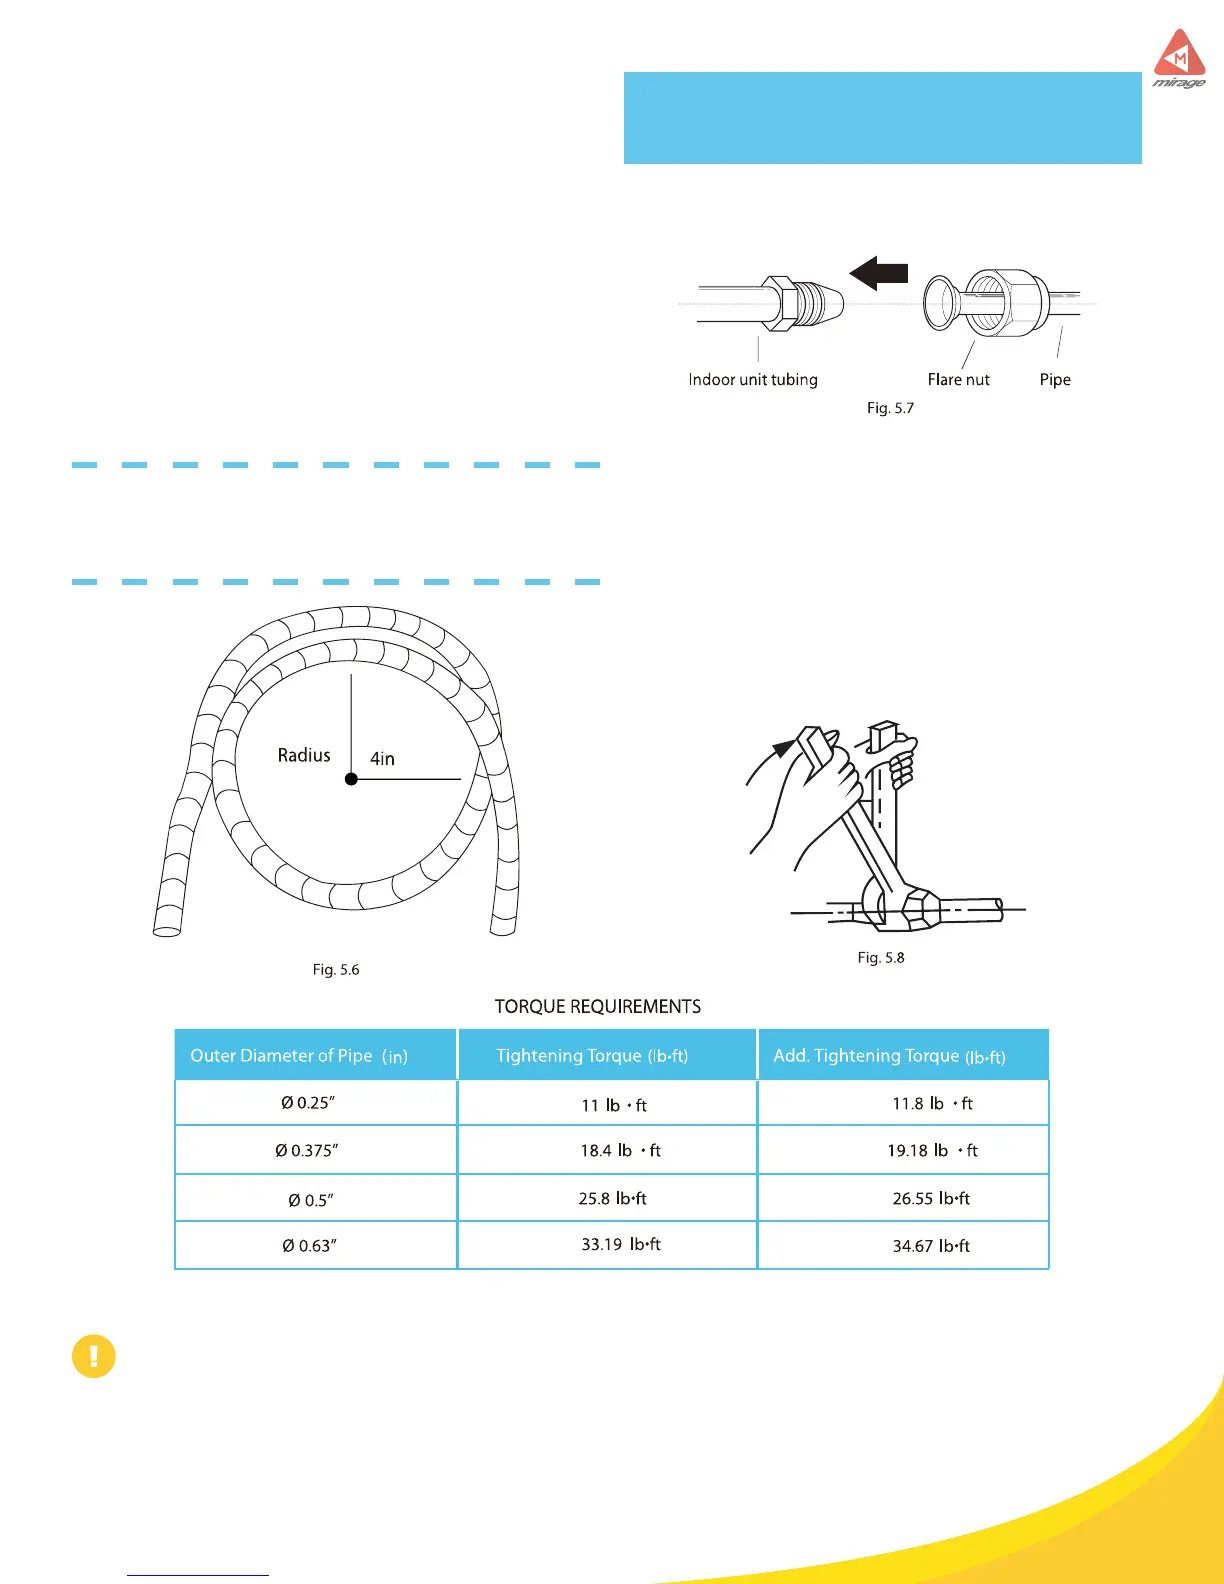
MINIMUM BEND RADIUS
When bending connective refrigerant piping, the
minimum bending radius is 4 in. See Fig 5.6.
Instructions for connecting
Piping to indoor Unit
Excessive force can break the nut or damage the refrigerant piping. You must not
exceed torque requirementes shown in the table above.
1. Align the center of the two pipes that you will
connect. See Fig. 5.7
2. Tighten the are nut as tightly as possible by
hand.
3. Using a spanner, grip the nut on the unit tub-
ing.
4. While rmly gripping the nut on the unit tub-
ing, use a torque wrench to tighten the are nut
according to the torque values in the Torque
Requirements table below. Loosen the aring nut
slightly, then tighten again.
DO NOT USE EXCESSIVE TORQUE



 To Next Page