Printing with paper that has been stored for over long period of time or of poor quality
may reduce the print quality or even damage the printer.
5.8 Date and Time Set
Press down the key while powering on the instrument to set the instrument date and time. The year
item shown as “XXXX” will firstly prompt out. Use the key and the key to change to current year.
Confirm the change by pressing and step to next item. In the following, the Month, Date, Hour and
Minute item will prompt out in turn.You can cancel all the changes by pressing and exit from the
date and time setting at any time during the operation.
5.9 System Reset
Press down the
key while powering on the instrument will restore factory defaults. The only time
this might possibly helpful is if the parameter in the instrument was somehow corrupted.
5.10 EL Backlight
With the EL background light, it is convenient to work in the dark condition. Press key to switch on or
switch off the background light at any moment as you need after power on. Since the EL light will
consume much power, turn on it only when necessary.
5.11 Auto Power Off
The instrument features an auto power off function designed to conserve battery life. If the tool is idle
(neither measuring nor any key operation) for 5 minutes, it will turn itself off. Before powering off, the
LCD display of the instrument will continue flashing for 20 seconds. Except key , press any key could
stop the twinkle of LCD screen and stop the operation of power off at the moment.
While the voltage of the battery is too low, the display will show <E00>, then power off
automatically.
When the instrument is being charged, the Auto Power Off will not function.
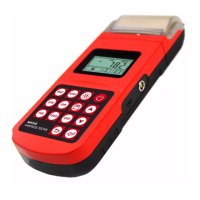
5.12 Paper Installation
Hold Both ends of the paper compartment
with fingers and open the compartment
cover with moderate strength.
According to the illustration, put the paper
into the paper compartment with attention to
the paper direction. If the paper is misplaced,
the instrument will fail to print.
Pull a trip of paper out of the compartment.
Make sure that the paper is well in place and
close the paper compartment cover.
5.13 Battery Charge
The instrument uses a NI-MH battery pack as its power source. When the battery pack almost runs out,
the battery symbol on the display will glint . It needs charging as soon as possible. Try to drain
your battery pack as fully as possible before it is charged for longest battery service.
The battery switch should be at ‘ON’ condition before charging.
Plug the power adapter into the mains supply power socket and then plug the charger connector
into the power jack of the instrument. If the instrument is in power off condition, it will turns on
automatically after the charger plug is inserted into the power jack. The battery symbol will