8
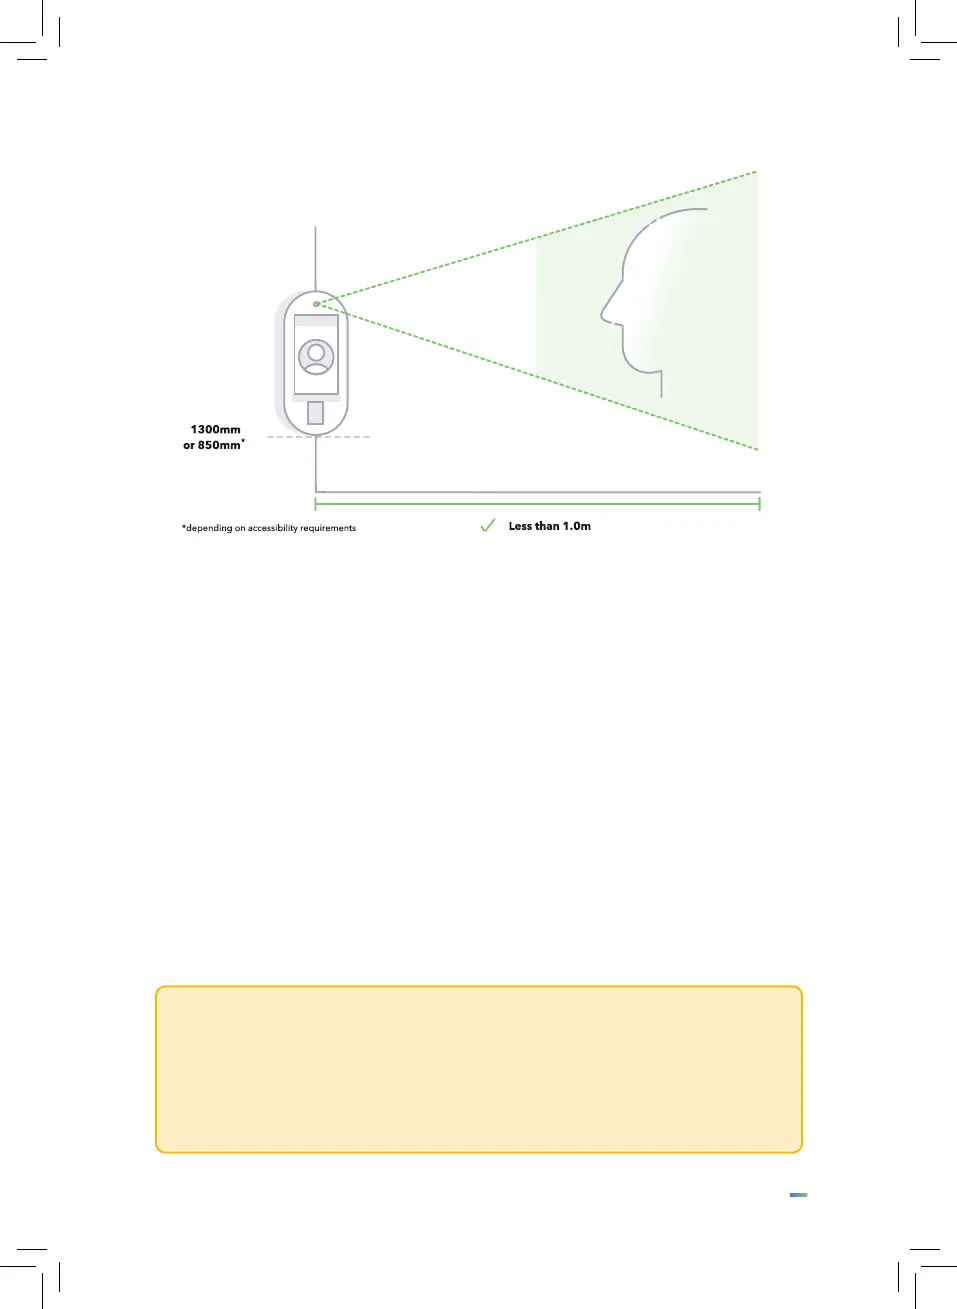
Placement
IP66 installations
The T2 is IP66 certied - installations that require protection against the ingress of water
or dust must use the rear cable entry.
Rubber seals are supplied as standard with all units and must be left tted to the cable
slots in the bottom of the unit before the rear plate is afxed. Before the wall bracket is
screwed to the wall, care should be take to ensure the wall is at and ush to the bracket.
To ensure water does not gather behind the the T2 supporting bracket, exterior grade
waterproof sealant needs to be applied. A ring of sealant should be piped onto the wall,
1cm from the outside edge of the bracket and cover the entire circumference prior to
screwing it to the wall.
Cables should be channeled into or presented through the wall and fed through the
holes in the T2 brackets. Once securely fastened, the two neoprene seals will compress
to ensure a watertight seal.
It is imperative that the DC power adapter should not be left exposed or
positioned externally. It should be placed inside and the long lead run down the
channel and into the back of the T2 through the waterproof aperture.
Similarly, where an ethernet cable is used to power the device, the cable should be
carried down a waterproof channel and in through the entry hole.